
The abbreviated length of J-frame boot grips makes them ideal for deep concealment and pocket carry. The problem for people with large hands or long fingers is that the backstrap is left uncovered to reduce the size of the grip. This causes a problem in that the trigger reach is short, making the gun harder to shoot.
Editor’s Note: Our article on modiying old-style Taurus Model 85 grips for use on S&W J-frames was a hit with readers, and generated additional interest in grip modifications. When reader Derek Perreault contacted me about his experience modifying some OEM S&W grips, I encouraged him to write it up and share it. I’m glad he took me up on the offer and hope you’ll find this interesting and useful. -Mike
I have long fingers and searched far and wide for a boot grip that would increase trigger reach, without success. I read on the gun forums where people were customizing larger grips by cutting them down to shorter length. This seemed like a good option.
suitable candidate
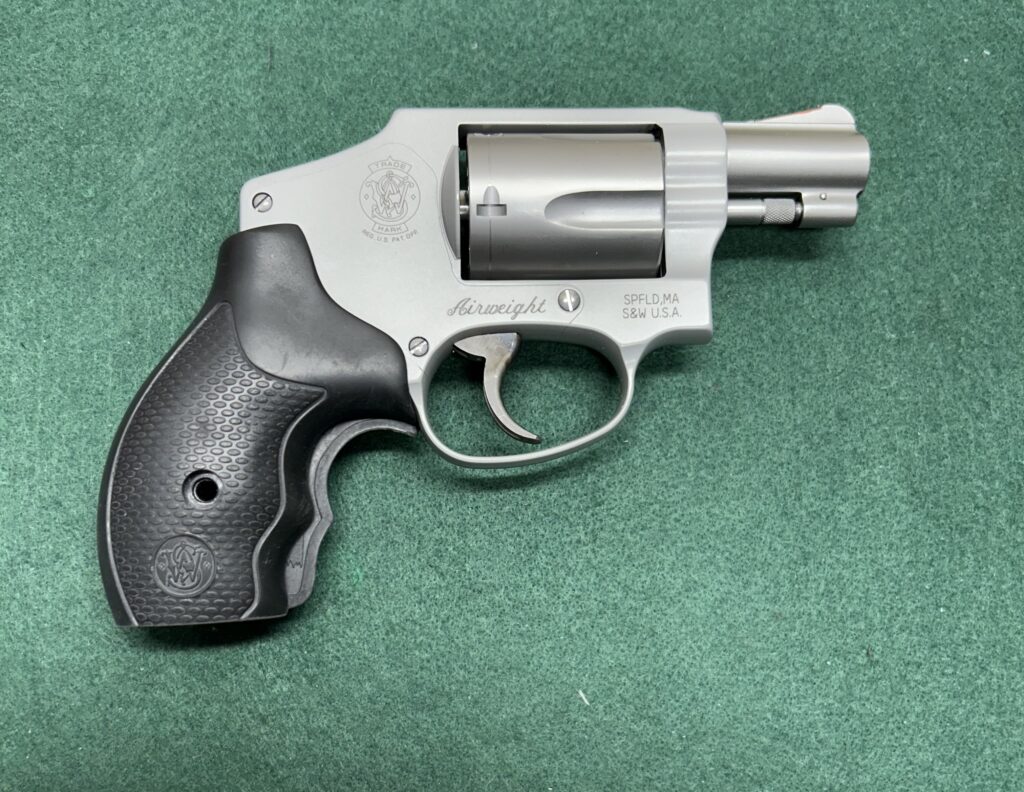
I remembered that I had a pair of S&W combat grips that I had ordered to try on a S&W Model 60-10. I ended up going with the larger Hogue Monogrip on the Model 60, so the combat grips were relegated to the “grip box.” I thought these round butt J-frame grips would be a good option for my grip modification experiment.
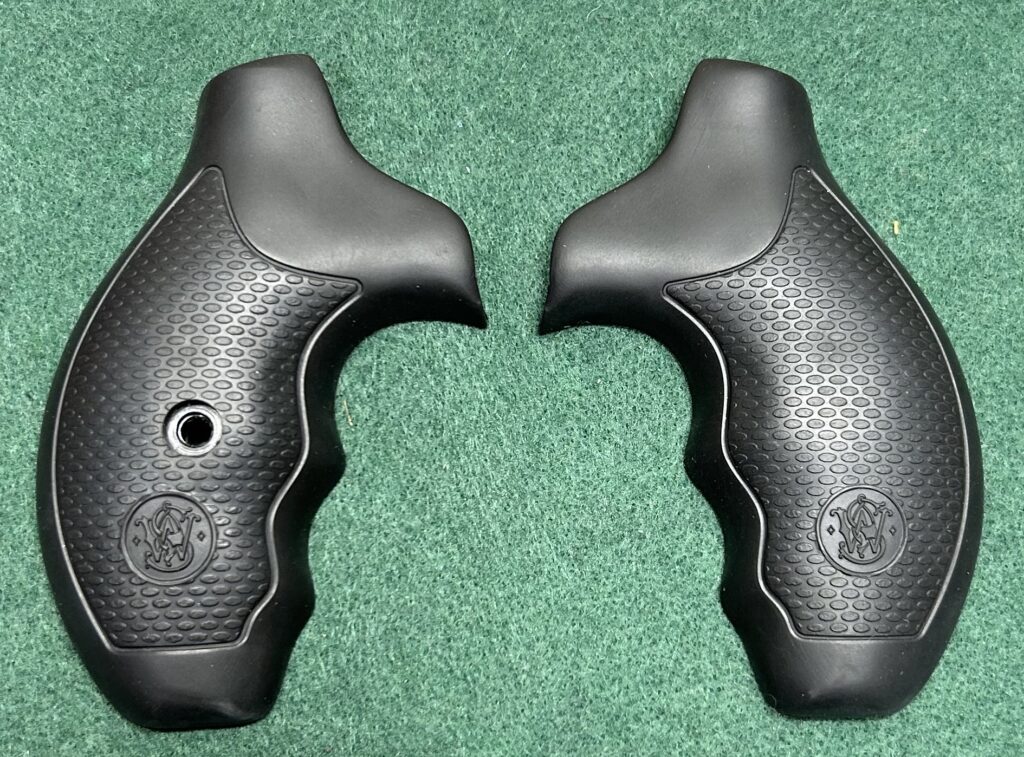
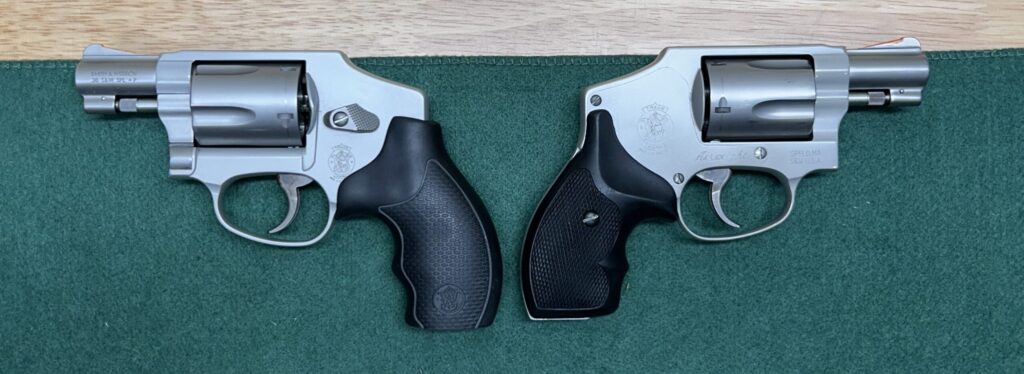
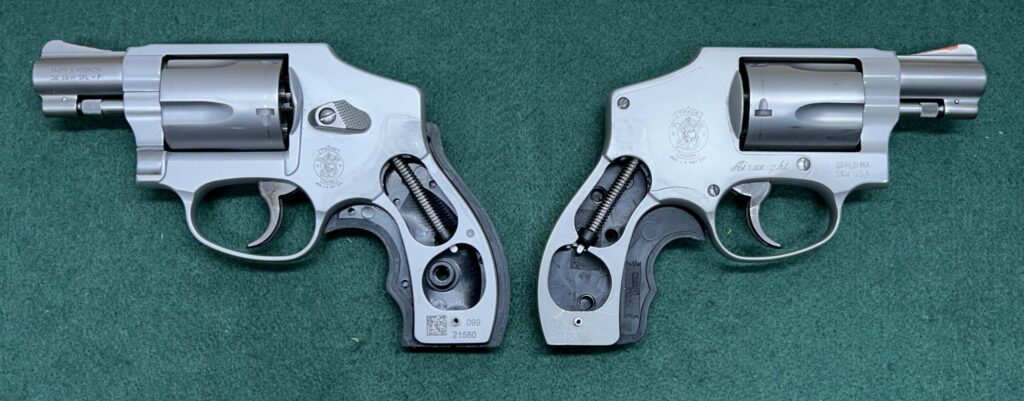
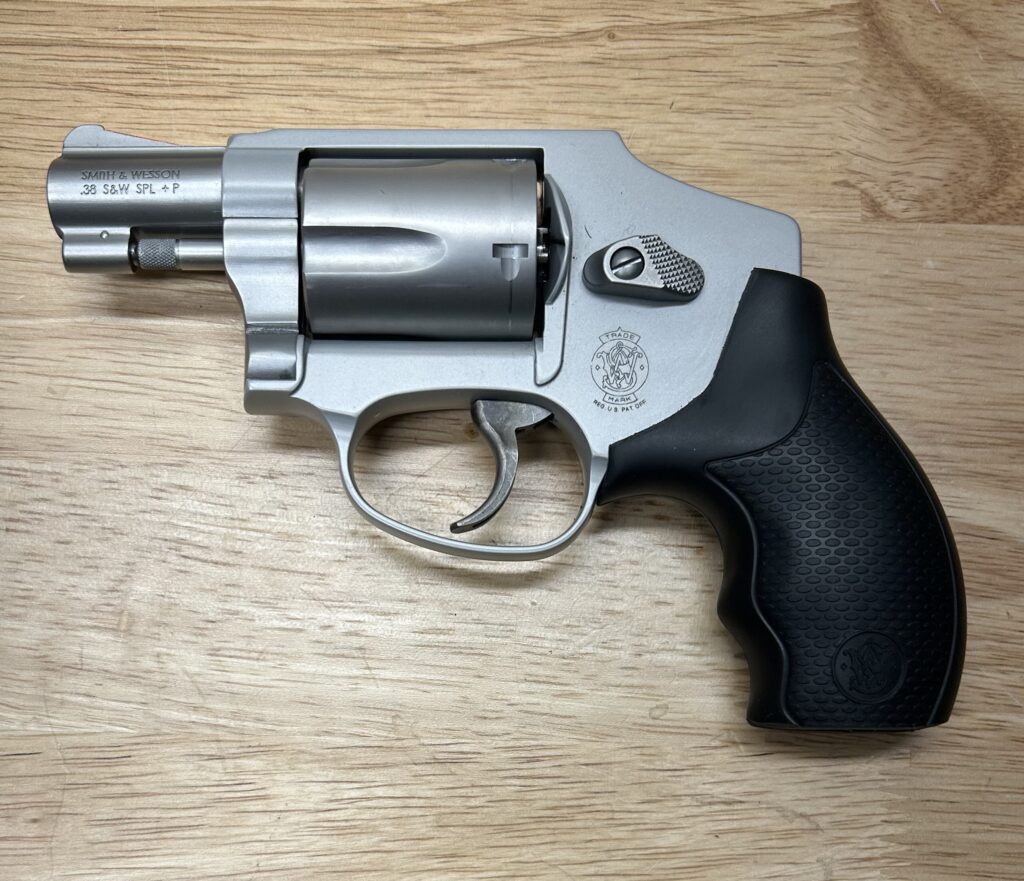
I put the grips on my S&W 642, and they felt much better than the stock boot grips. The backstrap was covered by 3/16’’ of rubber and that small increase in trigger reach made a big difference in the leverage on the trigger. I verified that there was adequate clearance for Safariland Comp I and HKS 36 speed loaders, and I decided to try shortening them.
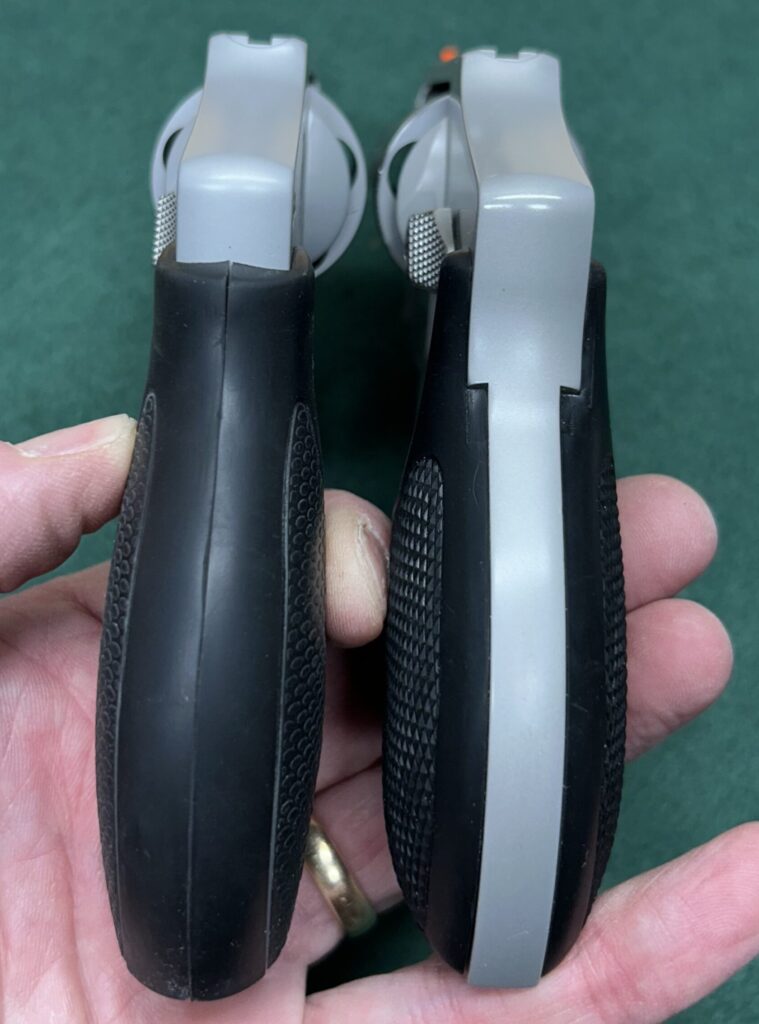
The combat and boot grips are roughly the same size and shape except for length. The combat grips are shifted to the aft of the grip frame by 3/16” covering the backstrap.
cuttin’ time
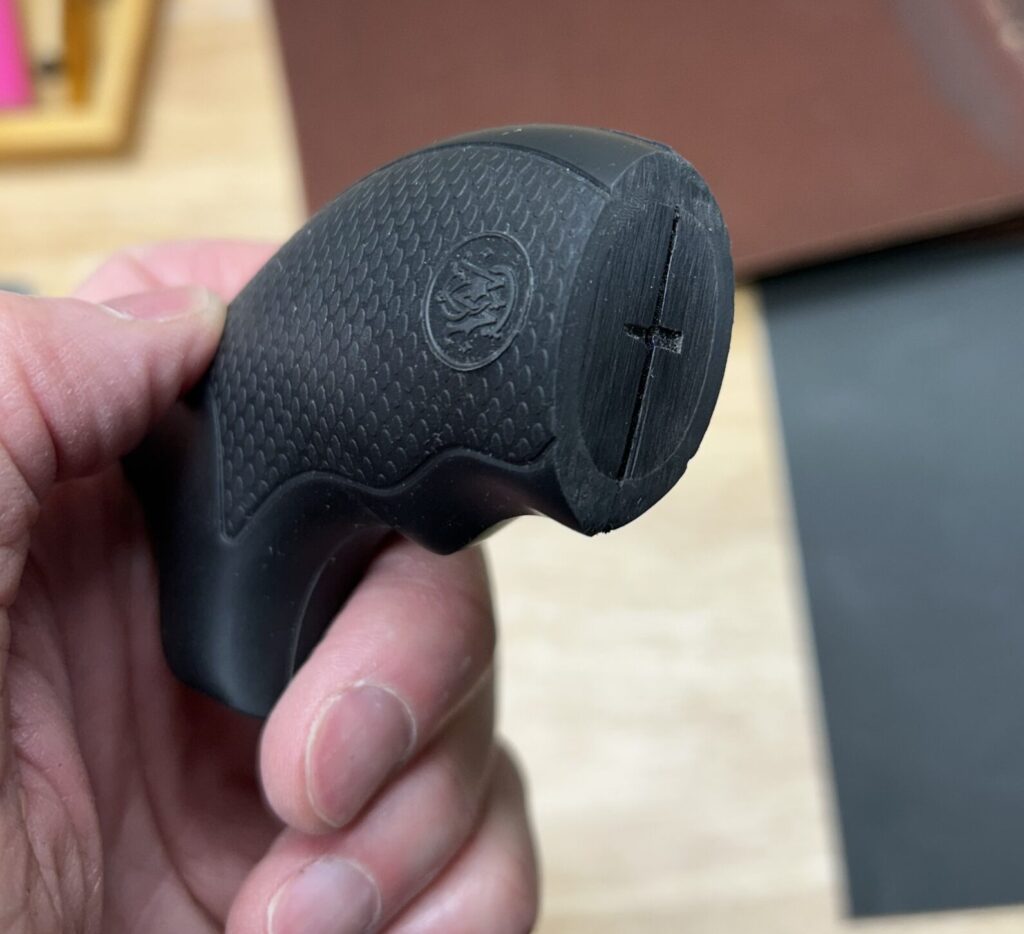
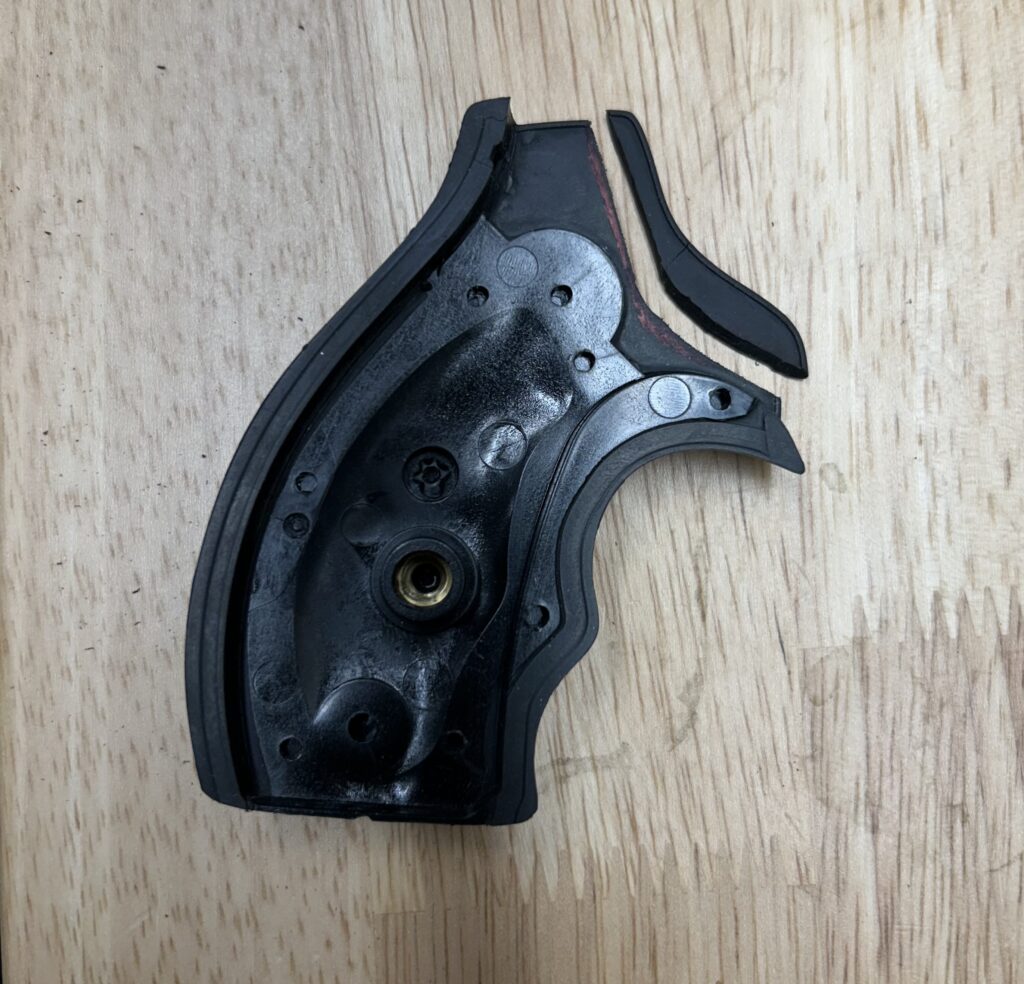
After inspecting the grips, I decided that cutting down the center of the web in the plastic skeleton with a hacksaw was my best option for shortening the grips.

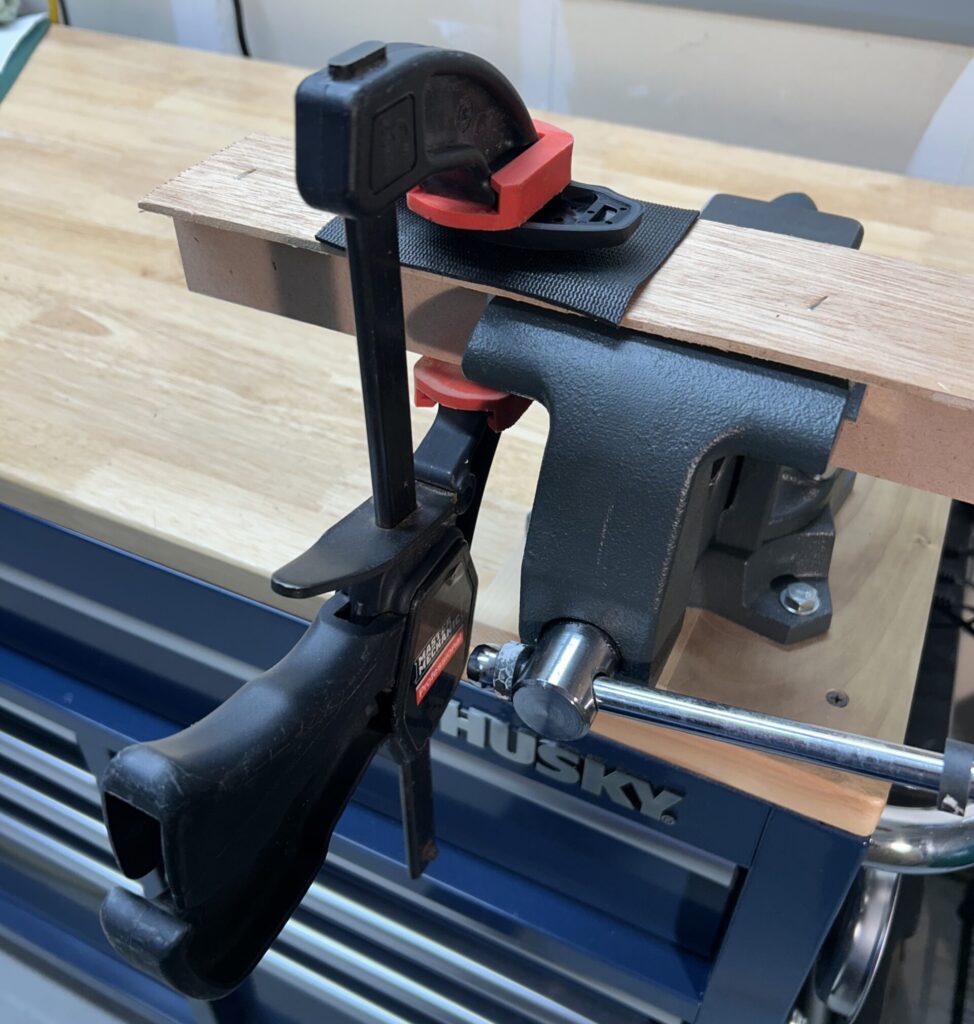

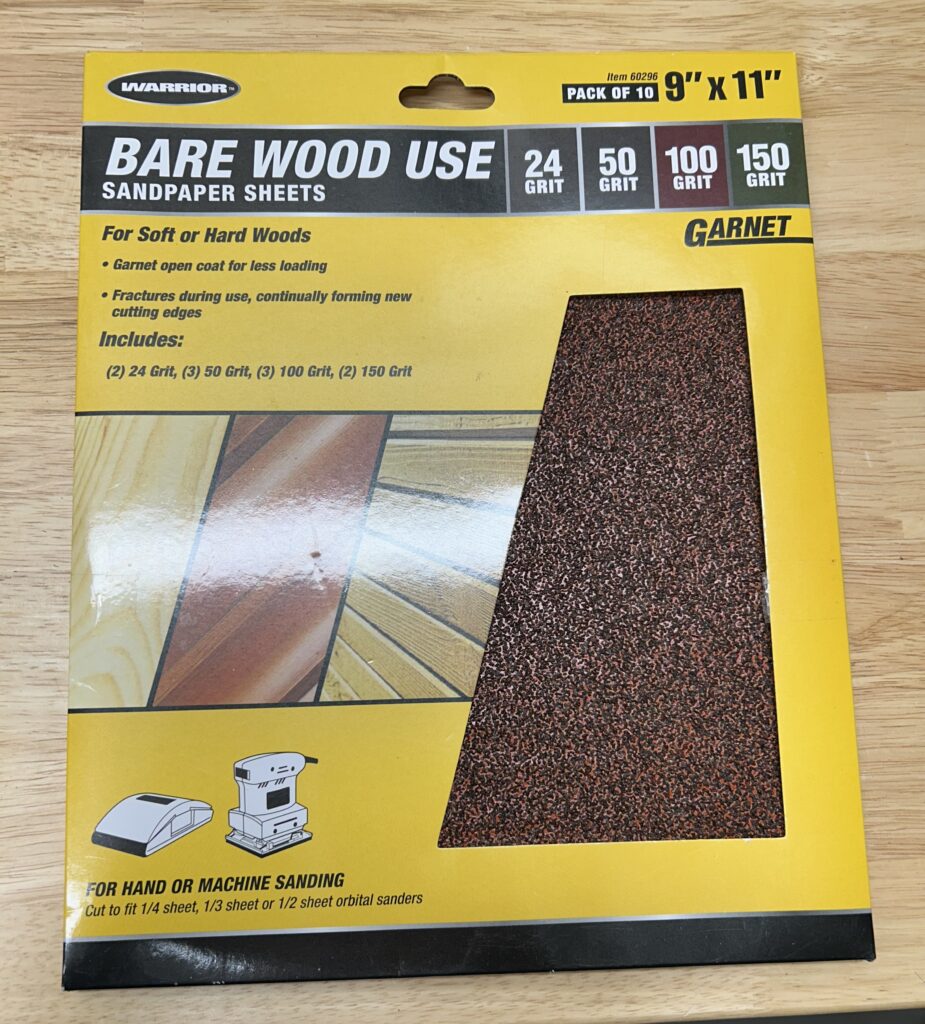
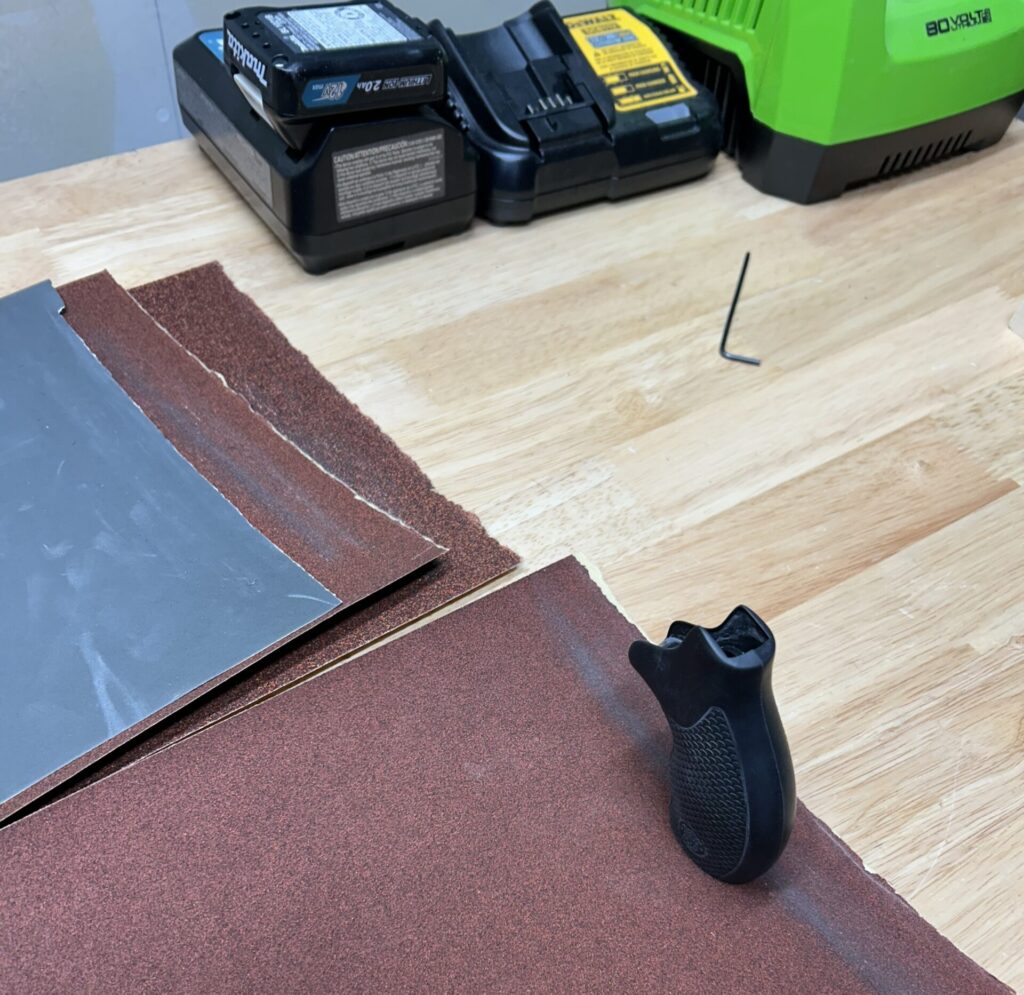
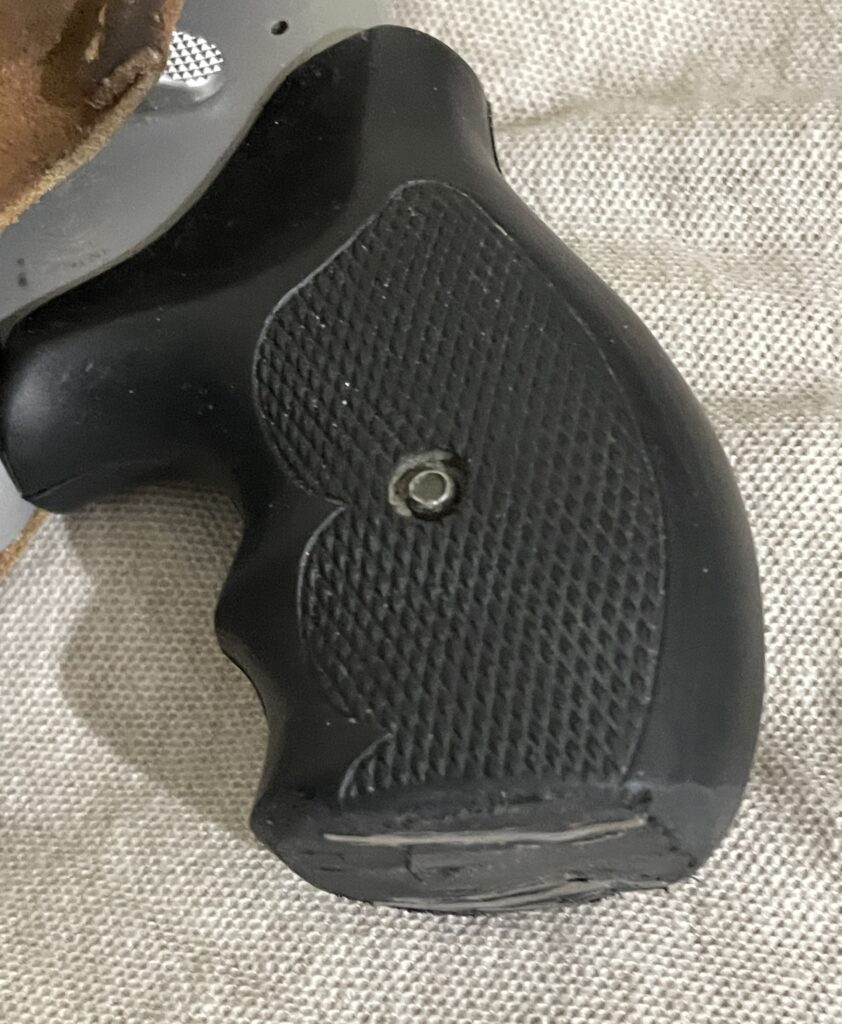
After both halves were cut, I screwed them together and ran the cut end along sandpaper layed flat on my workbench to even up the ends and smooth up the cut. I used open coat garnet sandpaper which is less likely to load up with rubber and plastic. I worked progressively using 50, 100, and 150 grit. I finished with 400 grit wet/dry sandpaper.
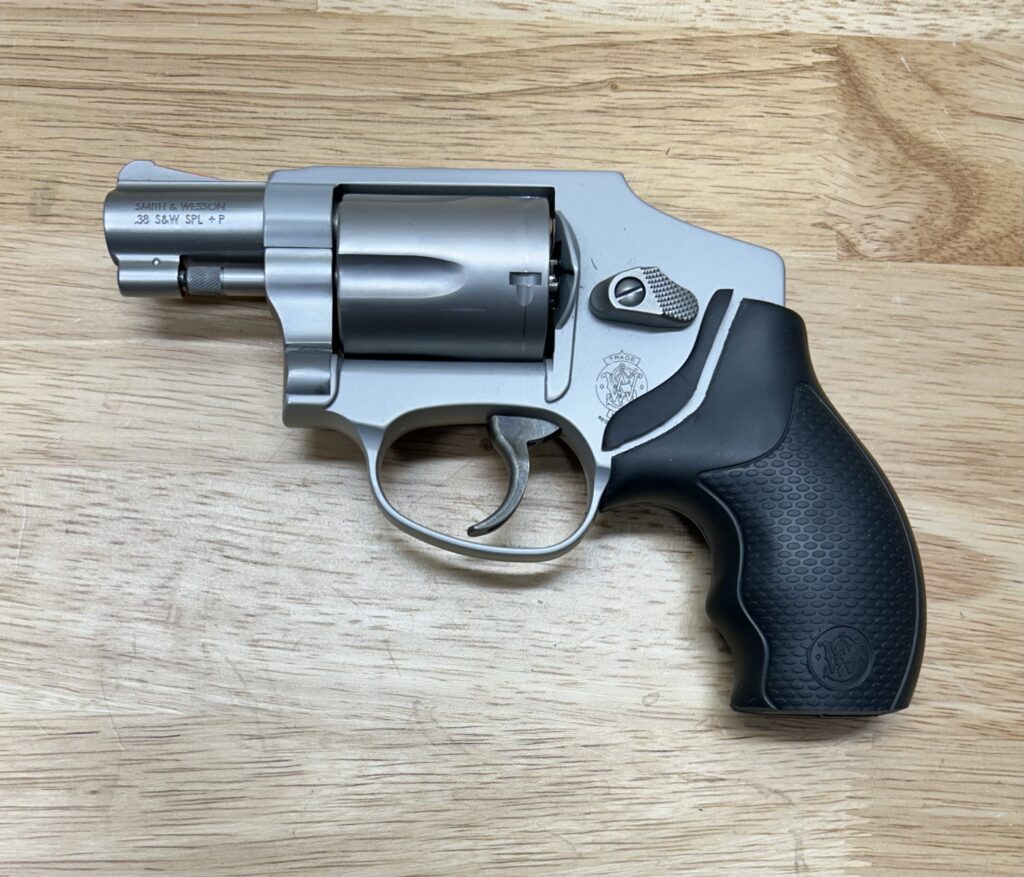
success!
The modified combat grips offer improved trigger control, leading to smaller group size on target. I notice little difference in concealability compared to the stock boot grip.
Even better
I mentioned earlier that the combat grips have adequate clearance for speed loaders. It’s not perfect, but it works. When I was looking at the larger speed loader cut on the Hogue Monogrip, I realized I could cut away some rubber on the S&W combat grips and get more clearance for speed loaders. I used a single edge razor blade to cut the rubber. It worked really well, and now my speedloaders work without interference. I highly recommend this modification.
A caution
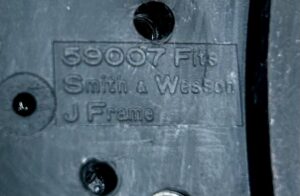
One thing to be careful of, is to make sure you don’t try this on the Uncle Mike’s Model 59007 grips that were once OEM for S&W round butt J-frames. The Uncle Mike’s grips (that the later S&W Combat Grips were modeled after) have a steel skeleton under the rubber, and it’s more difficult to get a clean cut and a smoothly finished surface on these. Stick to the plastic-framed S&W version, and you’ll be happier with the result. Use a magnet to check your grips before you cut, if you have any doubts.

When something doesn’t work right, and if you have the skills and the tools, carefully modify it until it does. Thanks for showing us the way.
You are welcome Spencer. I had fun doing it.
Excellent post! Kudos to the author for documenting his process and rationale. Very nice photographs too!
Thanks to RevolverGuy for making this tutorial available.
Thank you John. Mike did a great job of editing the article.
Excellent job Sir, of making them yours.
Well illustrated and a detailed description of the process you followed.
Thanks for the kind words Tony. I am glad that Mike encouraged me to write the article. It was a fun project.
This is a great article. I grew up around guys who weren’t afraid to go to their work bench to make their guns work for them. It seems like that has gone out of style. Thanks for bringing that back. I especially like the cut to make speedloaders work. I’ve always used a file or dremel tool to accomplish this (on every set of aftermarket grips I’ve ever bought). Looks like I need to get some razor blades.
Good job!
I’m glad you appreciate it BC. It seems that most guns are “project guns” to some degree. It helps to be able to do some modifications yourself.
Nice work, Mr. Perreault, thank you for sharing it. I picked up a 640 that came with the grips that you used in your project. I felt like they had potential- your modifications realized that potential. In addition to increasing the trigger reach, having that layer of material (even if it’s fairly firm rubber) surrounding the backstrap helps lessen the beating the shooting hand takes with gnarly +P’s or .357 Magnums. As my hands age, having that extra layer of padding back there is sure helpful. Thanks for detailing your improvements!
Kevin, I can relate to the aging hand dilemma. Less hand and arm strength, along with arthritis and tendinitis makes me a lot less tolerant of recoil. I am glad you found my article helpful.
Is this the Kevin that I think it is?
I just ordered a 640 this morning, and was looking online on how to modify the grips.
Fancy seeing you on this thread!! Hope all is well.
Good point Kevin. The 38 special Airweights are pretty snappy, even with light target loads. I did notice a reduction in perceived recoil with the modified grips. My range sessions became longer after the modification. The layer of rubber definitely helps. I can get half a pinky finger on these grips and I think the extra purchase helps with recoil control as well.
Mr. Perrault – You have offered a rather ingenius solution to an actual problem !! Now the question is whether the aftermarket manufacturers will pick up on this concept ( doubtful ) For those with grizzly bear size paws, the boot grip is great for concealment, but no so much for actual shooting. Your modification hits that sweet spot ! Well done, Sir.
Thanks s. bond. As you stated the grips hit the sweet spot. For me they are the perfect mix of concealment, control, and recoil reduction. I tried several different grips before I converted my first set about eight years ago. After that I stopped looking. It would be nice if this article inspired some factory or aftermarket innovation.
Do you or any readers have suggestions for a K6? For me, the OEM grip is miniscule. I would try a textured grip from Altamont, however that would not help in the girth department.
Jeff, I’ve written a few articles here about experiments with Kimber grips. If you search for “K6s” in the Search bar, you’ll find them.
The rubber Hogue Bantam Monogrip actually feels pretty good in the hand, but suffers from being difficult to remove for routine maintenance. It’s probably got the most “belly” of the grips I’ve tried, and the rubber helps with recoil.
The LOK Grips Palm Swell Veloce grip is a full 3-finger grip that is a little thin through the middle, but feels good to my large hand because the front-back distance is lengthy. LOK Grips also has a 2-finger grip that’s a little shorter for carry. These are G10, so a little heavy, but the traction is good.
I’ve also modified some VZ Boot Grips for the K6s. They’re open backstrap, and don’t fill my large hand as much as I’d like on a gun that I’ll shoot a lot, but are good for concealment. You’ll see those on my DLC 2″ gun in photos on the website.
I worked with Ryan Hamre on some K6s grips for over a year, trying different prototypes and giving feedback. Although I haven’t seen the final design he went with, I’ve got a feeling they will be good grips. However, like the VZ Boot grips, they are designed to be minimalist. The Hogue and LOK grips will fill your hand more. Texture is very good and they’re lighter than all the G10 options.
You’ll have to cut on all of these to get decent speedloader access, except maybe the Hamre Forge–Ryan was doing pretty well there, on the last prototype I tried.
A friend just purchased a set of the Control Core grips that Kimber sells on their website, and I’m waiting for a report on those–they look promising. We’ll see.
Thanks
I’ve railed about naked backstraps being the fatal flaw of most boot grips many times here; all my revolvers wear rubber grips that cover the backstrap to protect my tender paws. If you’re a boot grip kind of guy, this is the best of both worlds. And it has the advantage of being cheap and so easy even I could do it.
Old 1811, we are in agreement on this. All of my revolvers except one now wear rubber grips that cover the back strap.
I second all of the kudos from commenters on the recoil benefits that come from having some rubber on the back strap. I don’t have large hands, but this mod is a winner in my book. I did it with an old Butler Creek rubber grip that had the shank in it; just had to saw harder and put up with a less than perfect result visually.
Worked like a charm. I have the OEM combat grips on three J frames. This mod allows me to carry one of them in pocket. Thank you for sharing a such a worthwhile modification.