The search for a good set of J-frame stocks seems like a never-ending journey, and sometimes it leads to some pretty creative solutions. I was recently introduced to one of these, and I’d like to share it with the RevolverGuy audience, because it might just do the trick for some of you.
A Good Pair of Boots
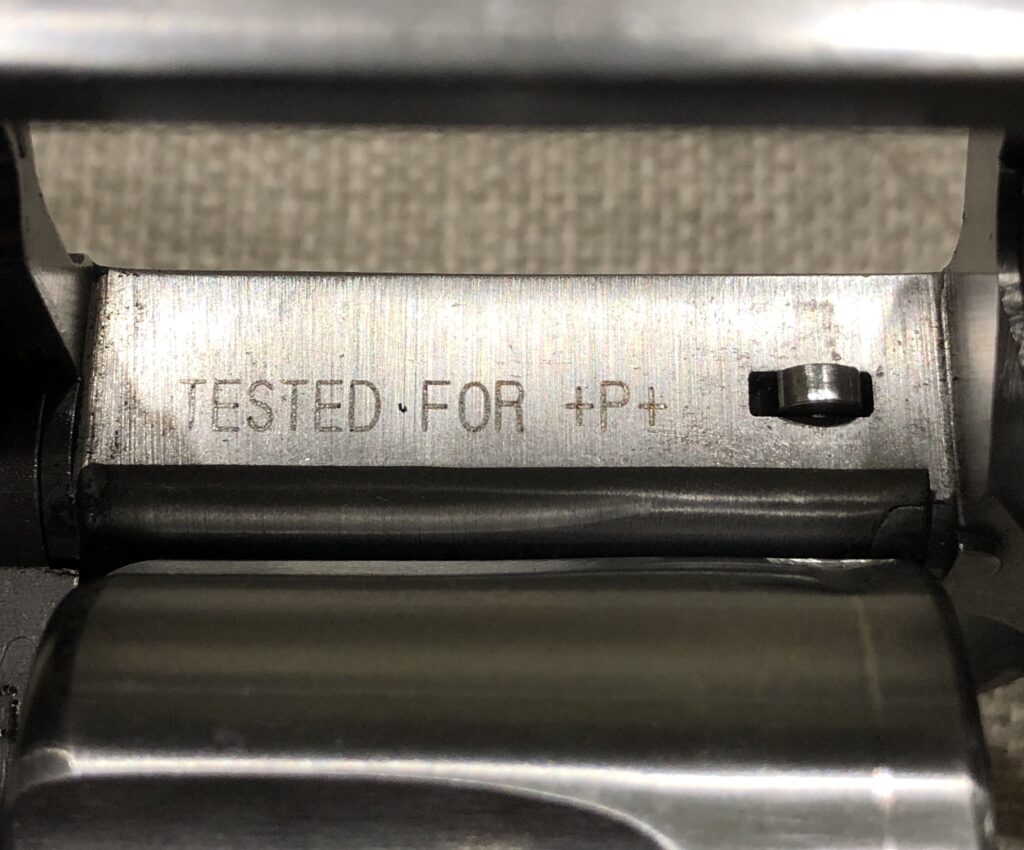
RevolverGuy readers are well-acquainted with my affinity for the Smith & Wesson Model 640 Centennial, in its original guise. The Model 640 was introduced in 1989 with an all-stainless, .38 Special frame that bore the factory’s first endorsement for +P ammunition in a J-frame (actually, early samples were stamped with a “+P+” rating, but that disappeared pretty quickly when the lawyers got nervous). I know many RevolverGuys think steel-frame J’s are a little too heavy, and prefer the lighter ones made from aluminum alloys, but I’ve never found the extra ounces objectionable, and prefer the heavier guns for their superior shooting qualities and durability.
The first 640s were sold with standard J-frame “splinter stocks” made from Goncalo Alves, but in 1994 they began to ship with a Craig Spegel-licensed copy of his famous boot grip, built by Uncle Mike’s for Smith & Wesson. The Uncle Mike’s boot grip was made from hard, checkered rubber, and featured an open backstrap, palm swells, and a proper speedloader relief. They were excellent grips, and were very well received by consumers.
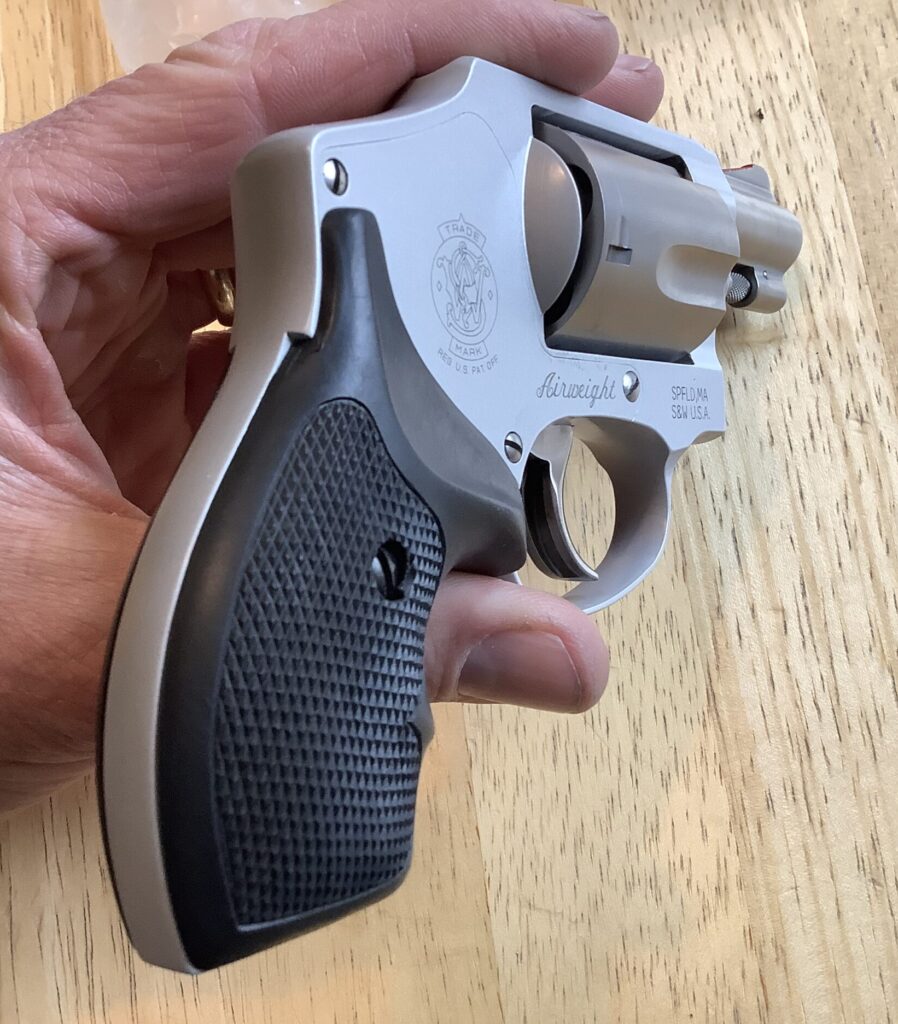
The Uncle Mike’s boot grips migrated to other J-frame models in the catalog, like the aluminum-frame Model 642, before the license with Spegel expired and Smith & Wesson elected to replace them with a substitute boot grip of their own design and manufacture. Sadly, the replacement grip wasn’t quite as good as the version it replaced (being made of a softer rubber that was more tacky and less durable, and lacking the palm-filling contours of the Uncle Mike’s grip), and shooters found themselves looking for a better J-frame option.
Options
Some shooters found a pair of Uncle Mike’s grips, while the supply was still plentiful, while others tried various models from firms like Pachmayr, Hogue, and Altamont, among others.
I liked the Uncle Mike’s grips fairly well, but the open backstrap made the trigger reach awfully short for my long fingers, and I preferred not to use rubber grips for pocket carry. I was eager to find another solution, and eventually replaced the Uncle Mike’s grips with a beautiful set of uncheckered Secret Service grips from Eagle Grips, that were made of rosewood. The Secret Service grips were still open back, but added a little more material in the sinus area, and I was happier with how they felt in my hand.
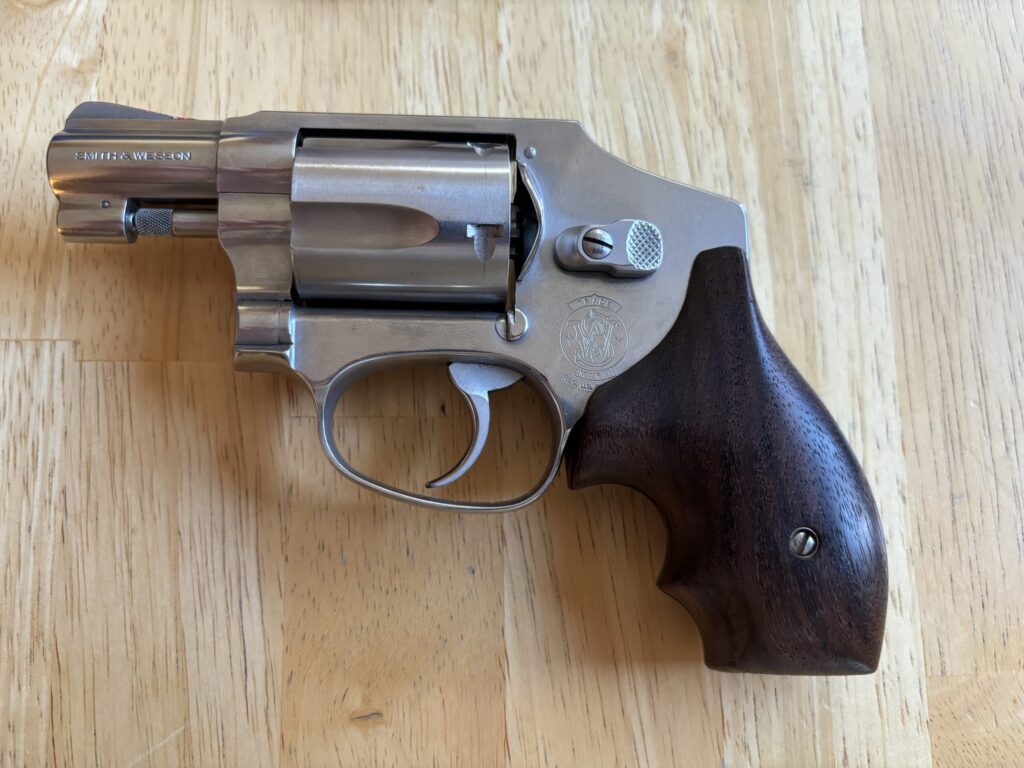
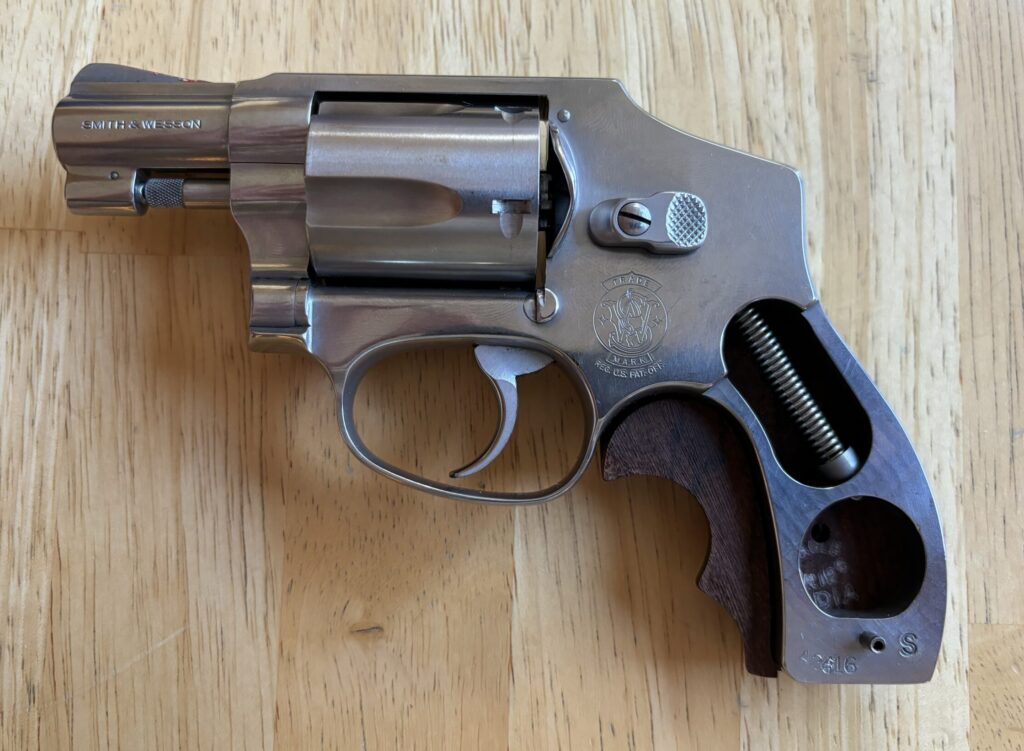
The search continued though, and I tried a few other designs. None seemed better than the Secret Service grips until I discovered the excellent Crimson Trace LG-405 LaserGrip, which I’ve written about previously, here in these pages. I found the shape and size of the LG-405 grip made it fit my hand nicely, and really appreciated the clever design, which placed soft rubber on the front strap and back strap to cushion the hand, while the sides were hard plastic to reduce friction (something I appreciated as a regular pocket carrier).
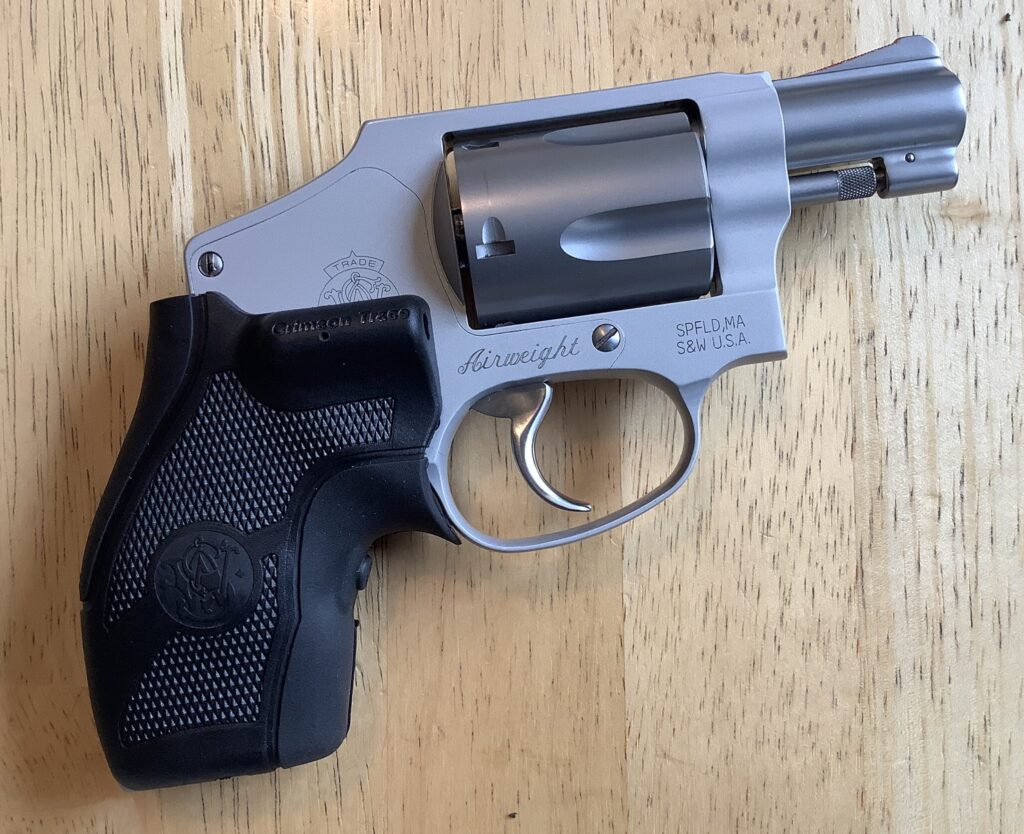
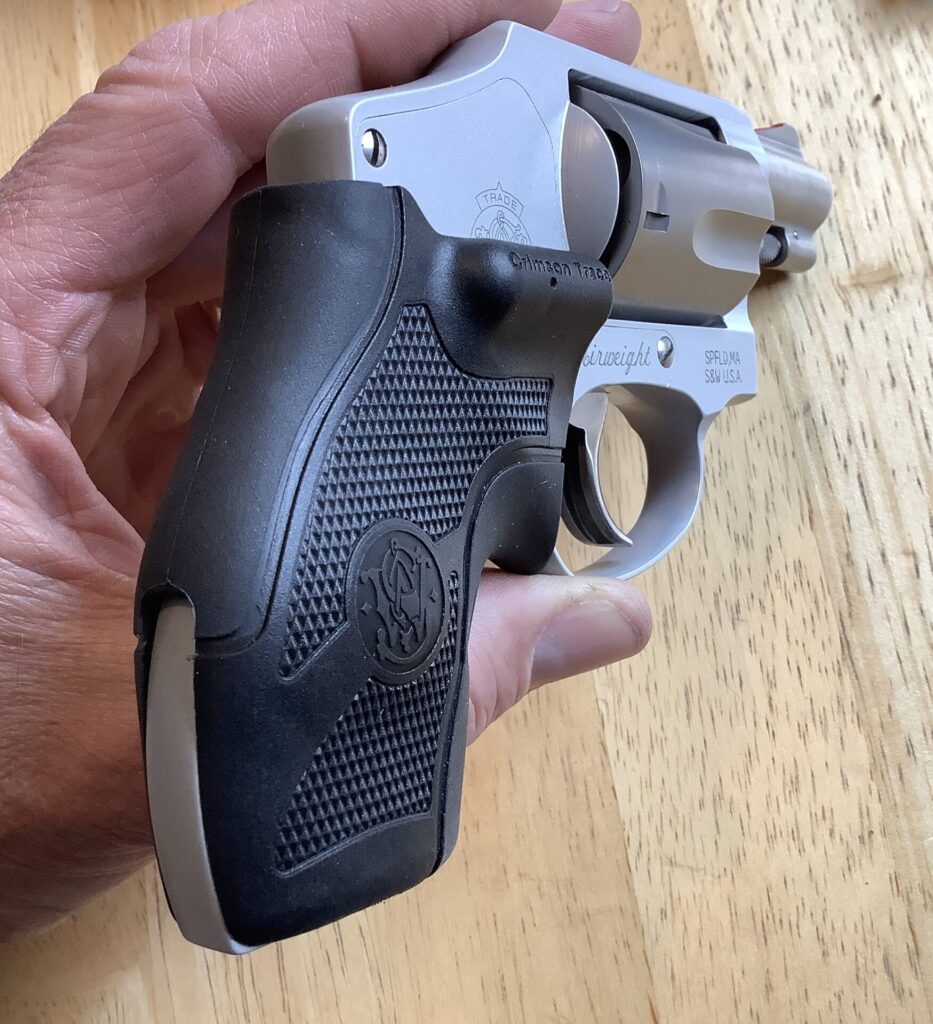
The LG-405 grip featured a partial backstrap, located just below the recoil shoulder, to help cushion the hand against recoil and change the grip angle to a more comfortable and naturally-pointing angle. I really enjoyed this feature, perhaps more than the laser aiming module that ran the price up so high on these grips (and which scared so many people away from them). I didn’t get full backstrap coverage with the LG-405s, but I got close enough, and the grips have enjoyed a run of almost two decades on my beloved 640.
No Bull!
What I didn’t realize is that a full backstrap solution was sitting under my nose the whole time.
Smith & Wesson’s most vigorous competitor in the small frame revolver market during this period was Brazilian maker Taurus Firearms. Their exceptionally popular Model 85 revolver (and some other variants, like the enclosed hammer Model 850) was outfitted with a variety of different stock designs over the years, but one of them developed a reputation as an excellent boot-style grip.
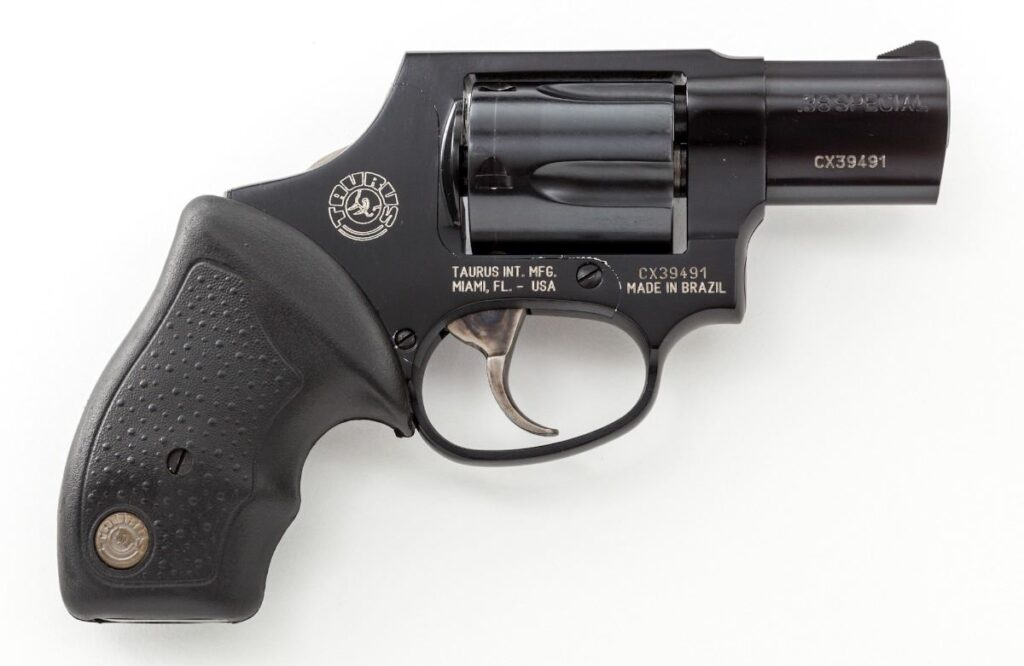
This grip was made from hard rubber and ended flush with the bottom of the frame, as a good boot grip does. It was smooth on the front and back straps, and had a pebble-type texture inside of a border, on the sides.
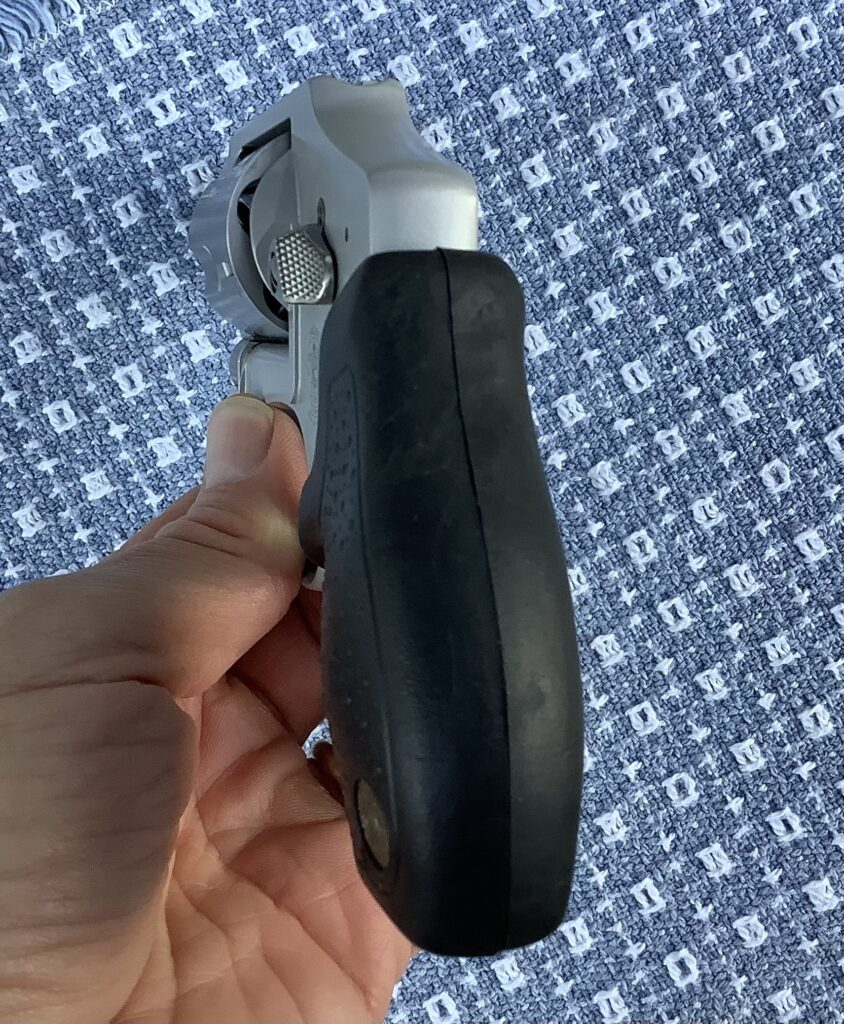
What made the Taurus grip unique is that it had an enclosed back strap. An extra rib of material covered the back strap and increased the trigger reach just a bit, making this grip an excellent fit for larger hands.
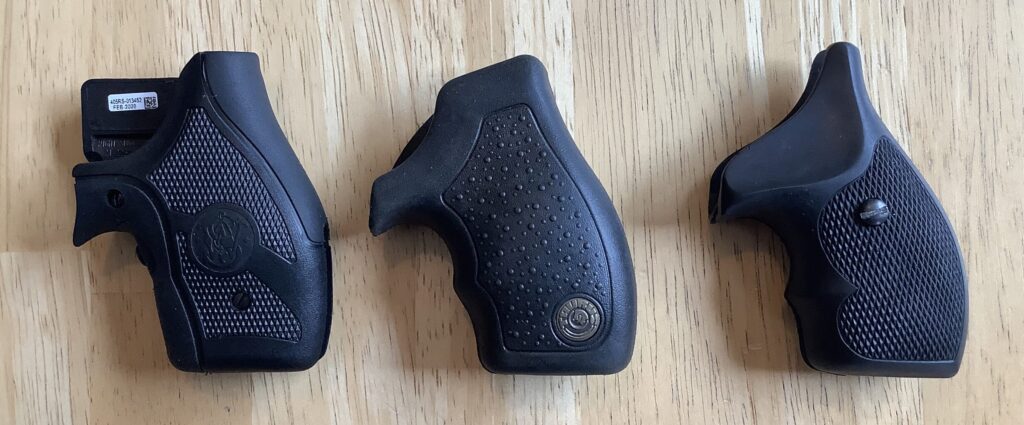
Although I was ignorant of it at the time the practice started, I’m told some savvy S&W revolver shooters quickly discovered the Taurus boot grip and began to mount the Brazilian grips on their American snubs. The grip frame profile on the Model 85 was a near-duplicate of the Smith & Wesson J-frame, which made the Taurus grips an excellent fit on Smith & Wesson small frame revolvers.
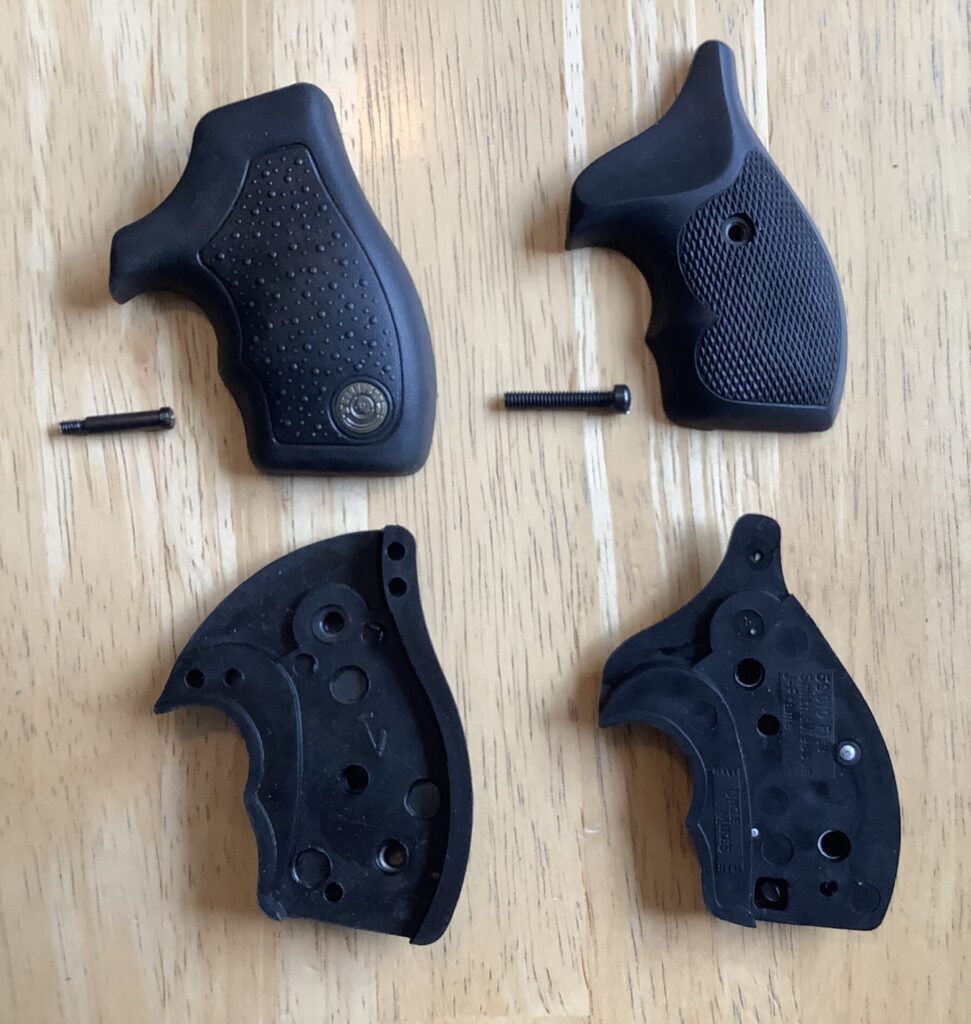
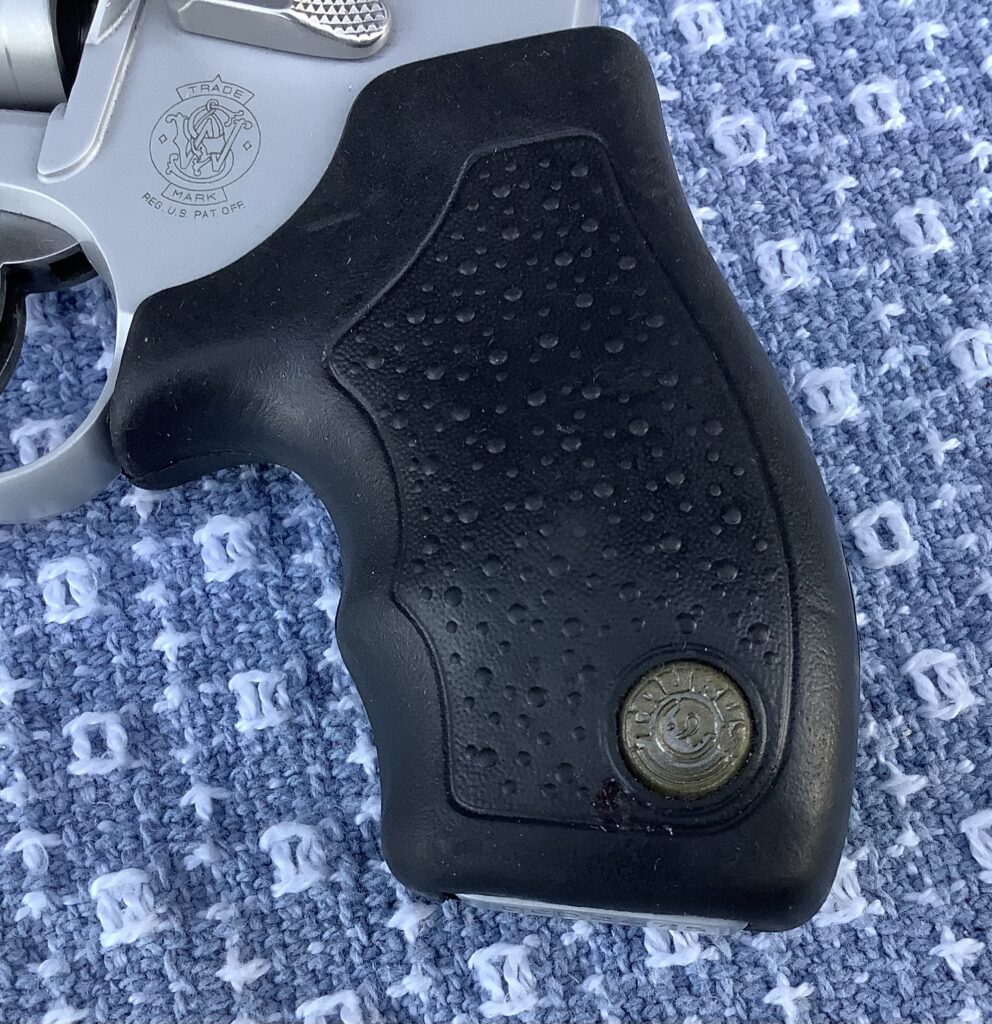
There were two rubs to consider, however. First, the location of the grip frame locator pins on the Taurus and Smith & Wesson frames was not identical, with the Taurus pin resting closer to the front strap, so the Taurus grips had to be modified to fit the Smith & Wesson. Second, the grips featured an embedded Taurus medallion at the heel of the grip, which was objectionable to some S&W owners.
There wasn’t a whole lot you could do about the second problem, but the first problem could easily be solved with a drill. It was a simple matter to drill out the Taurus grips in the right spot, so they could be mounted on a Smith & Wesson. Once again, I wasn’t aware of the practice at the time, but I’m told it became a popular idea, and there were quite a number of shooters who bought new Taurus revolvers, just so they could obtain the grips for use on their S&Ws. Apparently, there was a period of time where it wasn’t uncommon to see brand new Taurus revolvers for sale on the used market, sans grips, as a result of the growing practice.
An Experiment
When friend and RevolverGuy Dean Caputo clued me into this recently, I decided to give the whole thing a try. I found a couple auctions for the old Taurus grips online, and wound up winning both of them when I forgot to withdraw my second bid. I soon had not one, but two sets of Taurus grips to experiment with on my Smith & Wessons.
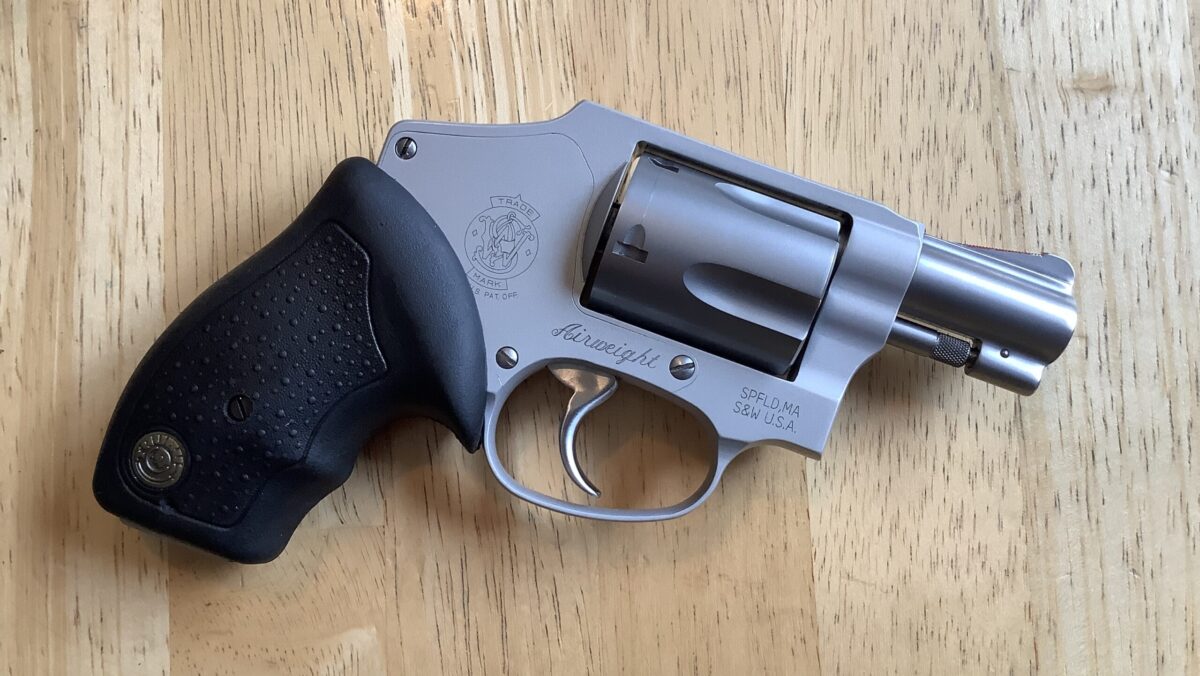
I have to admit the Taurus grips feel pretty darned good in the hand! I really enjoy the covered back strap, as it increases the trigger reach and makes the gun fit my large hand better. The Taurus grips don’t have as much palm swell as the discontinued Uncle Mike’s, or even my Crimson Trace LG-405s, but they do have more fore-aft depth, and I like that.
The material on the Taurus grips is harder than the rubber used in the Uncle Mike’s grips, and harder than you’ll find in a set of Pachmayrs or Hogues. This is both a good and bad thing, as the Taurus stocks won’t help cushion the recoil very much, but they also won’t be as “grabby.” making them a better fit for pocket carry than the softer grips. I think it’s useful to think of these stocks as wood panels that are more durable and economical.
Modifying the Taurus Grip
When I placed the Taurus grips on a Smith & Wesson Model 642, they fit the frame perfectly, absent the frame locator pin location. It was an easy task to mark the grips for drilling, to relieve them for the S&W frame pin.
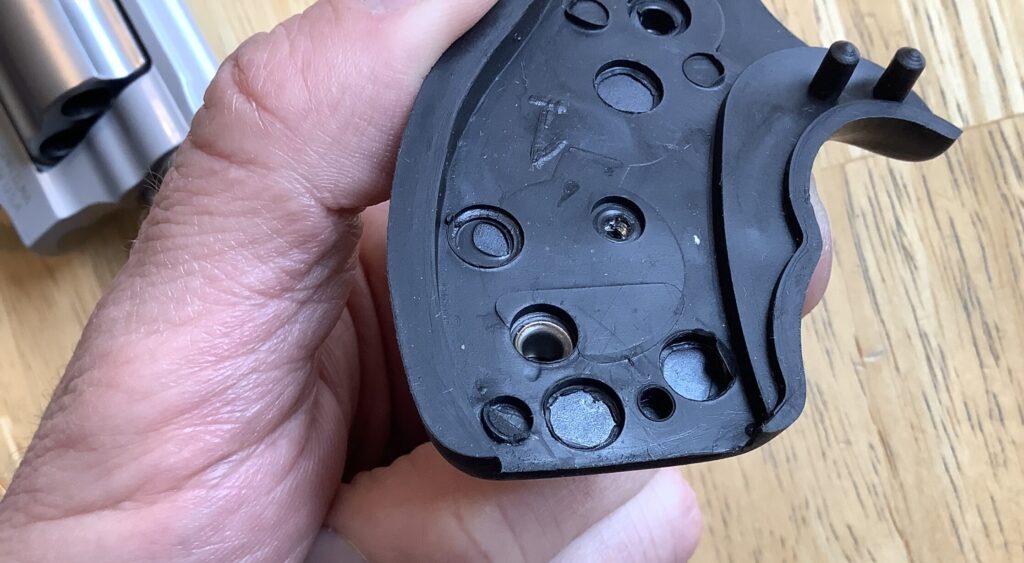
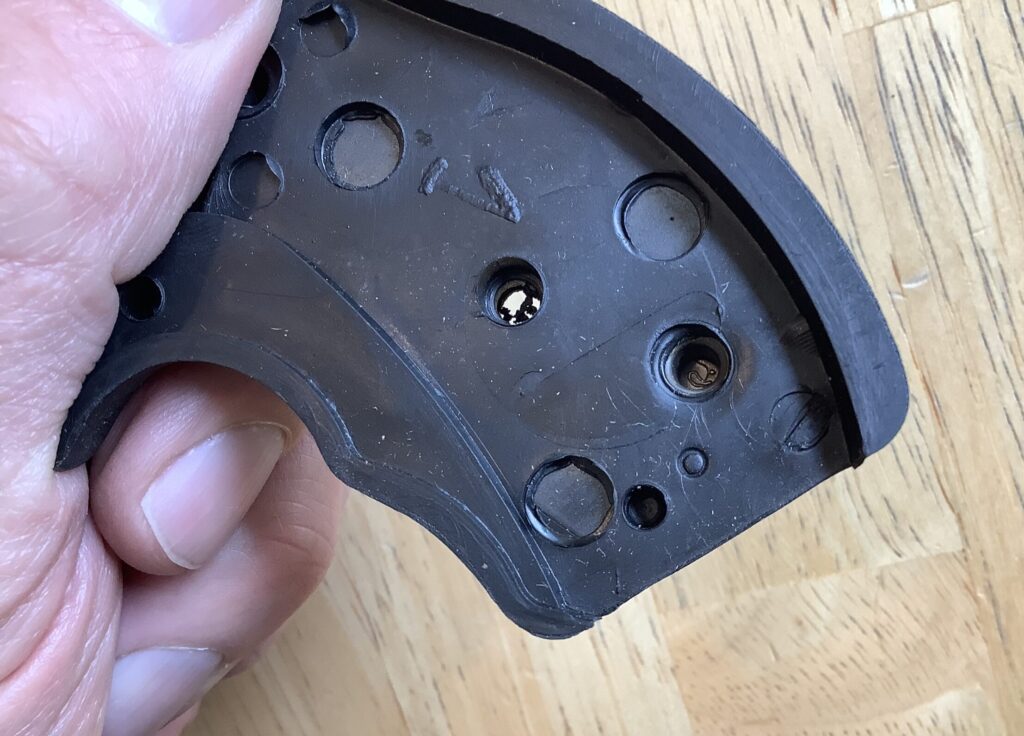
Once I started drilling on the grip, however, I discovered a metal skeleton underneath the rubber surface. The drill bit needed a little pressure to get a bite on this part, and here’s where it got interesting.
If you’re patient and take your time, it’s not too difficult to get through the metal plate without damaging the grips. But if you’re trying to rush the job, like I was (Pro Tip: Don’t try to sandwich these projects into that extra 15 minutes you have before you leave for work), you’ll soon find there’s a fine line between enough force, and too much. After a few seconds of watching the tip of the drill bit skip along the metal, and fail to take a bite, I leaned on the drill a little too much and quickly punched right through the metal plate, and straight through to the outside of the grip (it’s a short trip between the plate and the grip’s exterior).
Argh.
Not content to learn from my mistake, I did the same thing on the other side.
Of course. Well, at least they match now.
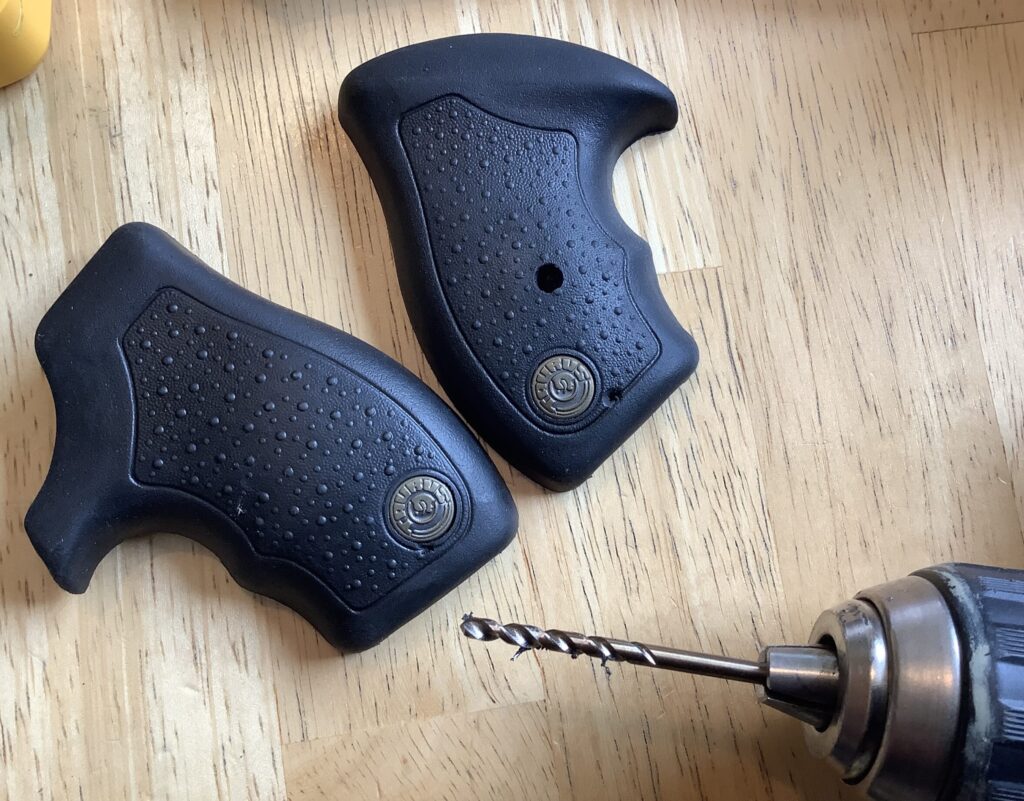
Fortunately, the rubber grips do a pretty good job of camouflaging the small idiot holes I made with the reduced diameter bit for my pilot holes, and in any case, they really don’t hurt much of anything. I suppose I could put a little sealant in the holes to prevent any water/sweat from getting inside the grips through the holes, but honestly, that’s probably unnecessary. If I sweat that much on the gun, it’s going to leak under the edges of the grips anyhow.
Maybe it was a good thing I won both auctions, because now I can have a do-over, on a day when I can take my time and do the job right.
Results
It might be because the rubber is getting old and shrinking a bit, but the seam between the two panels is a little proud on the back strap, right near the recoil shoulder. I suppose I could use a hair dryer or heat gun to soften things up and try to reshape the grips to close the gap, but I’m not interested in going to the effort because I never noticed it when I was shooting the gun. It’s a cosmetic thing, at best, and maybe if my shooting buddies focus on the split, they won’t notice the extra ventilation holes in the sides of the grips. Besides, I’ve seen lots of new Pachmayrs that don’t fit any better.
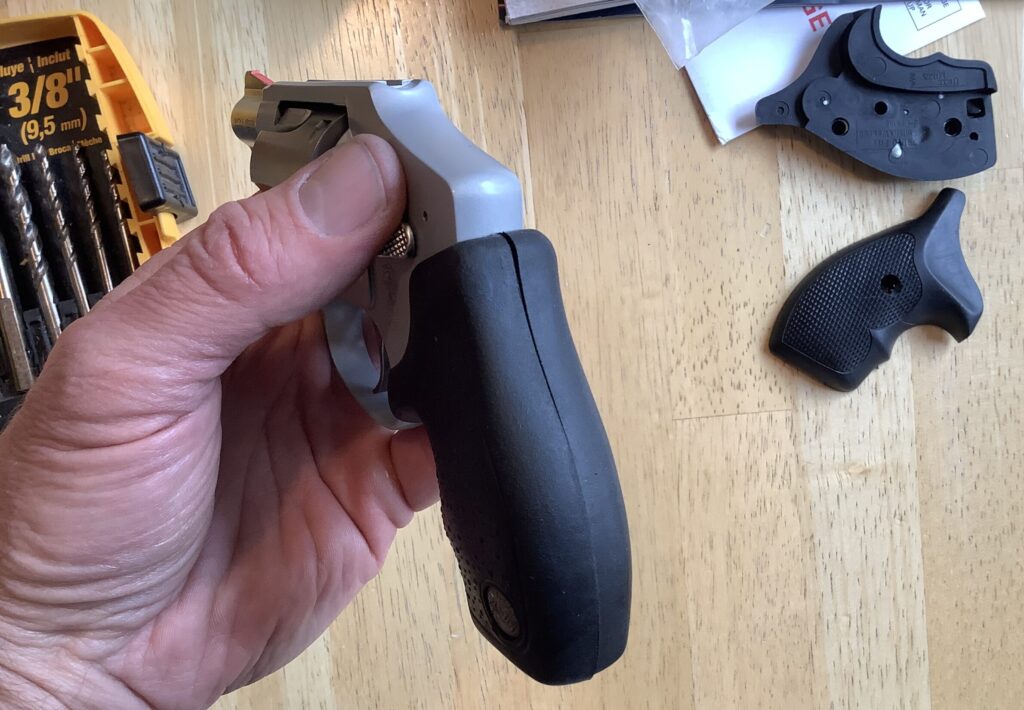
One thing that’s nice is the Taurus stocks allow an HKS speedloader to pass without any drama. That’s rather uncommon on grips these days, and I was grateful I didn’t have to attack these new grips with my files and sandpaper, like most of the ones I try.
The feel of the “new” grips is pretty darned good, actually. I really do like the increased trigger reach, but I’m definitely left wanting a little more belly on the sides. These grips feel a little too thin through the midsection, for my tastes, and I was worried the thinner back strap would concentrate the recoil force on a smaller area, making these grips shoot “harder” than the Crimson Trace LG-405 grips, but I didn’t notice this effect during live fire. I did notice the hard rubber on the Taurus grips doesn’t provide any appreciable cushion for your hand, unlike the softer material and purpose-built crush zone on the LG-405s.
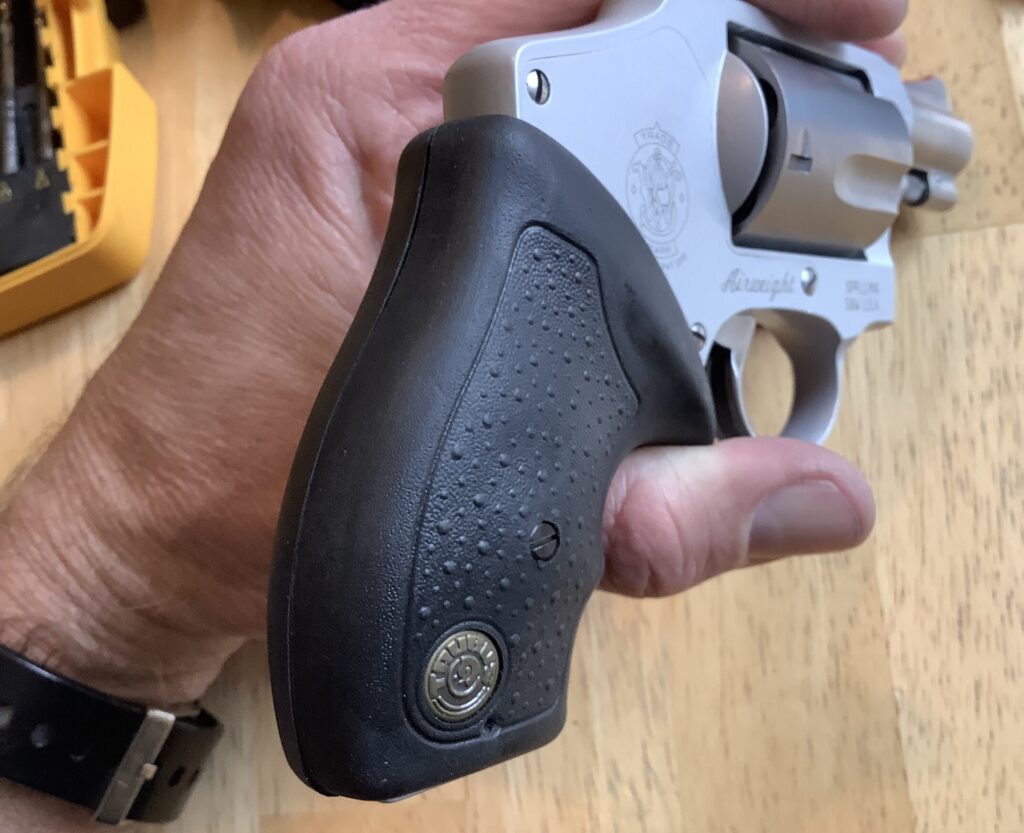
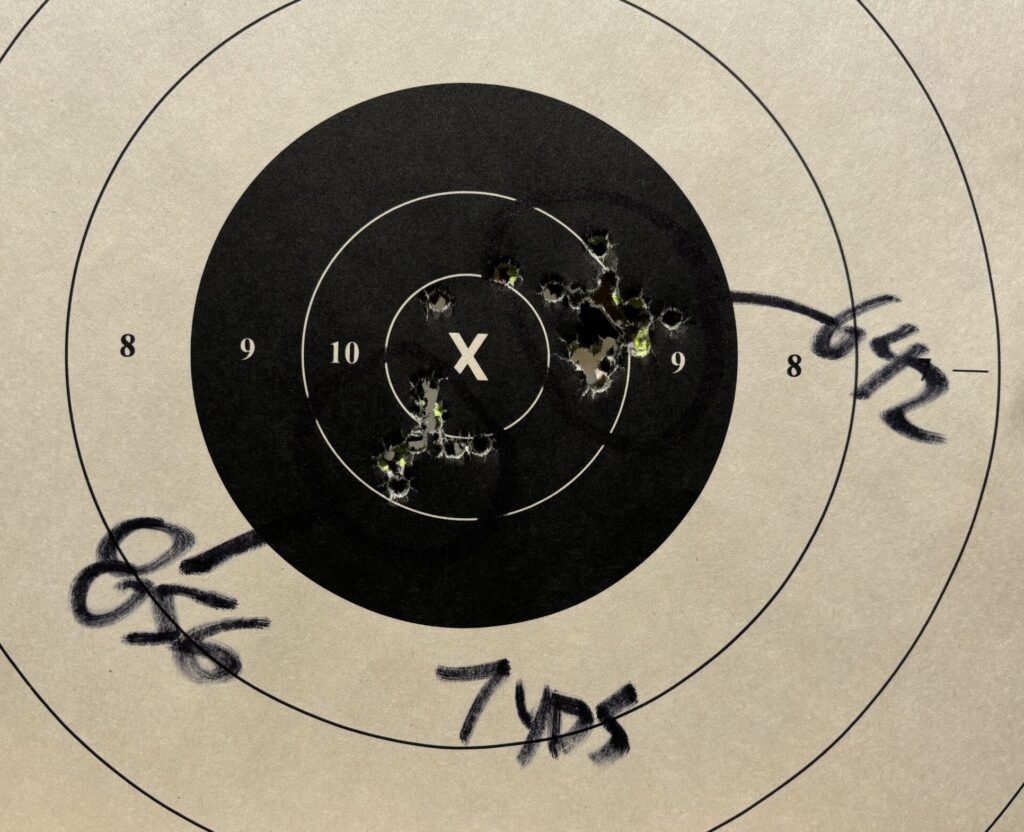
I do prefer my Crimson Trace boots, but I find that I like these modified Taurus grips better than the current OEM J-frame stocks, and the discontinued Uncle Mike’s stocks that are still so popular (and priced accordingly). I also prefer them to the current Hogue offerings for the small frame Smith & Wessons.
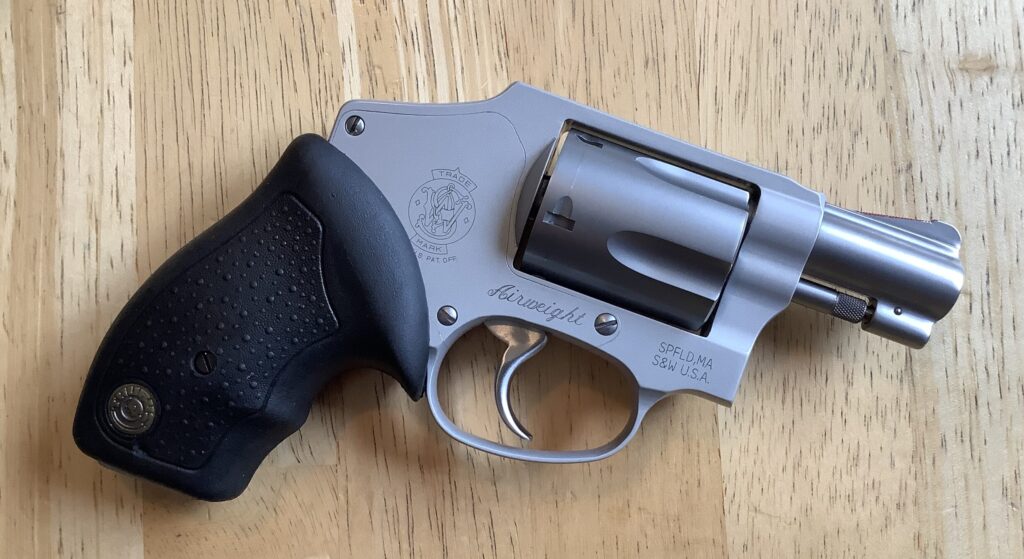
Maybe someday a maker can use these Taurus grips as a baseline to build a better rubber boot grip for all of us. If they added some nice palm swells, and used a more forgiving rubber formula, I think they could really have something here.
And I know it would please a lot of folks to take their Taurus-marked grips off their Smith & Wessons!
*****
hold the presses!
I’d planned on leaving things there, but before press time, I took a few minutes to modify the second set of Taurus stocks and figured I’d add my report on that effort.
The second set turned out better than the first. I was able to get the hole drilled in the right grip panel without punching through, by taking things a little slower.
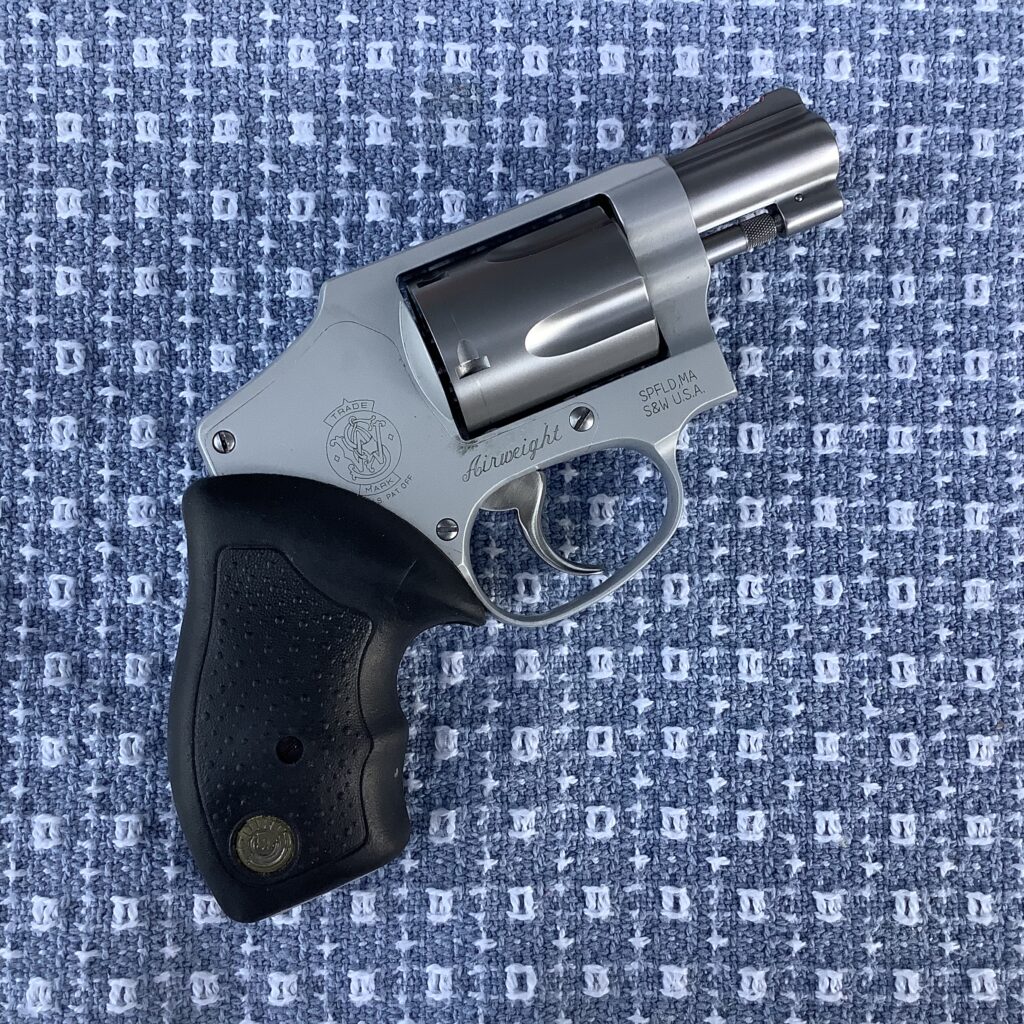
Unfortunately, the drill bit still poked through the left panel a smidge. The left panel has a much more substantial piece of metal to get through in that area, and a very thin exterior layer of rubber. When the tip of the bit finally broke through the metal, the rest of the bit quickly punched through the rest, and I couldn’t arrest it before I’d marred the outside of the panel. I took a little solace in the fact that the hole wasn’t as big as the one I made in the first set of grips, but I was still a little frustrated by it. I think a drill press is the way to go for this project, if you have one. You should be able to do the job nicely on both sides with one of those.
Fortunately, this second set of grips fit much better at the rear seam, and I didn’t have any gaps. They look nicer on the gun that way.
Anyhow, give these Taurus grips a try, if you’re looking for an enclosed back strap option for your J-frame. They might be just the ticket for you.
*****
Train with revolverguy!
As a reminder, Mike will be teaching a Defensive Revolver class in Northern California in October. See this post for additional details.

It’s a lot of fun tinkering with firearms and related products…until something goes wrong. Having been there and done that, I’m not only older but hopefully wiser. A lot more careful, too.
As your article mentions, Mike, a drill press would be the better way to go to make the holes in the grips. Installing a depth stop on the drill bit to prevent overpenetration is advised as well. If one doesn’t have a depth stop, the quick and dirty solution is to wrap colored tape around the drill bit to achieve that measurement.
Still, your adapting those Taurus grips to fit your J-frame was an excellent solution for your needs. You might want to try mixing silicone bathtub caulk with black enamel model paint and plugging the unwanted grip holes. They might disappear.
Thanks Spencer, I’ve been thinking about a little dyed caulk. I’ve also got some JB Weld that’s the right color already, which would be easy enough to apply. The second set will do for now, though, until I get around to fixing the first.
Great idea here, Mike. I would suggest those who want to try them secure a set of these Taurus 85 grips sooner than later- now that the word is out supply will diminish rapidly! Finding that balance in a J frame grip is tricky. A while back I had some say in what firearms NMSP issued and I selected 642’s as the issued back up gun. The guns tested and originally purchased (2006ish) came with the Craig Spegel licensed Uncle Mike’s grips. they worked wonderfully with HKS speedloaders and most recruits/ officers could make it through transition training without too much hand trauma. The training was heavy on Federal 130 FMJ, duty ammo 135 +P Golt Dot shot sparingly. The guns were well received, a second batch was soon needed and ordered. The shipment arrived with the substitute grips you described. They wouldn’t work with our speedloaders and the tacky surface grabbed at our wool blend trousers when used with the Galco Ankle Glove. As you described, the Crimson Trace 405 was (and is) a joyous solution. The cost made them a no go for general issue by the bean counters, but many officers purchased their own to use. S&W has collaborated with Crimson Trace before, we’ve discussed how cool it would be if CT would offer the grips in a “non-laser” version and sell them for a tariff competitive with other rubber grips. They’d be even more comfortable without that laser port tapping the last knuckle on your trigger finger during recoil. What say you, S&W? Anyway, thanks for the neat DIY conversion with the T-85 grips. Excellent!
Amen, brother. A non-laser set of CT LG-405s would be excellent, but when I spoke to their grip designer about it, he was uninterested. They had done some non-laser grips for the Kimber K6s, you may recall, so it wasn’t an unreasonable suggestion.
Awesome DIY grip project, Mike! I too have a grip project currently underway. I’m guilty of buying an old Colt Diamondback last week mostly for the grips. They were the most expensive set of grips that I ever bought LOL
Ha! Attaboy, partner! I’m glad I’m not the only one who thinks like that. I’ve actually bought guns before because I already had a holster for them. ; ^ )
Send me some photos of your Diamondback and let me know how your project turns out! Be safe.
Maybe Acraglas for the through holes?
On the back burner is a project to fit a pair of RB Shooting Aces to an 856. Initial fit isn’t perfect but it’s not bad.
I ended up buying a pair for $20 or so shipped and they have become my favorite j frame or 856 grips. I enjoy the modern stock grip but for carry and comfort the older versions are best.
I’m going to purchase another set or two to keep around as there is no rubber boot grip that covers the back strap. Hogue is missing a market there.
The new VZ or AFR grips seem nice but I prefer a squishier feel; the hogue tamer on an LCR is a favorite as well after cutting off the finger grooves.
I’ve put a set on a J frame before. It’s pretty easy if you take your time. But for my hand size I’ve never found a set of boot grips better than Uncle Mike’s. I have them on a 442, 640, 642, and a 642 Pro. Have another set coming from eBay. Only other J frame grips I use are panel with a BK or Robertson grip adapter.
Good one Mike. A great illustration of the path folks follow to find out which grips work best for them.
One of the top things to gaining competency with a revolver, even more so in Js and other small frames.
There is something oddly satisfying about fitting the wrong grips to a gun. I modified some LCR grips to fit on my SP101s (and modified the SP101s to accept the screw that those grips use). I don’t know if they are my favorites, but I left the long 3″ LCR grips on my 4.25″ SP101 and the standard LCR grips on my 2.25″ SP101. That said, the 3″ SP101 gets the most use and still wears the factory grips, so take that for what it is worth.
It sure appeals to the tinkerer in each of us, doesn’t it? Your mods sound interesting, and useful!
Really interesting article Sir! I have been using Hogue Bantam grips on my J frames but have been wanting something that covers the backstrap to help with my longer fingers as well. The bigger Hogues provide that backstrap material but its also a longer grip so you give up the ability to pocket it or hide in an ankle holster. I dont know why I never thought of the Taurus grips. I think its time for a new project! Thank you for the info and for always supplying us with great revolver material.
Let us know how it works out for you, Mark!
I did it the easy way. I bought a Taurus 856 and got an extra round capacity to “boot.”
Cheater! 😁
Hello Mike,
Great solution to a problem I suspect is common but most people just live with.
Us revolver guys come in all shapes and sizes so sometimes we have to get resourceful. I had the same problem as you. One 642 with the Uncle Mikes boot grip and a later 642 with the S&W boot grip. Like you, I have long fingers and could not shoot the guns well. I wanted more reach in a shorter grip for pocket carry. I bought a set of grips from S&W that are the same that are being used on the current standard 60 and 640.
I shortened the grip using a fine hacksaw to cut through the rubber and internal plastic. I cut it 1/16 of an inch longer than the grip frame so that it just covered the bottom of the frame because I wanted to cut through the heavier plastic base for more integrity. It came out better than I expected and made the gun much more shootable. I think the Taurus grips might be a little more hand filling and an easier modification making it a better option. I just thought I would throw it out there in case someone has a spare set of grips in the grip box they don’t mind cutting. Thanks for another excellent article.
Thanks for sharing that solution, Derek. How did you finish off the bottom of the grips? Can you feel any of the hard plastic skeleton on the underside?
I used the finest hack saw blade I could find and it came out very smooth. I may have buffed the cut edge with some super fine sandpaper but it has been about 7 years and I can’t remember. I was going to cut it flush with the end of the grip frame but I was worried about cutting too short and having the grip frame protrude and look bad. I figured a little longer would not hurt. The 1/16 inch of plastic skeleton is completely surrounded by the outer rubber and flush with the bottom of the rubber so you can’t feel it. You can’t see it from the side. You can only see the plastic if you look at the end of the grip.
Great info, thanks Derek!
You are welcome Mike.
I tried to attach pictures but couldn’t get it to work.
Thanks Derek. We’re not set up to support attachments or links, so I appreciate the detailed explanation you provided.
I should have mentioned that the 1/16 inch of skeleton actually forms a web on each half and covers the bottom of the grip frame. It creates a flat surface at the end of the grip flush with the outer rubber. I wanted to have some material to work with in case I messed up the cut. A steady hand could cut the grip flush with the bottom of the grip frame like a stock boot grip.
Hogue has their ‘Bantam’ stocks for J-frames that include the overmolded rubber, G10 and assorted hardwoods . . . the G10 is nice for pocket carry. Plus, it saves you the trouble of drilling holes.
The Hogues are open back and a little long (in some versions), though.
Mike, I fitted a set of these grips a few years ago to a 1970’s era Smith M36 and found that they prevented the hammer from being cocked for SA fire, thus rendering it DAO without any internal modification to the weapon. Handy tidbit for those who prefer their revolvers Alvarez’ed, but don’t want to resort to a gunsmith, or wish only for temporary modification.
Fascinating, EDW! Thanks for adding that!
For those who didn’t get the reference, “Alvarez’ed” refers to the LE practice of rendering service revolvers DA only–a step Miami PD took after a controversial OIS, involving officer Luis Alvarez, which ignited a race riot in 1982 (it was a good shoot, but the media, you know . . . )
Kind of a side tangent, but funny none the less. Putting Taurus products on S&W revolvers reminded me of this….my Wife had adopted (absconded…) my 44Spl snubby as her own, and I wanted it back. I figured the only way to get it back was to replace it with another revolver the Wife liked. Now, the Wife was a ballistics technician for Speer/CCI for ten years, and had a rather sour opinion of Taurus products due to the problems they had back in the 80’s….she hated testing loads in the Taurus revolvers that Speer had.
Anyway, I went to see my buddy at the pawn shop to see what he had, turns out he had a very sweet S&W Model 65 3″ heavy barrel. It was so nice I almost decided to keep it for myself. I told my buddy about the Wife’s aversion to all things Taurus….he laughed and headed to the back room. He came back with a Taurus box. He said “have fun with this, but don’t send me the bill for your divorce lawyer!”
So the Wife’s birthday came around, and I handed her the nicely wrapped box. She opened it up, saw the big Taurus label on the box, and did a nice job of hiding the look of confusion on her face. She looked the Model 65 over and told me that it was a nice looking revolver. I mentioned that Taurus seemed to have mismarked the barrel and to take a close look at it. All I can say is I’m glad my reflexes were quicker back then after she saw her new revolver was not a Taurus….or otherwise the tip of her pointy boot would have been firmly planted up my backside.
To this day, whenever my buddy sees the Wife he asks her if she is in the market another nice Taurus….and then quickly moves behind the counter….
Hahahaha! Mike, that story made my day! Thanks for sharing it!!
Most importantly, did you get your .44 back? 😆
There are generally a good many, and often expensive, options for hard grips for most revolvers. However it seems there are not so many choices in aftermarket rubber grips, which I prefer, and I have found their current quality poor. Both Pachmayr and Hogue rubber grips fit my square butt S&W Model 10-5 so badly that I put the original wooden magna grips back on. At least the magnas fit perfectly and look good.
I am glad you were able to find a decent rubber-grip option for the J-frames.
It’s disappointing, isn’t it Steve? We should have better options available!
You don’t need to use the S&W stock pin with the Taurus boot grip. Molded fingers on the grip interlock the two halves, so the two halves won’t shift with respect to each other. It fits tightly enough (at least when I tried it on my 642) in the grip frame, that the grip won’t shift around. You can just drive out the stock pin and keep it somewhere.
No need to possibly bugger up the grip drilling a new hole.
Good luck finding one. Last I looked they were asking stupid prices on ebay.
Thanks Lee, I’d considered that, but wanted to keep the frame pin in place for use with other grips and knew I’d lose it if I removed it! If someone likes these Taurus grips enough that they’re gonna stick with them, then your option is definitely worth consideration.
I rather suspect this article will bump those auction prices up a bit. Sorry guys!
I put an Ergo Delta grip on my model 60 pinned barrel. Not the prettiest thing you ever saw but, I’m not going to anything else.
Those look interesting, Rick. I still haven’t tried one yet.
+1 on the Ergo Delta grip – really like it, and it is friendly to large hands as well as smaller.
For those concerned about the Taurus medallion, I wonder if one couldn’t cut off the base of a brass case and attach it somehow (JB Weld perhaps)? You’d have a nice custom logo instead, if it didn’t protrude too far…
There are tons of Smith and Wesson grip medallions on evilBay. Gotta be an easy way to fit them in place of the Taurus medallions.
I’m a big fan of the 642/442 stock grips, so no messing around with those for me. Picking up a stainless 856CH in a few minutes and even though I already have a Hogue 67000 ready to go, I’m going to try and come up with a way to attach the stock Taurus roll pin grip with some sort of mechanical fastening, just for fun. That roll pin is almost as annoying a S&W lock, IMHO.
I really like my Taurus revolvers, but I agree about the 856 grip’s roll pin. It is the very first thing I would change if I could. They need to go back to screw and nut fasteners for grips.
I had wondered about Taurus grips on S&Ws. I vaguely remember some discussion about them years ago but don’t recall the source. VZ is still not making their grips for the Linsey’s edition Centennials for public consumption. I have pretty much settled on the Hogue Bantams for my 640-no dash and 80s manufacture Model 36 as the palm swell and texture of the rubber actually does a somewhat decent job of dampening the sharpe recoil impulses from hotter loads. My hands are more or less medium size. I prefer the Bantams over the Uncle Mike’s boot grips or similar Pachmeyers. I would still like to find some better designed grips for the Centennial frame that cover the back strap however. I’d also like to see a well-grounded article on realistic options for dealing with shrinking J-frame sights on pre-pinned-front sight revolvers. I currently use orange nail polish and Sharpies but my 36 has a rather thin blade and there’s only so much orange paint will do. Listings of reliable sources who would mill, cut dove tails, install, etc would be welcome. Thanks for this article. It was well-written and interesting.
Rob, I’m glad you enjoyed the article.
The shrinking J sights is something I struggle with too. I use the paint on mine, but do understand some of the older sights are petty thin. I’ll try to work up an article on that.
Our friends at XS Sights used to take in customer guns and machine them to accept their big dot sights, but they’re not doing that work anymore. They would machine the front sight into a post, then slip their dot sight over the top of it and glue it in place. Worked great. A local gunsmith should be able to do the same job for you, but if you can’t find one, I’d reach out to Friend of RevolverGuy, Roy Huntington, at sumarohousedesign@yahoo.com and ask him if he would do the job for you. We’ve also got an upcoming article that will publish on the 28th of this month, which will provide more gunsmith resources for you, so stay tuned.
Here’s that special XS sight product:
XS Big Dot Revolver Front Sight S&W
From the dropdown menu, make sure to select the one that says “S&W J-Frame Integral Front (fixed rear, milling required)”
Hey Rob,
If Mr. Huntington is too busy, you might reach out to Dave Lauck at D&L Sports, too. His S&W revolver sights are outstanding.
Yes!! Dave would do a great job!
I confess to being a bit of a snob concerning Taurus in the past. However, I just came upon a new/old stock Model 94 snubby in .22 LR. The action is smoothing up nicely. It had a full-size grip which I just swapped out for a Model 85 boot grip I found after reading this. I’m liking the feel so much I just got a second set for a future Model 60 project. Thanks, Mike!
Glad you found it useful, Mark!
I put a set of the Taurus 85 grips on my 442 7 years ago. They fit my hand pretty good and take a little of the “bite” out of shooting it with the back strap covered.
Sounds like a perfect solution for you, Chris. Did you encounter the same difficulty I had with the metal skeleton underneath, or were you more patient than me? ; ^ )
Hi Mike,
What size drill bit did you use? I bought a used set of these grips on eB a few months back but never got around to attempting to install them. After reading your post I think this will make for a nice winter project for my 442 =)
Thanks!
Loco, I think I used a 5/64″ bit for the job. I picked a bit that was just slightly smaller than the frame pin diameter. Hope your conversion works well! Let us know how it goes.
Hi Mike,
First of all Merry Christmas and I hope you and your family have an amazing New Year! Secondly, I wanted to thank you for this amazing article with the detailed pictures that were included. I have since performed this upgrade on 2 of my no lock JFrames 🙂 I find this is the perfect combo of conceal-ability and comfort as I really liked the original size of the combat grips and the Taurus offer the addition of backstrap coverage. It’s not as “comfy” as the Laser or Hogue grips but it’s a definite upgrade to OEM. For both my JFrames I found drilling was unnecessary. When I pressed the Taurus grip to the frame to make the impression into the rubber, both of my grip pins were almost pushed out. I was able to pull the rest of the pin out with a pair of needle nose pliers. I am not sure if others will have this experience but it made for a 5 minute install. 4 minutes to perform the work and 1 minute to admire the results! Thanks again!
Thanks Nacho, we had a wonderful Christmas and I hope you did too! I’m glad you found the article so helpful.
Yes, removing the grip locator pin will eliminate the interference, but I wouldn’t recommend it. The pin is helpful to keep the grips from rotating under torque on the frame, and holds everything in place nicely. The internal shaping of the panels will probably keep things in place well enough, but I like the additional support that the pin provides.