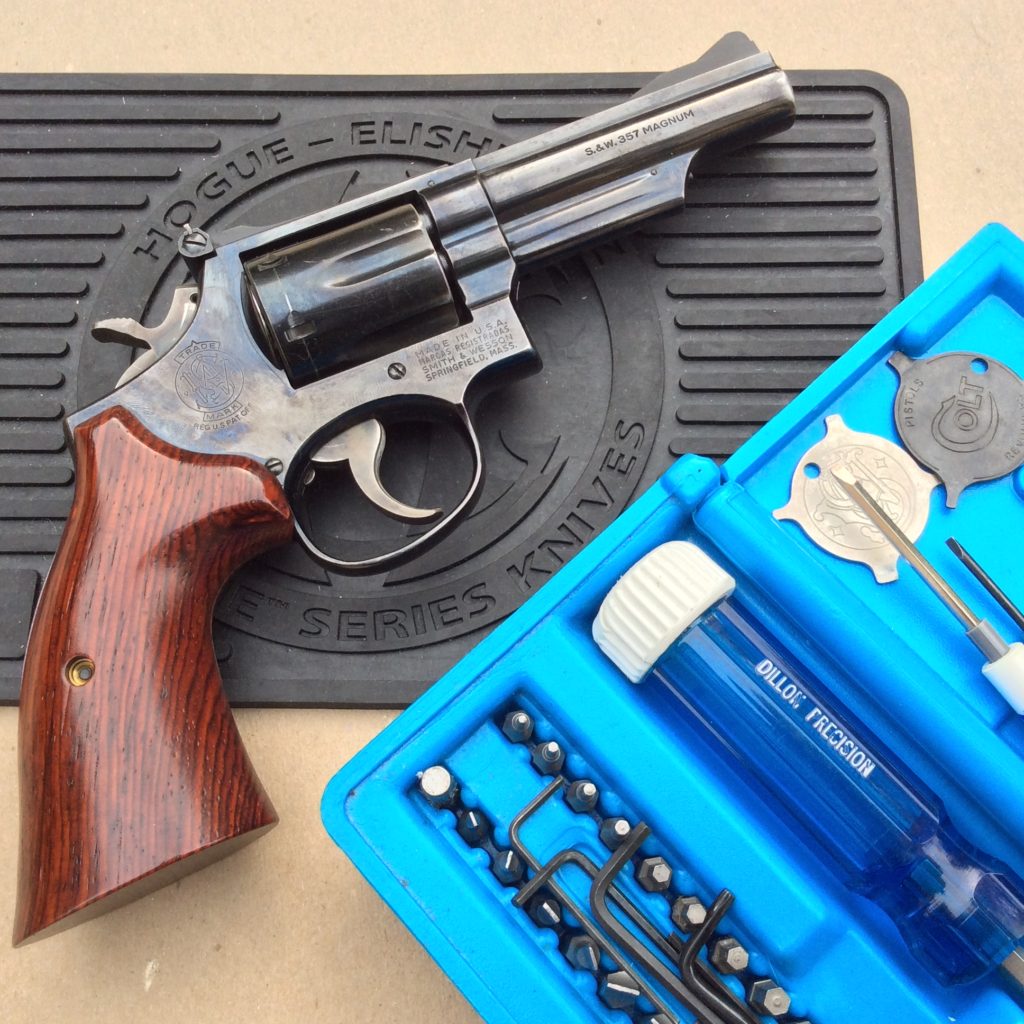
If you read the field report on the K6s, then you know that one of our test guns had a firing pin failure that rendered the gun inoperable. The RevolverGuy who owns this gun detected the problem during a routine inspection and function check, and it’s an awfully good thing that he did, because the gun was being carried as a defensive arm. Nobody wants their gun to go “click” when it should go “boom.” That’s the kind of surprise that we’d all like to avoid.
The experience got me thinking about function checks, and I thought it might be worth a few minutes to discuss them here, because almost everybody in the RevolverGuy audience has a gun that they depend on to save their skin. It’s in our best interests to make sure they’ll work when the time comes.
What and when?
To begin with, we need to draw a distinction between routine cleaning and maintenance, and the function check. When we’re cleaning or maintaining our weapons, we should certainly inspect the firearm for damage or mechanical issues, but that’s not what I mean by “function check.”
Instead, a function check is a specific test that’s conducted to ensure the firearm operates properly, and to ensure that the weapon is ready for service. A function check does not involve disassembly of the weapon—it’s conducted with the weapon in its carry mode. The focus of a function check is simply to make sure we’ll get that “bang” instead of a “click.”
You can (and should) do a function check following routine maintenance and cleaning, but you can also do one at other times. How often is up to you. Some people do them every once in a while, and others do them every time they put a weapon on. Your individual preferences will dictate, but a function check is appropriate whenever you want to guarantee that your weapon is ready to be used. Some of these occasions might include:
1. After cleaning and maintenance;
2. After a training session;
3. Before the start of a duty period;
4. When you take a gun out of storage with the intent to carry or use it;
5. As part of a daily / weekly / monthly routine;
6. After changing out any parts (grips, sights, springs, etc.);
7. Any time you just feel the need!
Why?
Guns are machines, and machines occasionally break or get out of tolerance. Furthermore, they need occasional maintenance to run smoothly.
Carrying a gun subjects it to environmental conditions that can cause problems. Guns get covered in sweat that can cause corrosion, get covered in dust, lint and other debris that can impede function, and get banged into surfaces that can cause damage or knock things out of alignment. Screws can slowly back out over time.
Ammunition is subject to problems too. Sometimes an individual round is flawed from the start, or becomes defective over time (corrosion, bullet set back, etc.).
How?
So, if you’re carrying a gun for defense, it’s important to do a systems check periodically to make sure that you’re good to go. If you find any discrepancies, either fix them or take the gun out of service until they can be corrected.
There’s a lot of ways to accomplish a function check on a double action revolver, but here’s a solid method you can use to get started, if you don’t have one:
1. Unload the gun in a safe manner. Set the ammunition aside and out of reach, where it would take a deliberate action to find it;
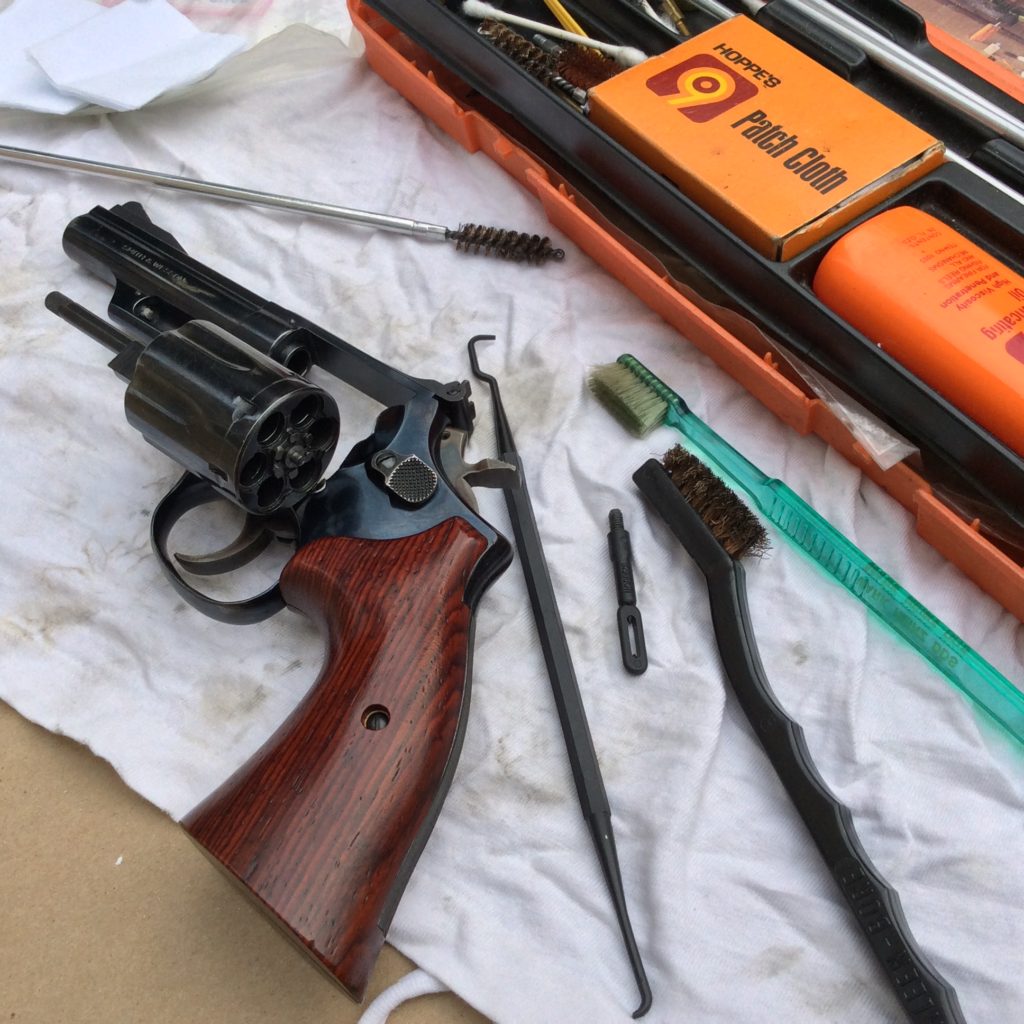
2. Conduct a quick visual inspection of the gun. Look for damage and irregularities, and check the overall condition. Look for things like rust, cracked grips, loose screws, bent sights, lint/debris buildup, clear bore, etc.;
3. Ensure the ejector rod is screwed in tightly (for S&W, Kimber, Colt, Taurus, Ruger “Six” series, etc.—N/A for Ruger SP and GP series);

4. For S&W, Kimber, Colt, Taurus, Ruger Speed/Security/Service Six, Ruger LCR:
Turn the cylinder and make sure the ejector rod is not bent.
For Ruger SP and GP series (or other guns where the ejector rod does not turn):
Visually inspect the ejector rod to ensure it’s not bent;
5. Push the ejector rod and hold it in. Ensure that it runs smoothly;
6. While the ejector is being held up, inspect the underside of the ejector and the ejector recess on the cylinder for debris—remove anything that you find with a brush or rag;
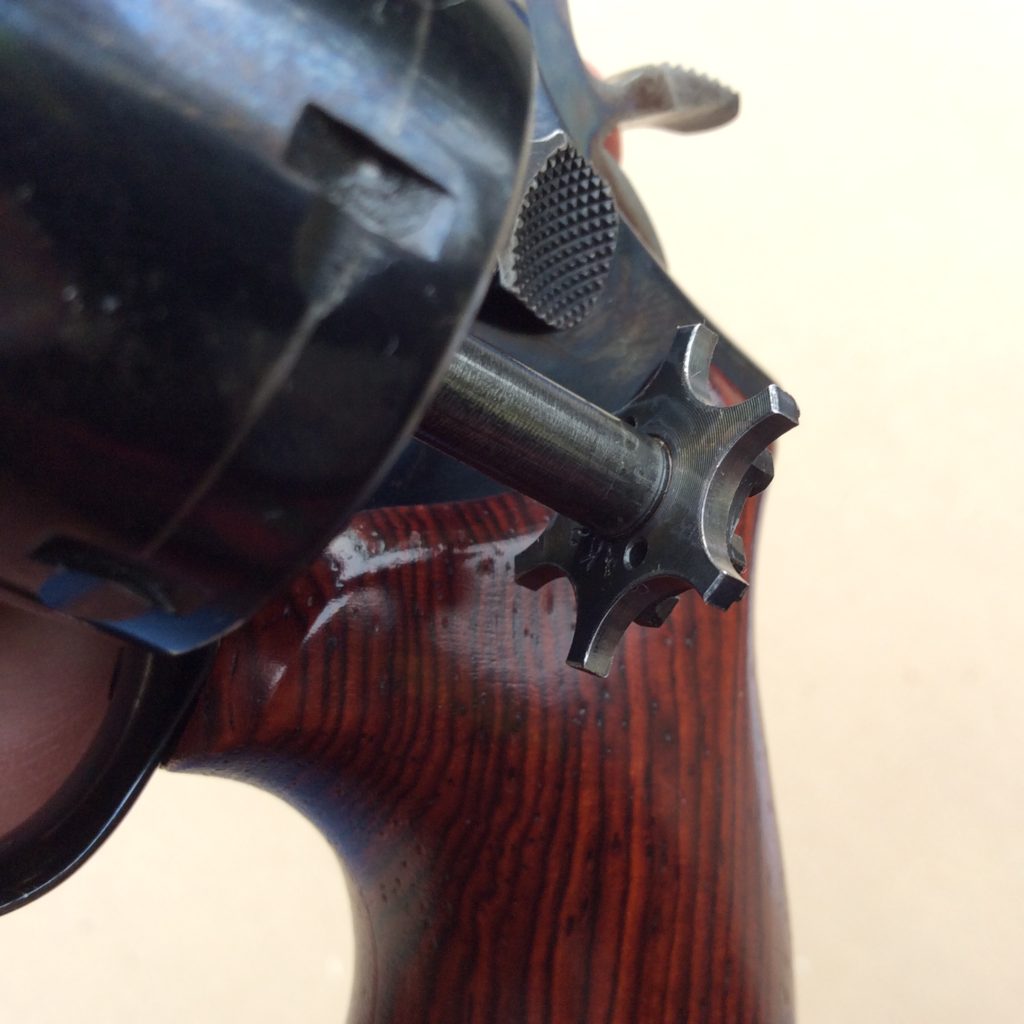
7. Release the ejector rod. Ensure that it returns smoothly and seats flush;
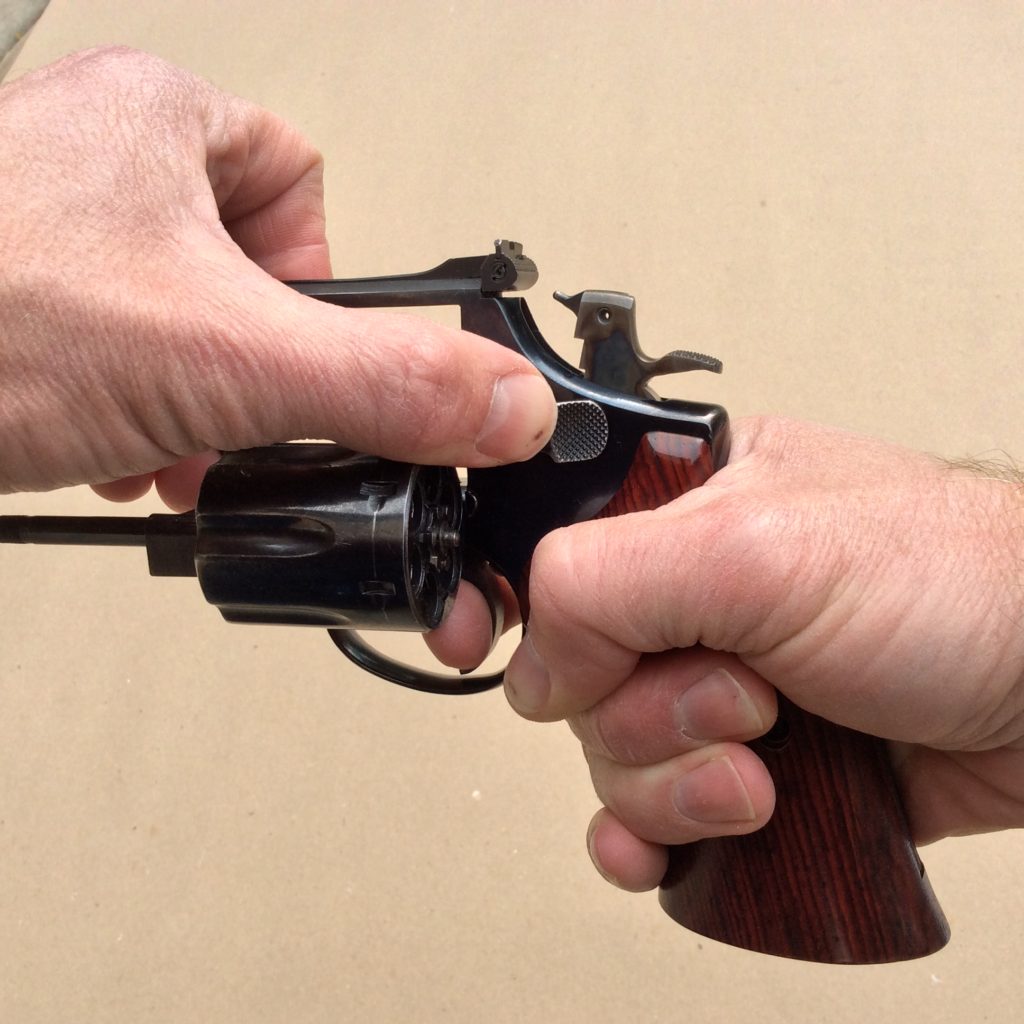
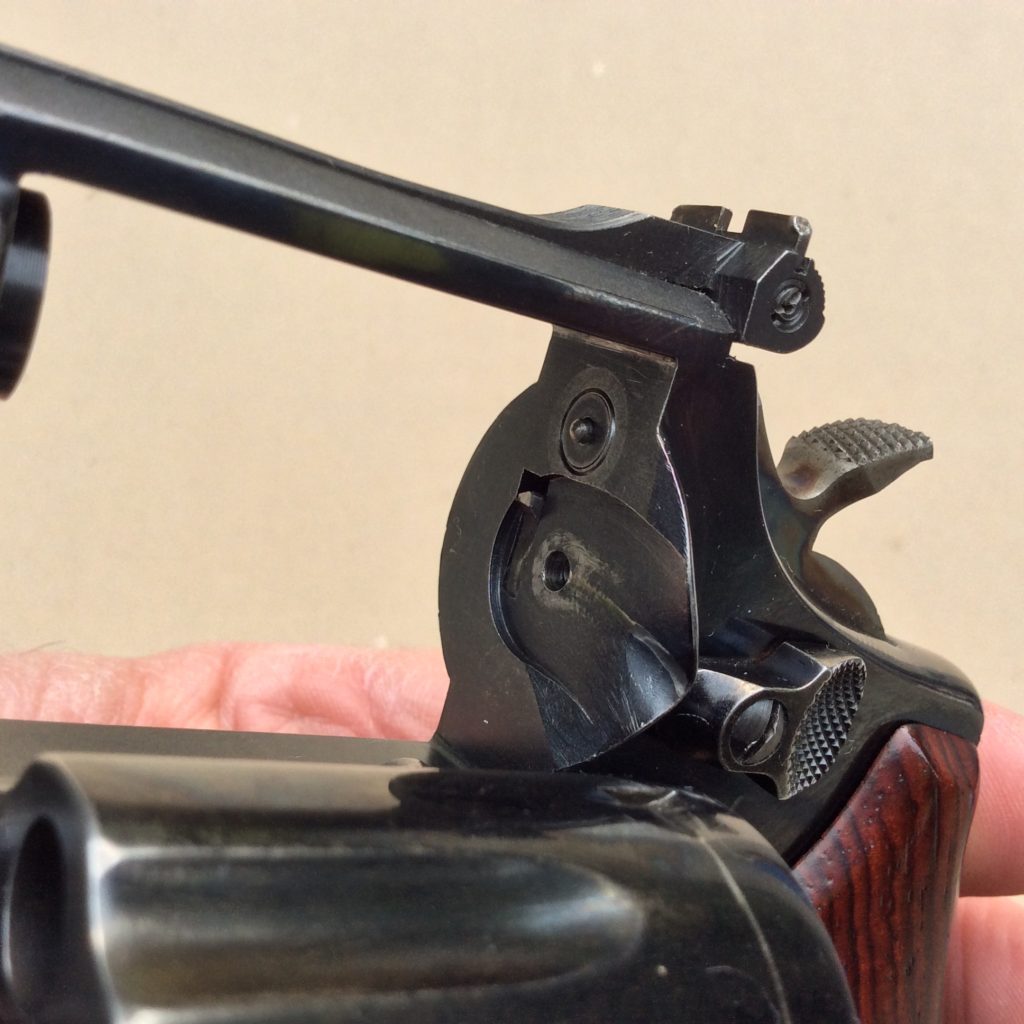
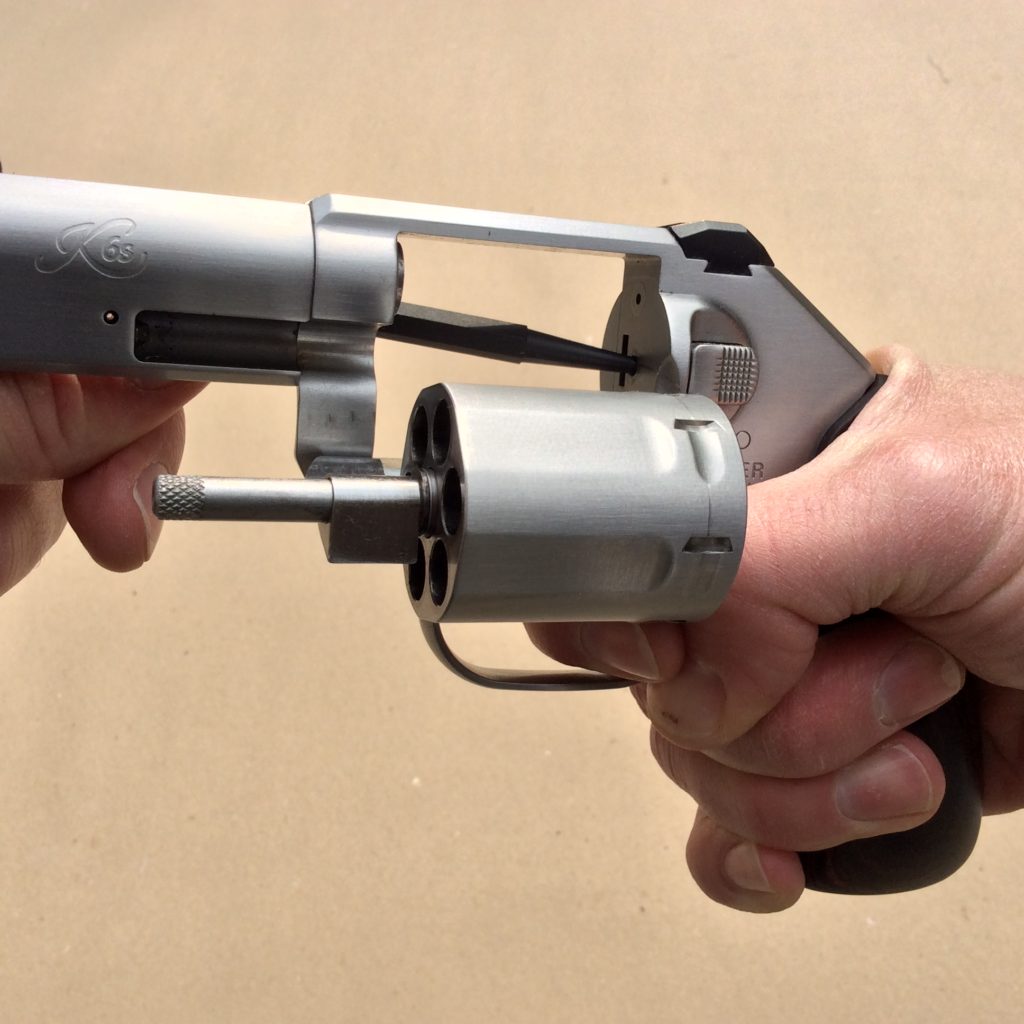
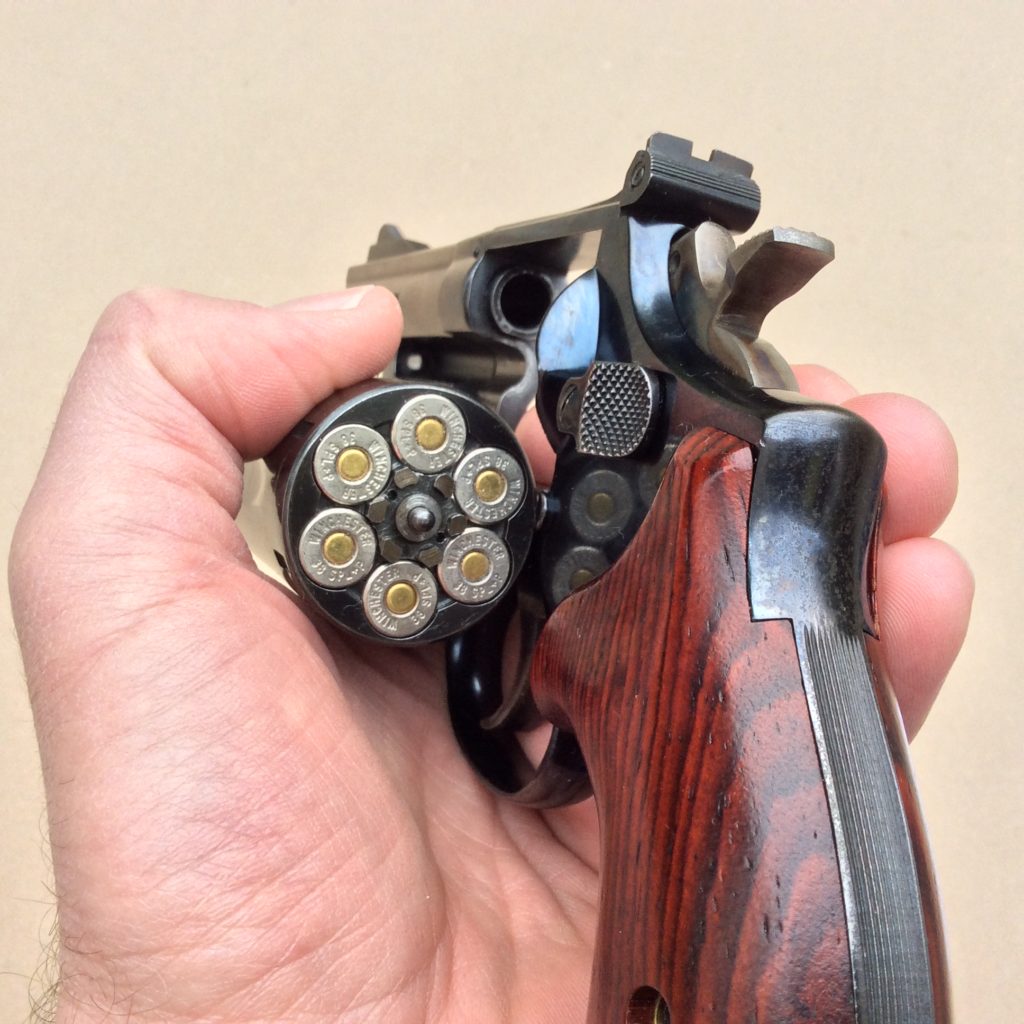
8. For S&W, Taurus:
With the cylinder open, pull the cylinder release to the rear. While holding it to the rear, pull the trigger in double action and hold the trigger to the rear. While holding the trigger to the rear, ensure that the firing pin is protruding through the breech face, and inspect it for damage. Allow the trigger to move fully forward, and ensure that the firing pin retracts back into the gun.
For Ruger SP and GP series:
With the cylinder open, rock the cylinder release forward and hold it there. While holding the release in the forward position, pull the trigger in double action and hold the trigger to the rear. While holding the trigger to the rear, ensure that the firing pin is protruding through the breech face, and inspect it for damage. Allow the trigger to move fully forward, and ensure that the firing pin retracts back into the gun.
For Kimber, Ruger LCR:
With the tip of a punch, push and hold the tip of the cylinder release in, where it protrudes through the center of the breech face. While holding the tip of the cylinder release in, pull the trigger in double action and hold the trigger to the rear. While holding the trigger to the rear, ensure that the firing pin is protruding through the breech face, and inspect it for damage. Allow the trigger to move fully forward, and ensure that the firing pin retracts back into the gun.

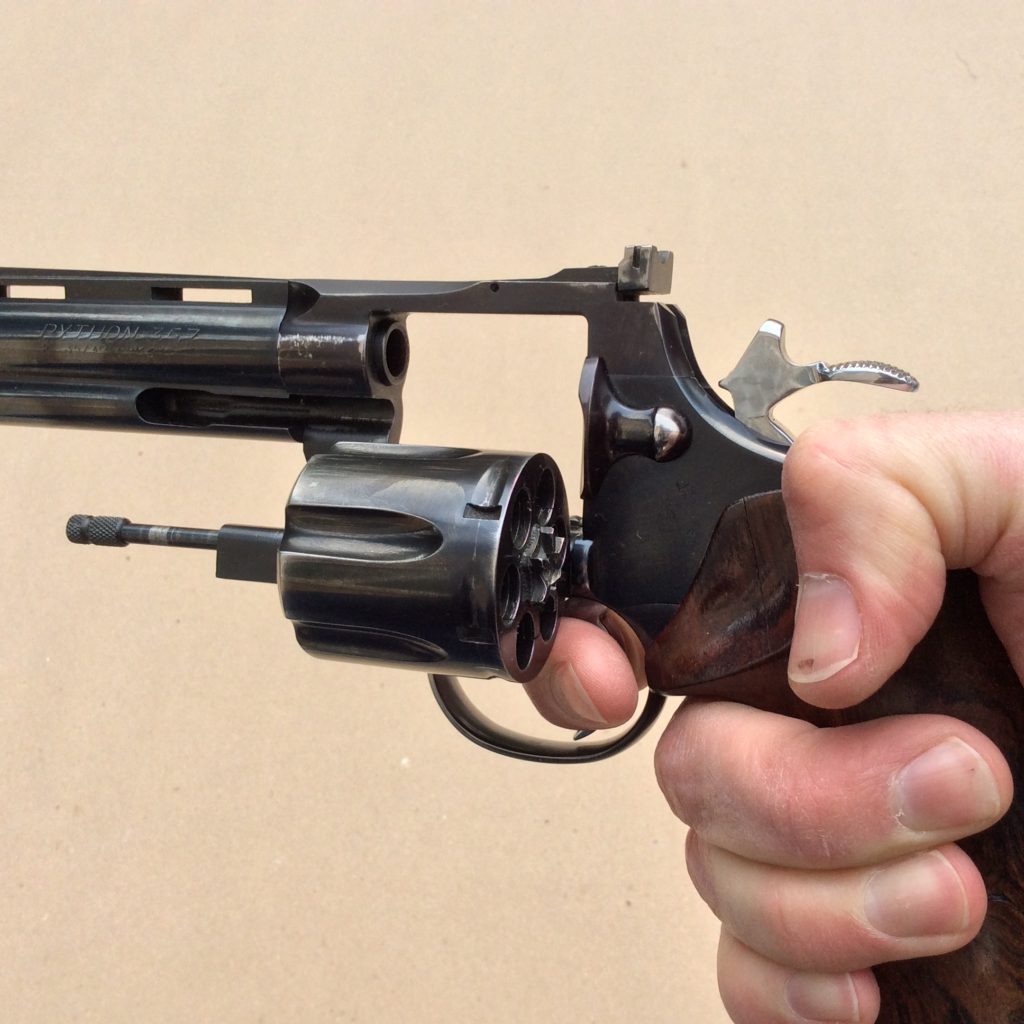
For Colt, Dan Wesson, and Armscor:
With the cylinder open, pull the trigger in double action and hold the trigger to the rear. While holding the trigger to the rear, ensure that the firing pin is protruding through the breech face, and inspect it for damage. Allow the trigger to move fully forward, and ensure that the firing pin retracts back into the gun;
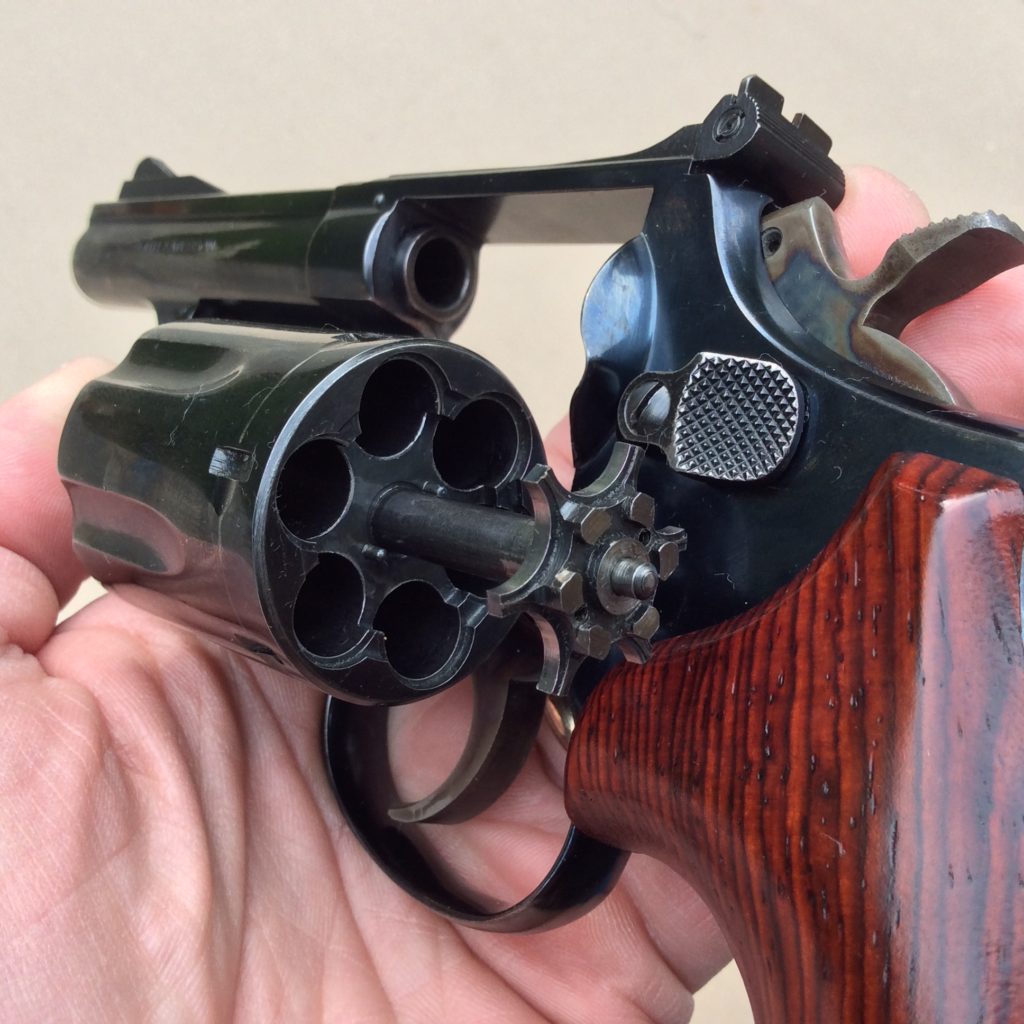
9. Ensure the gun is still unloaded. Close the cylinder, and ensure that it goes into place without any unusual resistance. Ensure that the yoke or crane fits flush with the frame (no large gaps, not bent);
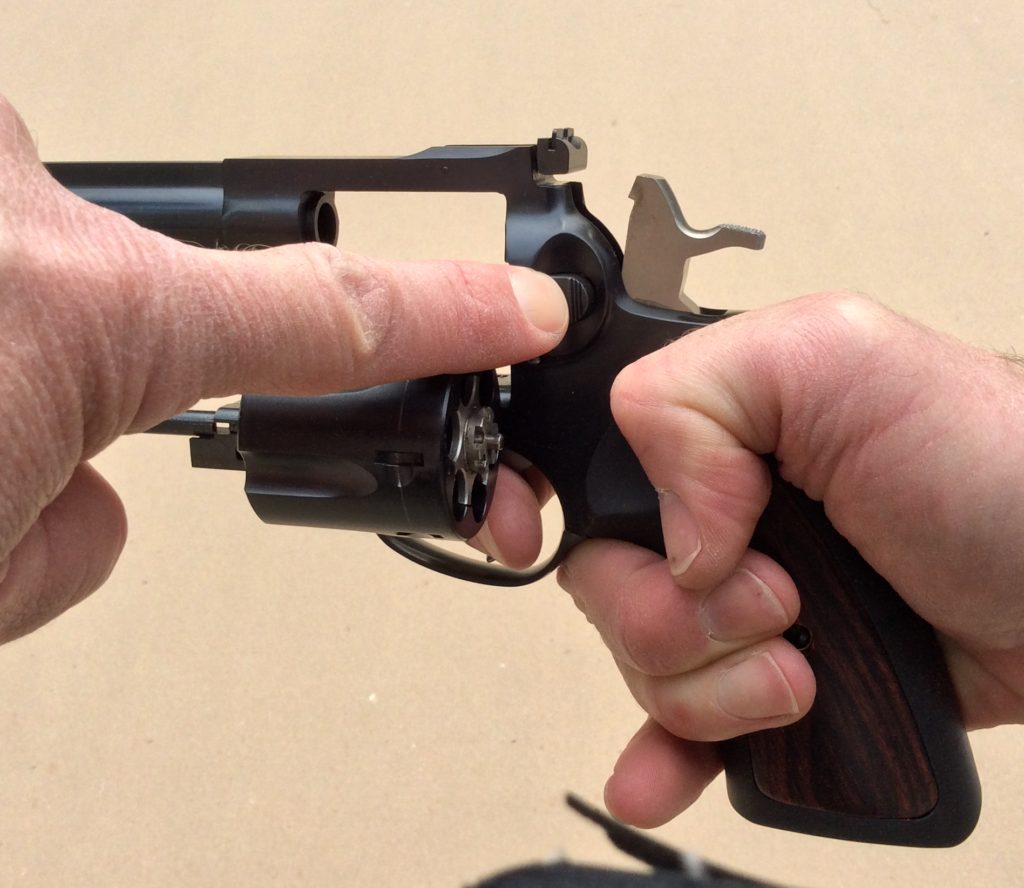
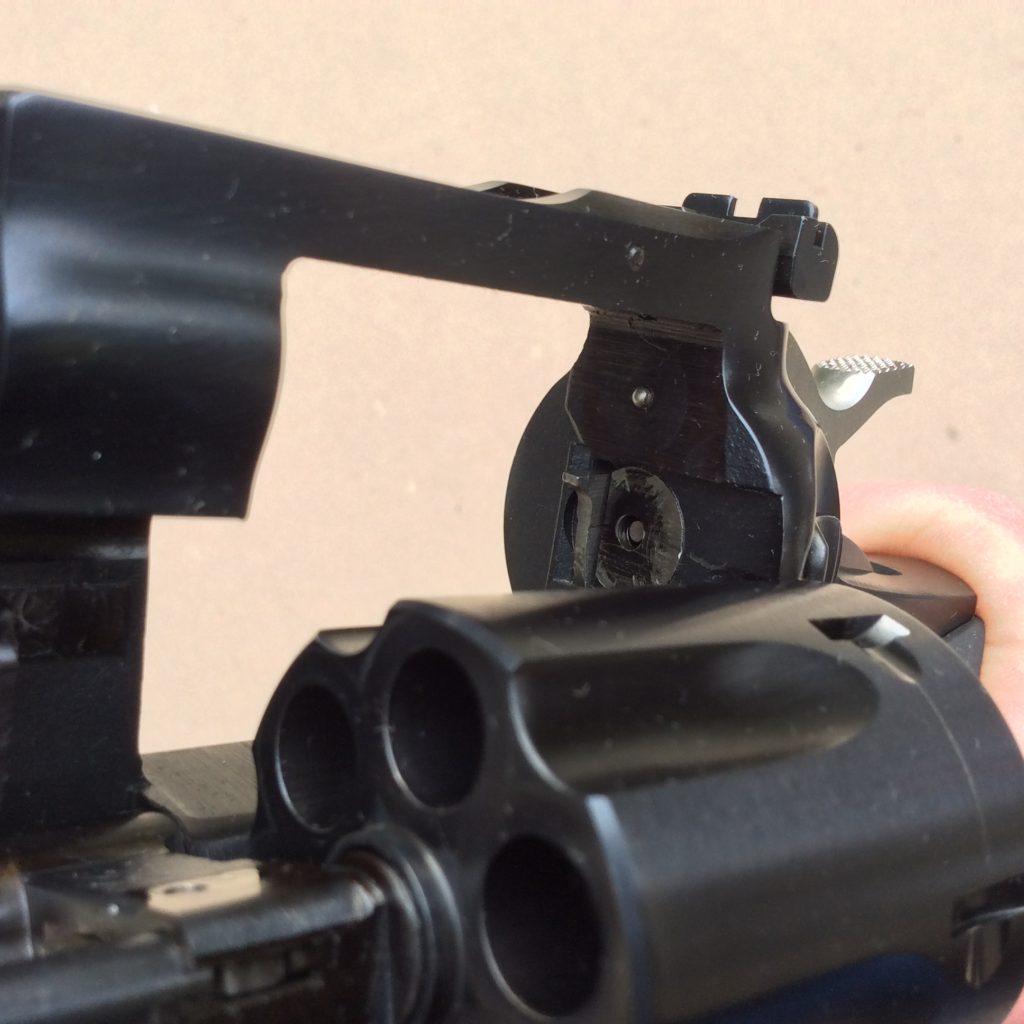
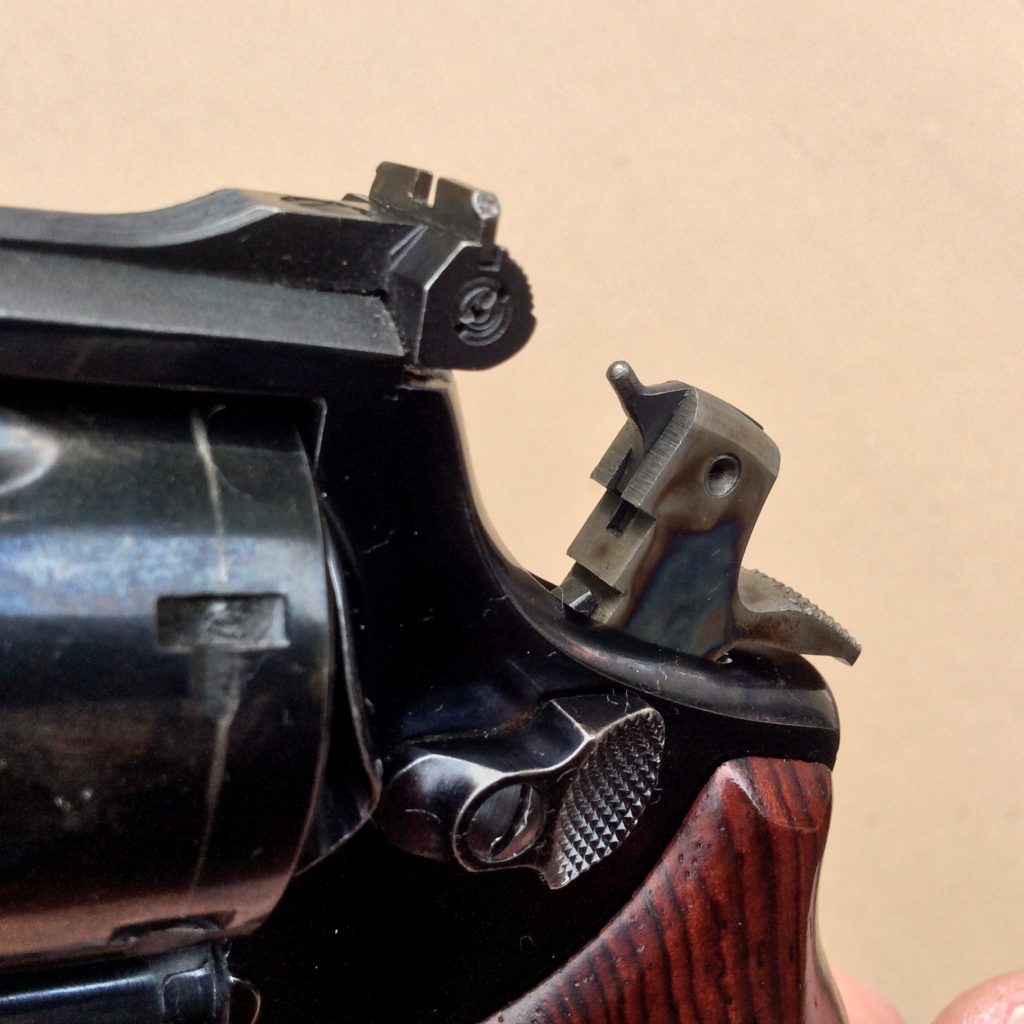
10. For guns with hammer-mounted firing pins:
Point the weapon in the safest direction. Cock the hammer in single action mode (hold it back, if there is no single action capability), and inspect the firing pin for damage. Lower the hammer when finished;
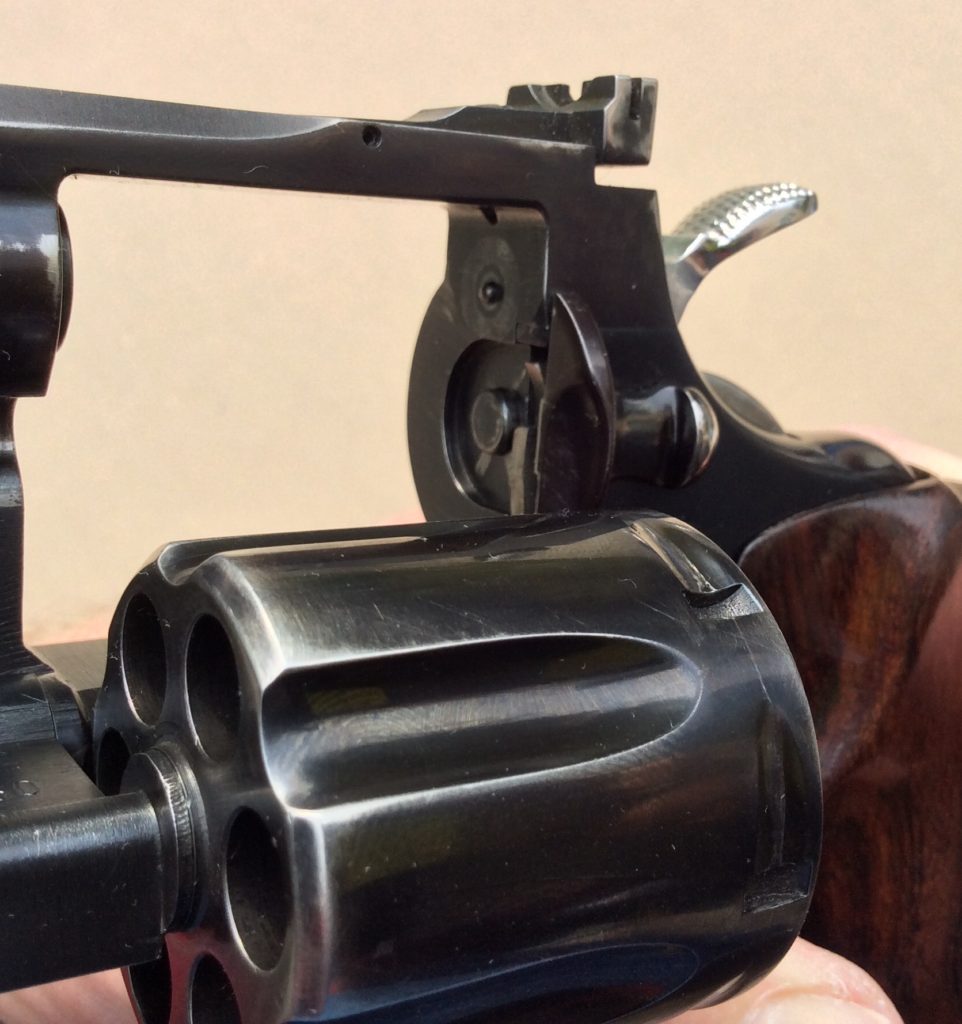
11. Point the weapon in the safest direction. Slowly pull the trigger in double action mode, until the cylinder bolt rises from the bottom of the cylinder window, and goes into the stop notch on the outside of the cylinder (this will happen before the hammer falls). Hold the trigger in position, grip the cylinder with your thumb and index finger, and try to rotate the cylinder. Ensure that the cylinder does not rotate (On Colt revolvers, it will rotate a little bit, then lock firmly into position—there should be no rotation after it locks). Complete the trigger pull, and hold it to the rear after the hammer falls. Check the cylinder again to ensure it will not rotate. Allow the trigger to move fully forward.
12. Reholster the weapon, or set it down with the cylinder open;
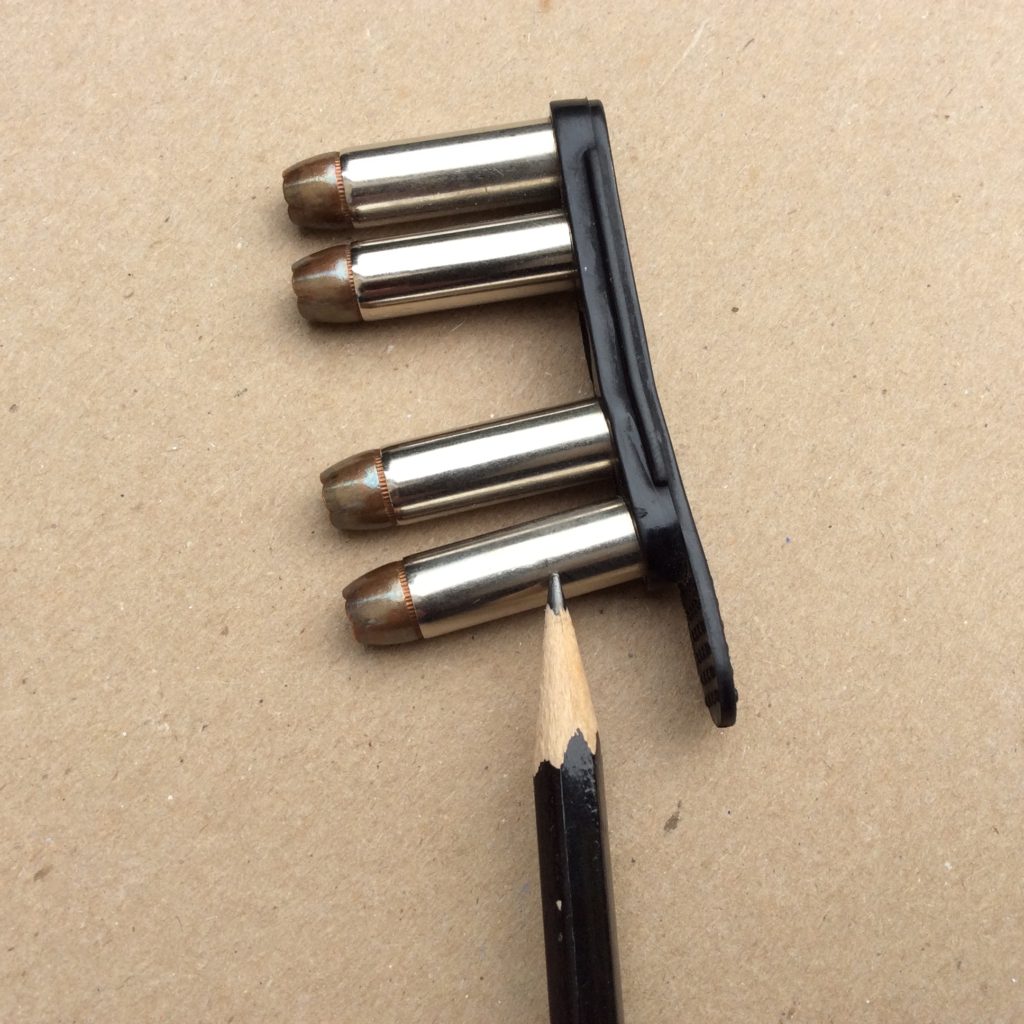
13. Locate your ammunition and inspect it. Look for corrosion, dents in the case, deformed projectiles, projectiles that have begun to move in/out of the case, etc. Inspect the primers and make sure they are properly seated. Gently shake the cartridge and listen/feel for the loose gunpowder inside. For clip-fed revolvers, inspect the clip and ensure it is not bent or damaged;
14. Tell yourself, “I am going to load the weapon now.”
15. Draw or pick up the weapon. Point it in the safest direction, and open the cylinder;
16. Insert the cartridges into the cylinder. While holding the muzzle down, ensure that all the cartridges are seated flush in their chambers. Compare the case heads to each other, looking for any differences or abnormalities;
17. While holding the muzzle down, gently push the ejector rod to raise the cartridges ¼” out of their chambers. Release the ejector rod and ensure all the cartridges go fully back into position, flush in their chambers. If a cartridge remains sticking up, investigate the cause and clean/replace as necessary;
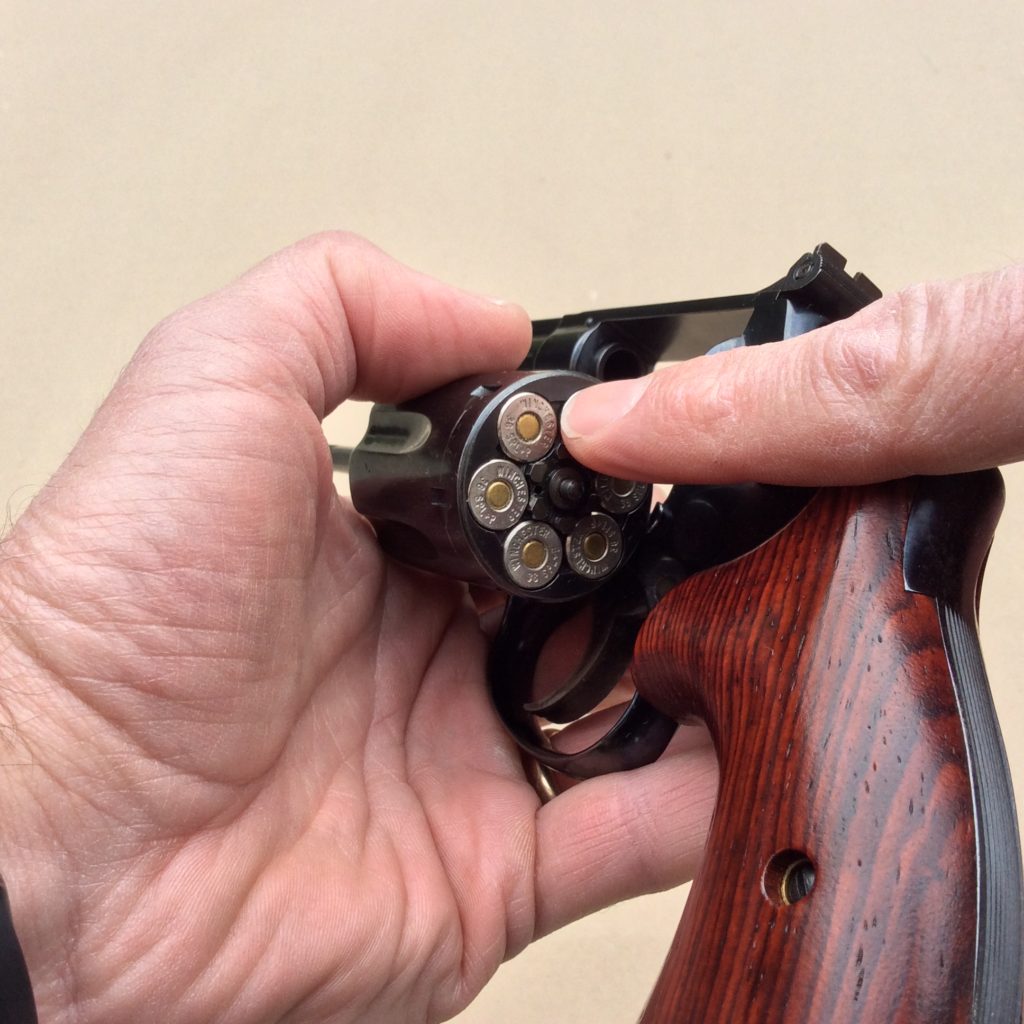
18. While holding the muzzle down, turn the cylinder as you lightly drag a thumb or finger across the primers of the cartridges, feeling for a high primer that will interfere with cylinder rotation. If a problem is detected, investigate and replace the cartridge as necessary;
19. With the gun pointed in the safest direction, close the cylinder;
20. Safely reholster, or return the gun to storage (lockbox, etc.).
Not tough
It sounds like a lot when you read it, but the steps shouldn’t take more than a few minutes to execute. I just did the test with a Ruger LCR 9mm on the clock, and it took two minutes and change to do it. Since the LCR 9mm requires an extra inspection of the moon clip, and requires you to hold the cylinder release back with a punch, it’s a little more time consuming than some other designs.
You can do this, and it’s a good habit to build if you’re going to rely on a gun for defense. A periodic function check might save you from a nasty surprise when you least expect it.
Be safe out there!
That pinned & recessed pre-1982 M19 had me too distracted the first time. On a second read; however, each point is well made. Revolvers are exceptionally tolerant of neglect, but even dust, dirt, lint, or other species of ‘dust bunnies’ can get into the wrong place and gum up the works. The real S&W revolvers (hammer mounted firing pin) can easily find crud in the firing pin channel in the frame. A pipe cleaner does short work of any debris.
A bent ejector rod is apt to be detected rather abruptly when trying to kick out spent casings. ( i.e. my S&W M13 that has enough yoke-to-rod clearance to barely allow air to pass ).
Alas, the ammo . . . keep it clean. If the copper jackets on your carry ammo is tarnished, a bit of Simichrome polish cleans ’em right up. Why carry nasty looking rounds in a clean gun ? If you HAVE to use it, at least let the perp know you care enough to use the very best.
Gold mine here! There are some things I’ve never thought to do. I’ll be sure to do this before I holster my wheel guns for carry duty. Many thanks, Mike.
You’re welcome, Sir! Glad you enjoyed it.
Awesome, Mike. I didn’t know the tricks for checking the firing pin with the cylinder open, so that is great info. I don’t know about the Kimbers, but it is possible to check the LCR without using a punch. I did it by putting my left thumbnail against the back of the release and pushing forward while prying out gently. I actually found that technique a little easier with my SP101 as well since it gives better leverage against the spring that’s in there.
Greyson, I gave something like that a try before with my LCRs and the latch kept slipping away, so I just recommended the punch here. I’m glad the SP101 is friendlier in this regard!
A visual and tactile feel of the seated cartridges is a must
practice to make sure the cylinder turns without any binding
whatsoever and no high primer exists.
Another way to do this with a loaded revolver–
recommended by Bill Jordan, the “daddy” of the Model 19 Smith–
is to gently pull back on the hammer, fingers off the trigger and
grasping gently the cylinder until the bolt stop lowers and
then rotate cylinder with fingers to see that it’s free of any binding.
I suspect this method evolved when a shooter just doesn’t have a lot
of time and perhaps performing a quick reload.
Thanks Ed. I mentioned that option in a photo caption and recommended against it. The thought of cocking the hammer over loaded chambers just gives me the willies, and I think the method puts extra wear on the tip of the pawl. It certainly works, but I think there are better ways to go.
Is a hammer mounted firing pin also called a hammer nose, or is that something different?
Riley the term “hammer nose” actually refers to the piece that we would call the firing pin on a revolver with a hammer-mounted firing pin. It’s pinned into the hammer and it pivots slightly. “Hammer nose” is just S&W terminology for what everyone else would call the firing pin.
Mike this is a SUPERB article in all respects!
Thank you Sir! Glad you found it helpful.
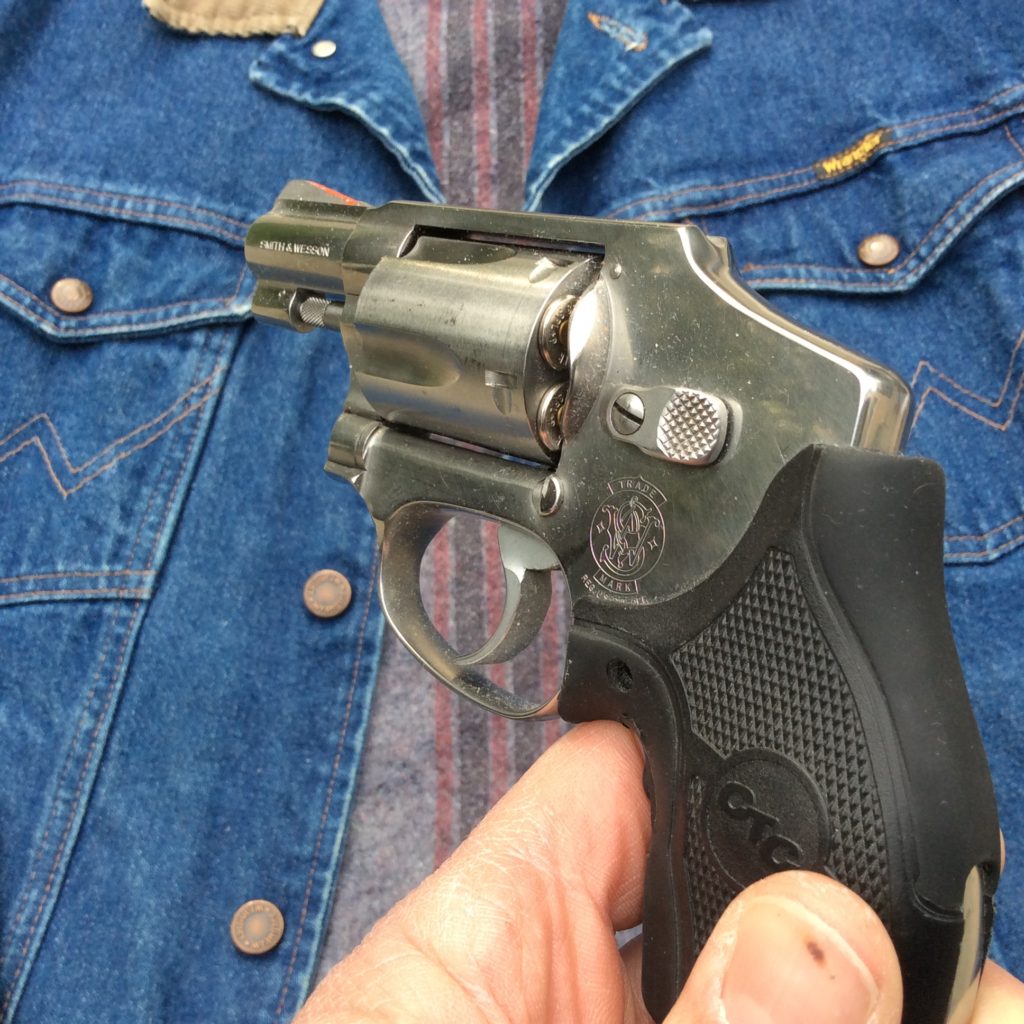
Hi. Excellent advice. I carry 2 442’s. Would the process be the same or different due to the enclosed hammers? Thanks.
Guy, with your 442s, you can still check the condition of the firing pin by opening the cylinder, then holding the cylinder release back as you pull and hold the trigger. The tip of the firing pin will then be visible for inspection, and when you release the trigger forward, it will reset. Inspecting the other elements of the gun will be unchanged.