We all enjoy a good, “do it yourself” success story, and when it involves classic gun leather, that makes it even sweeter for us RevolverGuys. Trust me–if you love leather holsters, this one is gonna knock your socks off!
The Call
Good friend Dean Caputo recently approached me about salvaging a special holster that was looking a little rough. As he described the condition over the phone and his unsuccessful attempts to correct the problem, it occurred to me that the best course of action would be to consult RevolverGuy friend–and Ace Holstorian–“Red” Nichols for help. After all, who better to advise us on the way to restore this old favorite than one of the world’s foremost holster designers and authorities on gun leather?
The Suspect
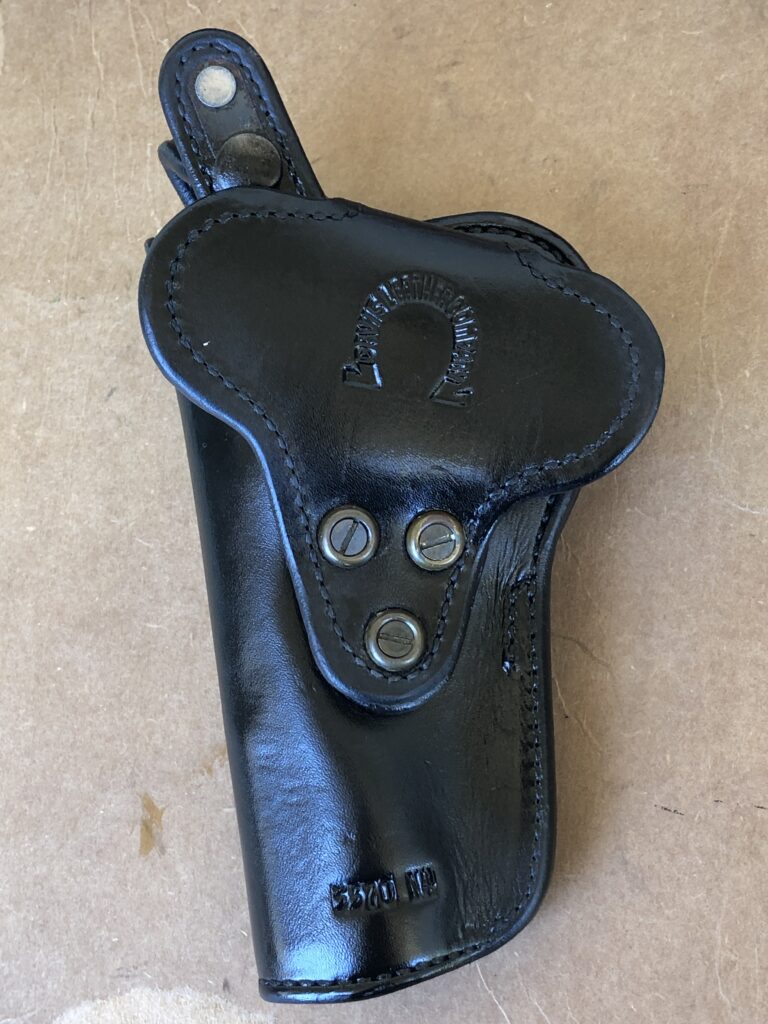
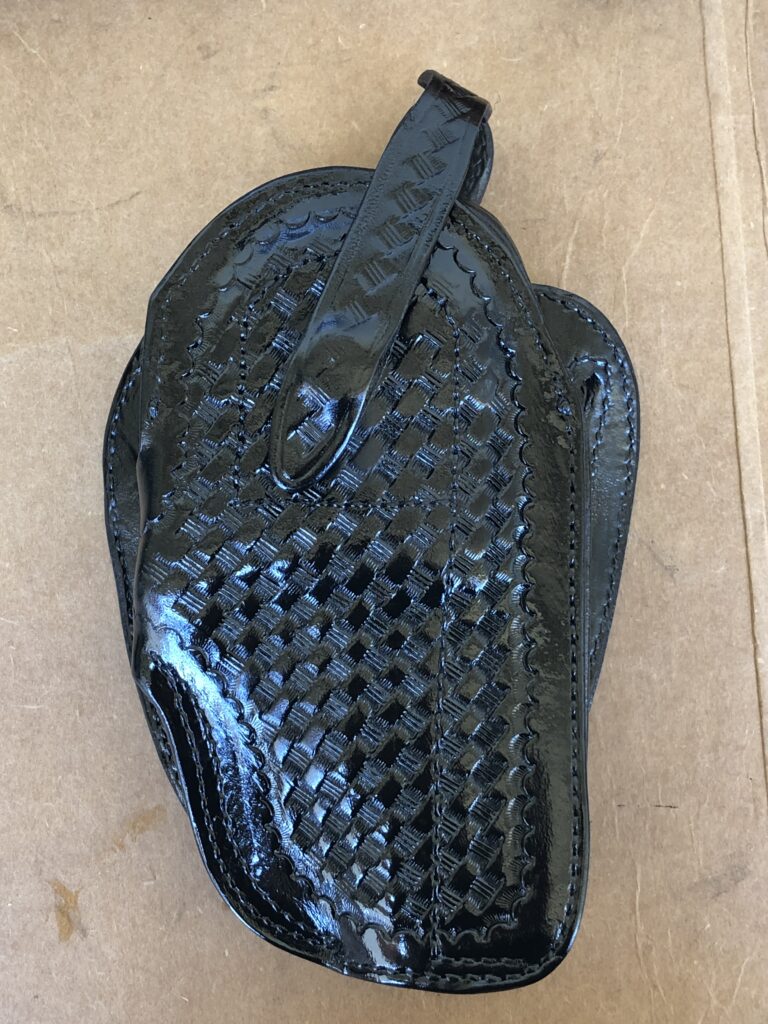
The holster in question was an uncommon Hoyt breakfront model that Dean had commissioned back in the early 1980s. Since Dean was carrying his duty gun in a Hoyt on patrol, he thought it would be a good thing to have a light duty holster that worked the same way for his turns at “riding pine” as the front desk duty officer. A high-ride breakfront that mirrored his normal duty holster would be just the trick for those days when he didn’t have to wear the full Sam Browne.
While it was technically a catalogued item, the Hoyt Holster Company didn’t get a lot of requests for such a beast, and particularly not for a 4” gun (most were for the shorter, 2.5” Model 19s). So, this would be a specialty job for Woody Hershman, the husband of Dick Hoyt’s granddaughter, Carol, and the man who inherited the work bench from Dick when he retired. It took a little bit for the odd job to make its way to Dean from Hoyt’s Coupeville, Washington address, but the end result was just what Dean wanted and it gave him great service.
Time passed, and the holster was phased out of service as Dean went to carrying a 5” Government Model on duty. It went into that proverbial “box o’ holsters” that all of us RevolverGuys are always working to fill, and it didn’t come out for a number of years.
The Misdemeanor
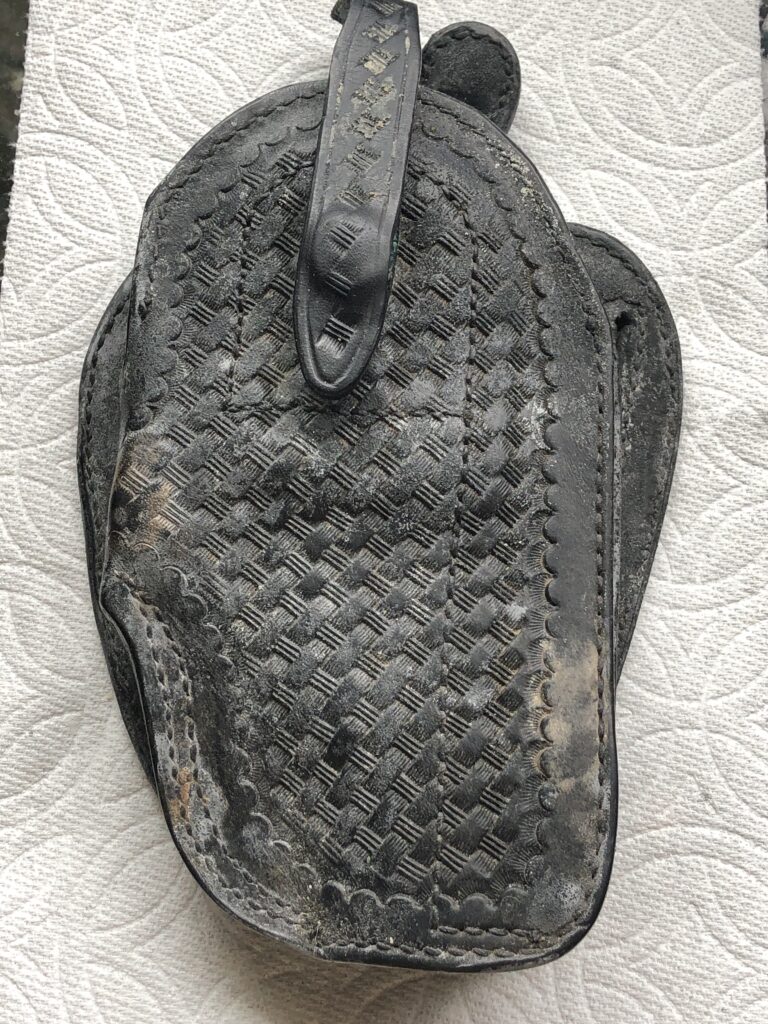
When it did surface again, the surface was . . . moldy. A fine mildew had formed on the leather, leaving the black basketweave looking like someone had spilled a glass of milk on it, and left it out to dry.
Dean wanted to get the unique old holster in good shape again, but didn’t know the best procedure for doing so. Fortunately, Red Nichols knew what to do, and he even went to the effort to illustrate the procedure in a post on his must-read Holsterguys Blog.
Armed with this knowledge and a shopping list of supplies specified by Red, Dean got busy.
The Felony
When Dean started his restoration work, though, he didn’t start with the Hoyt. Instead, he started with another holster that, in his words, he’d already “written off as a loss.”
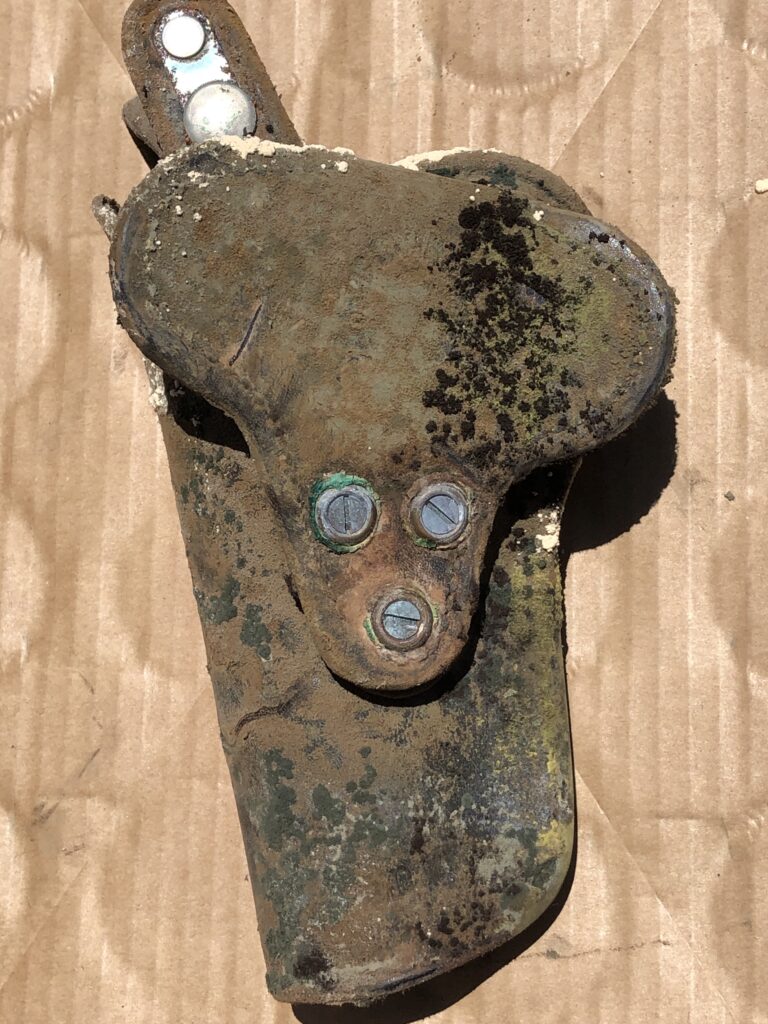
A few decades back, Dean had put the holster in a plastic tub with some other stuff, and stored it in the garage. Unfortunately, it managed to collect some moisture along the way, and began to mold very badly. When he came across the holster later, he was shocked to see its condition.
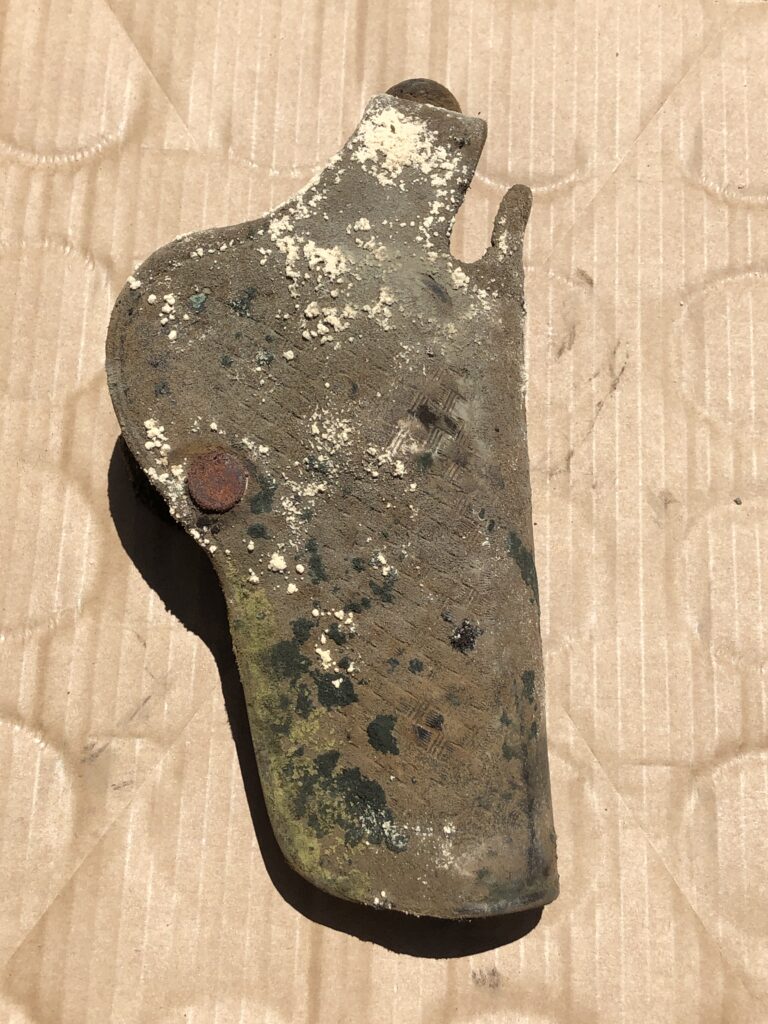
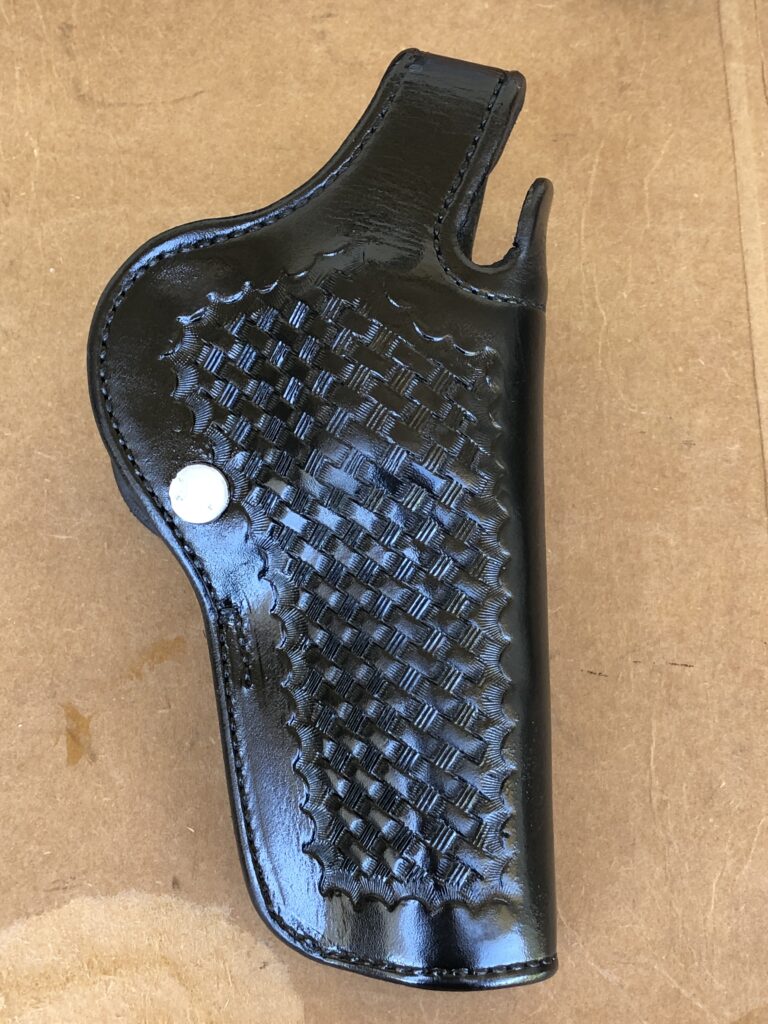
The holster was an absolute mess–hardly recognizable as a piece of leather at all. It had once been a custom job from his friend Gordon Davis, who ran a successful holster company that focused on building leather holsters for law enforcement. This particular holster was a high-ride thumb break, cut for a 4” Smith & Wesson N-Frame, which wasn’t a common request. Gordon had built the holster for his friend, and it gave him excellent service on duty before it was retired in the switch to another duty gun. Although Dean knew it was junk now, he couldn’t bring himself to throw it away because of the sentimental connection. He set it aside for another year, trying to get the courage up to throw it in the trash, where he sadly knew it belonged.
Fortunately, he didn’t, and his delay would pay off now.
Knowing it would help to get some practice on an item that could be sacrificed, Dean decided to try Red’s restoration advice on the Davis holster, first. He figured he could make his mistakes and learn the technique on the trashed Davis, before he started working on the prized Hoyt. “I knew it wasn’t going to work, but I thought I’d try anyways, for the experience,” said Dean. He got his new supplies all arranged, and got busy.
Corrections
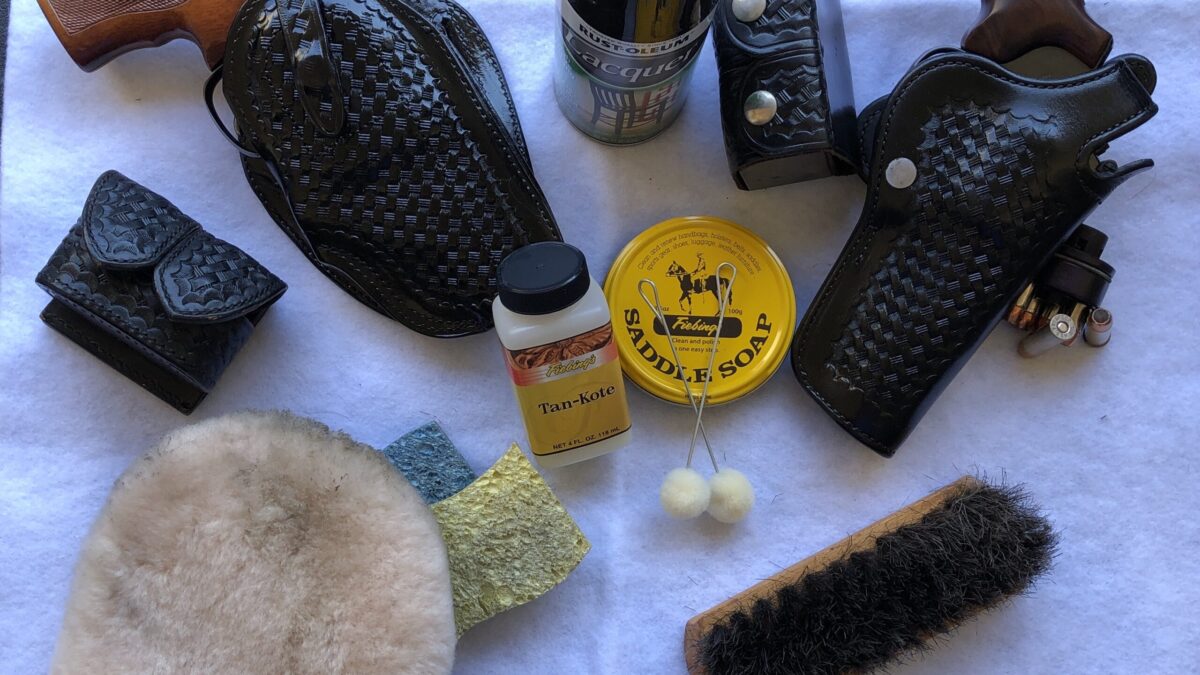
The first step was to start brushing the big crud off with a dry shoe brush. Dean said he was amazed at how much of the garbage came off the holster with the brushing, and within a short time there was a cloud of mildew dust that threatened to block out the sun. “I probably should have used gloves and an N95 mask,” he joked with me, but doing the job outdoors and monitoring the winds kept him out of trouble for the most part. Still, I won’t be surprised, if a week from now, we start to hear reports about a new pandemic sweeping through the nation, caused by a mutant spore with a mysterious Ground Zero origin in Dean’s Zip Code.
Stock up on toilet paper right now. COVID-20, the Caputo Virus, is in the wind.
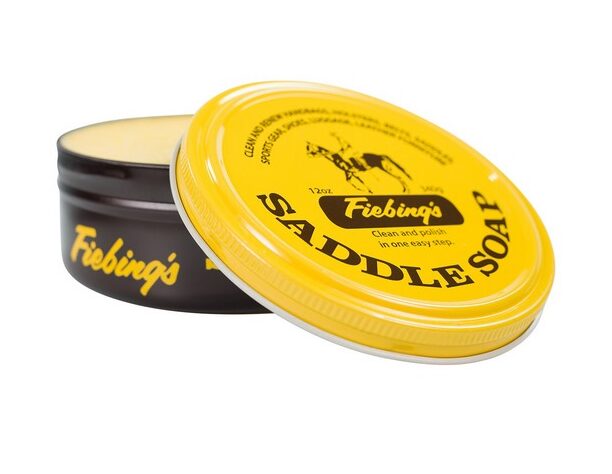
Following Red’s directions, the holster was next cleaned with a damp sponge and saddle soap. It was tough to get into all the cracks and crevices of the basketweave pattern, and work in the tight areas near the belt loop seams and on the inside of the pouch, but with some elbow work and a tool to get the sponge into the tight spots, Dean got everything cleaned off. He said he was really amazed at the magnificent job the saddle soap did on the leather, noting that it did 90% of the restoration by itself. Dean told me that he probably could have put the holster back into service without doing anything else to it, after he was done cleaning it off with the saddle soap.
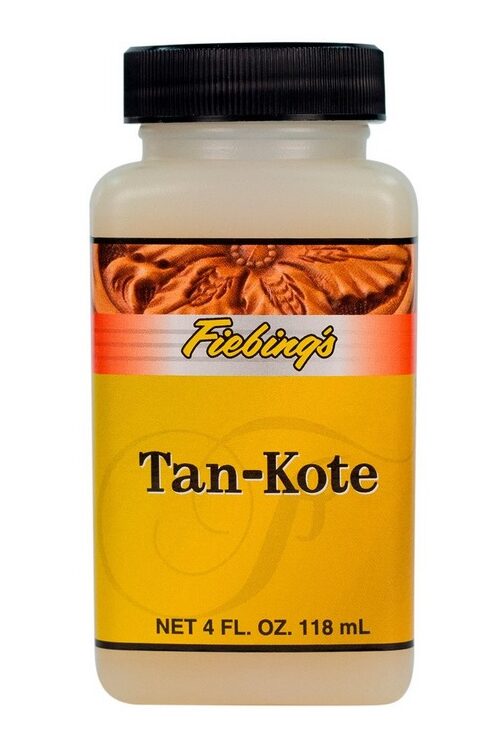
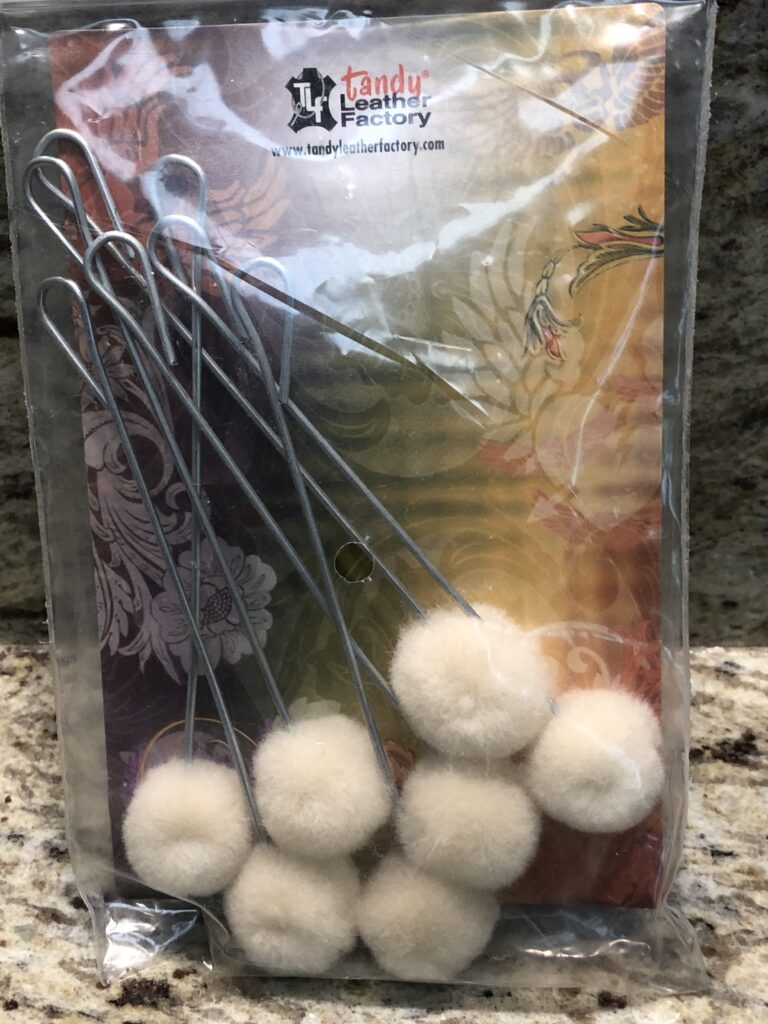
After a short drying period (which didn’t take long in the 105 degree ambient heat—particularly with a box fan blowing the hot air on the holster), it was time to apply the Fiebing’s Tan-Kote product that Red recommended, with some wool daubers and a wool mitt. Dean used the gumball-sized daubers to get into the crevices and tight spots, and to hit the stitches, and he used some Q-Tips to get into the holes in the leather that were left behind by the hardware that was removed. The mitt got all the big surface areas after that. Dean noted that he applied two coats of Tan-Kote to the Davis, and “it really soaked it up,” perhaps because it was in such bad shape.
Dean was really pleased with how good the holster looked after the application of Tan-Kote. “That stuff is amazing,” he said, remarking at how it nourished the neglected leather. The Fiebing’s website says that Tan-Kote is a “resin-based formula,” that’s “good for use as a top finish,” but Nichols cautions that a little can go a long way. “One coat is good, two coats is OK, but three coats is bad, and you may have to start over,” says Red, because the Tan-Kote has a lacquer-type component and it can start to build up on the leather. Dean confirmed that Red’s warning about Tan-Kote drying really fast was spot on, so use caution in application.
The hardware on the holster was soaked in a solvent and cleaned up with a toothbrush before it was reinstalled. Dean said he could have done a little polishing on his wheel to make the hardware (especially the tension screw) look really good, but he was so excited to finish the job that he didn’t take the extra time to do it. Maybe he’ll go back and do it later.
The holster looked so good after the Tan-Kote that Dean almost didn’t apply the spray lacquer that Red suggested, but he gave it a go anyhow, after the Tan-Kote had dried for an hour. By keeping the spray lacquer can moving, and fogging the leather from a little bit of a distance, he was able to get a good coat without any drips.
Rehabilitation
When the drying was complete, and the hardware was reinstalled, Dean was just stunned.
“I couldn’t believe it worked. I just couldn’t believe it.”
The write-off holster that looked like a rock which had been dredged from a radioactive, primordial swamp, was now looking like it was fresh off of Gordon’s workbench.
It had taken Dean about an hour’s worth of labor (not counting the one hour drying time, in between the Tan-Kote and the spray lacquer) to restore the leather, and another 15-20 minutes to clean up the hardware on the Davis rig, and the results were beyond anything he expected. “I really thought I’d be throwing that holster away,” he said, “but now it’s looking almost brand new.”
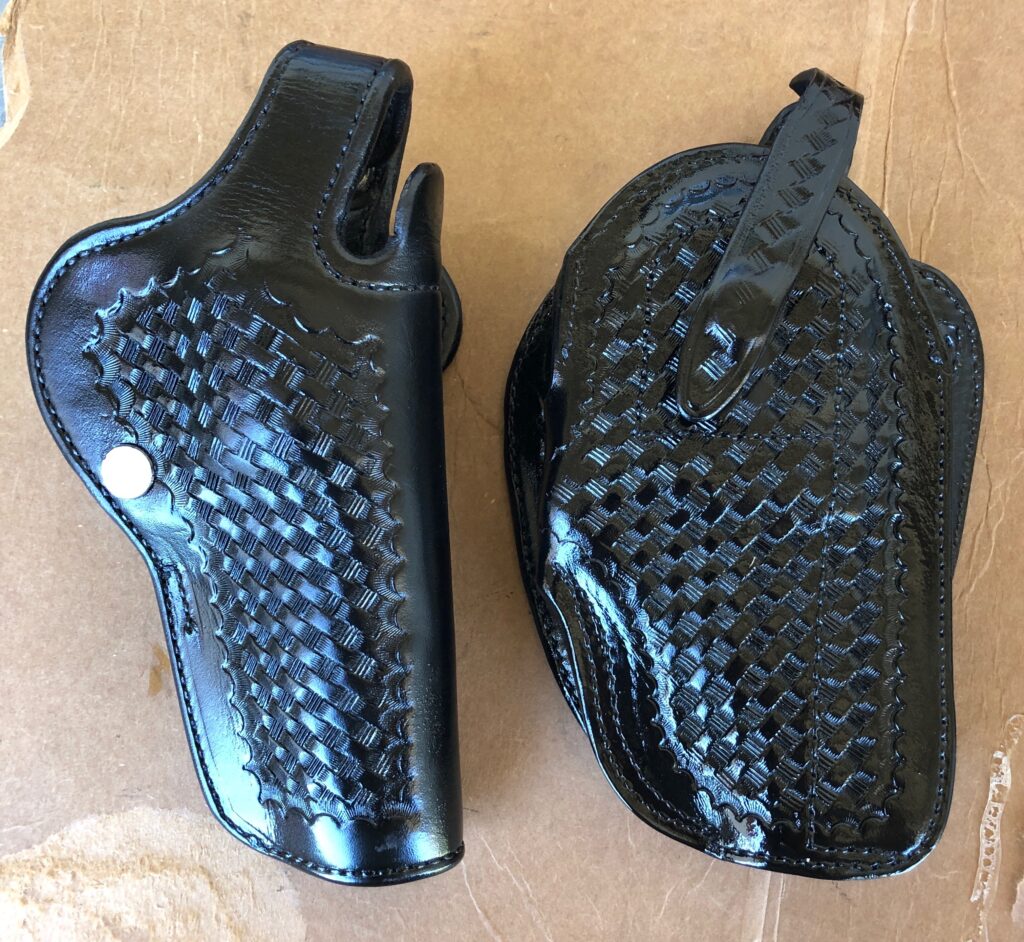
Buoyed by his success on the Davis holster, Dean ran the Hoyt through the same process and restored his old favorite to like-new condition as well. Everything worked great, but the lacquer on the Hoyt took a little longer to dry than on the Davis. “I never thought they would turn out this well. I’m just dumbstruck,” he said.
Happy Ending
In an era when most new holsters are plastic, and coming out of molds and dies on an assembly line, it’s especially nice to handle a leather holster made by a craftsman, and appreciate the skill that went into designing and building it.
It’s even more satisfying to handle a vintage holster from a maker who is no longer with us, and know that you’re holding part of his legacy, which still lives on in the leather.
But when you can salvage what you once thought was lost, and restore a custom piece built by the hands of a departed friend, it’s even more special. Almost magical.
So, it’s with a tip of the hat that RevolverGuy would like to thank both Red and Dean for the roles they played in bringing these great holsters back to life, and for letting us get a front row seat to watch the show. Enjoy your “new” holsters, Dean, and thanks Red for showing us the ropes!
Thanks Mike, Thanks Red, Thanks Dean! Excellent information for those with drawers full of leather. Classic holsters like these deserve to be rescued, preserved, and used!
They sure do, Kevin! Frankly, all three of us are still a little stunned at how successful Dean was at cleaning up the Davis holster. That really looked like a write-off, but it came out beautifully.
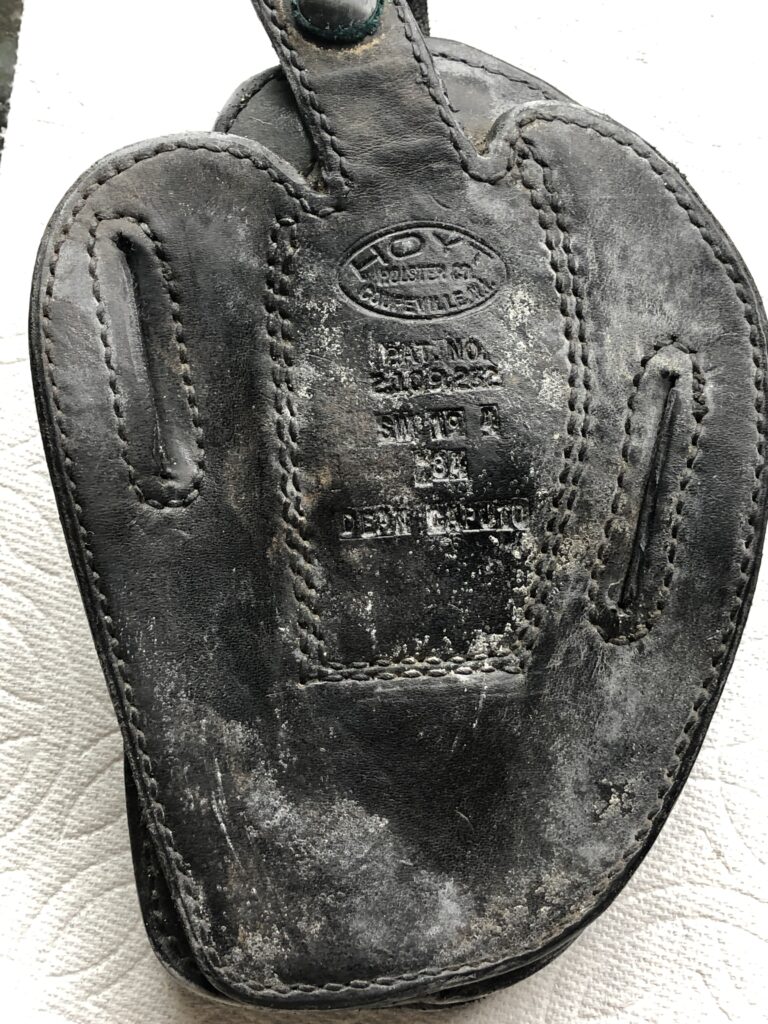
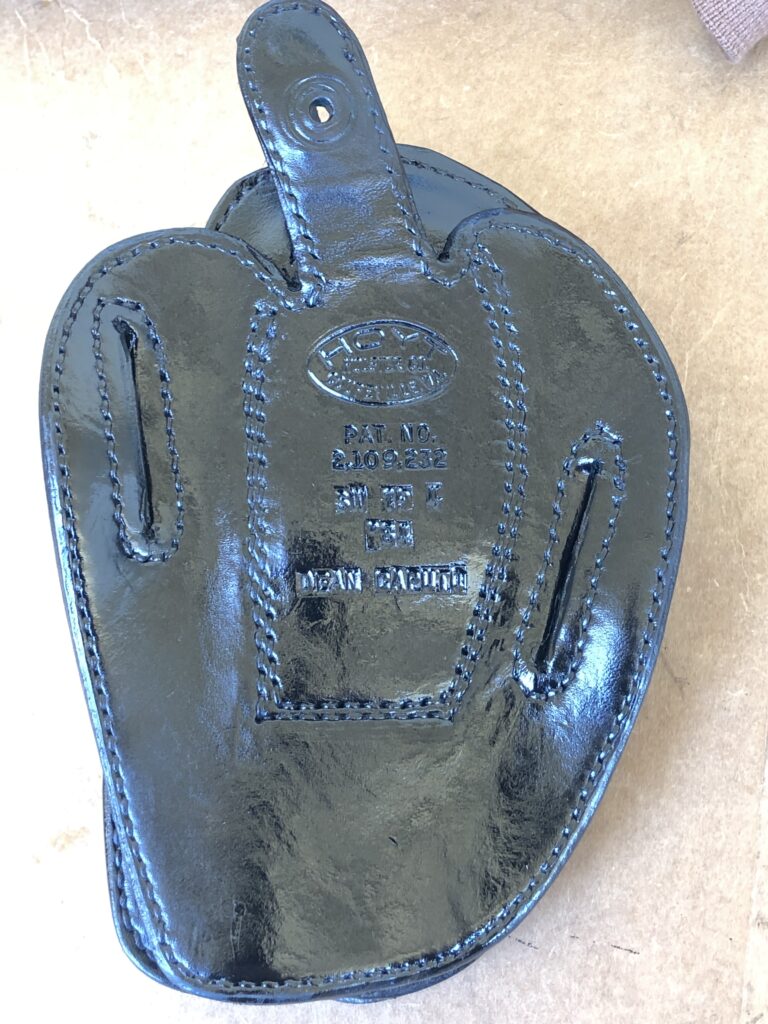
Isn’t it great that Hoyt Holster genuinely provided a ‘custom’ holster? I’ve many images from an auction of the company’s Coupeville II era (1980 onwards) that shows that not only did every one get the customer’s name stamped into it, but all of them were made somewhat differently according to the buyer’s requests :-). NO other gunleather maker ever did this, yet it was routine for Hoyt.
P.S. my rednicholsholsters.com site isn’t working for now; and because I don’t build holsters these days, since Jan 2020, likely it won’t be revived. I will be getting holstory.com working again because the book sells well regardless and will be updated to become Holstory II within a year or so.
Red, great to hear from you in these pages! Yes, I always enjoyed seeing an officer’s name or ID stamped on the back of the Hoyts. Very neat touch!
We’ll certainly do our best to keep RevolverGuy readers appraised of changes to your website URLs.
I love seeing old stuff resurrected…fantastic restoration…most people would have thrown it in the garbage; the results speak for themselves.
Excellent!!!
Thanks guy! This article has created in me an inspiration to “bring back to life” a couple of old, well tattered, worn leather holsters I have. I am a “leather guy” all the way,,, tried some Kydex and the likes in my younger days,,, mainly in competitions. But for EDC, it’s leather for me.
Tangentially related; today any new holsters I have made for me are made from horsehide VS. cowhide. Stiffer in the end,,, tough stuff.
Thanks again.
Wow! I hate to see my old neglected leather… I’m going to have to do something like this. I had no idea!
Those look great. I’ve done a similar treatment to some of my dads old Safety Speed Holsters and Sam Brown belt. What kind of spay lacquer was used. I’ve used a lot of resoline as a top coat
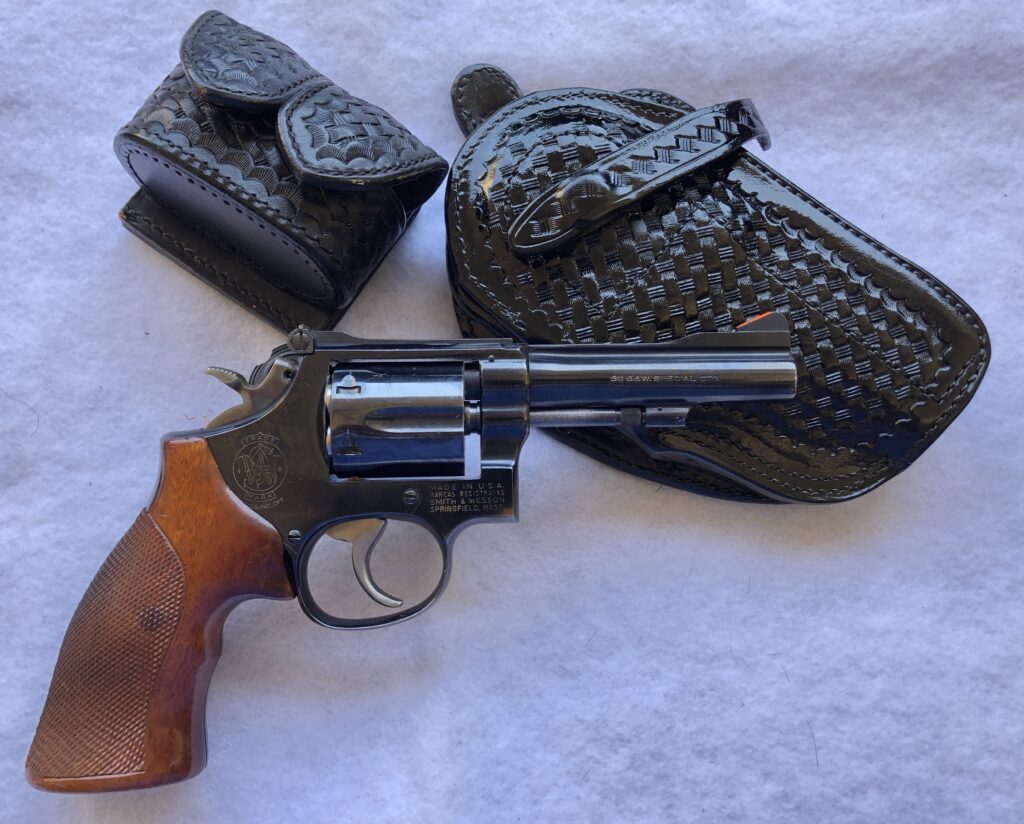
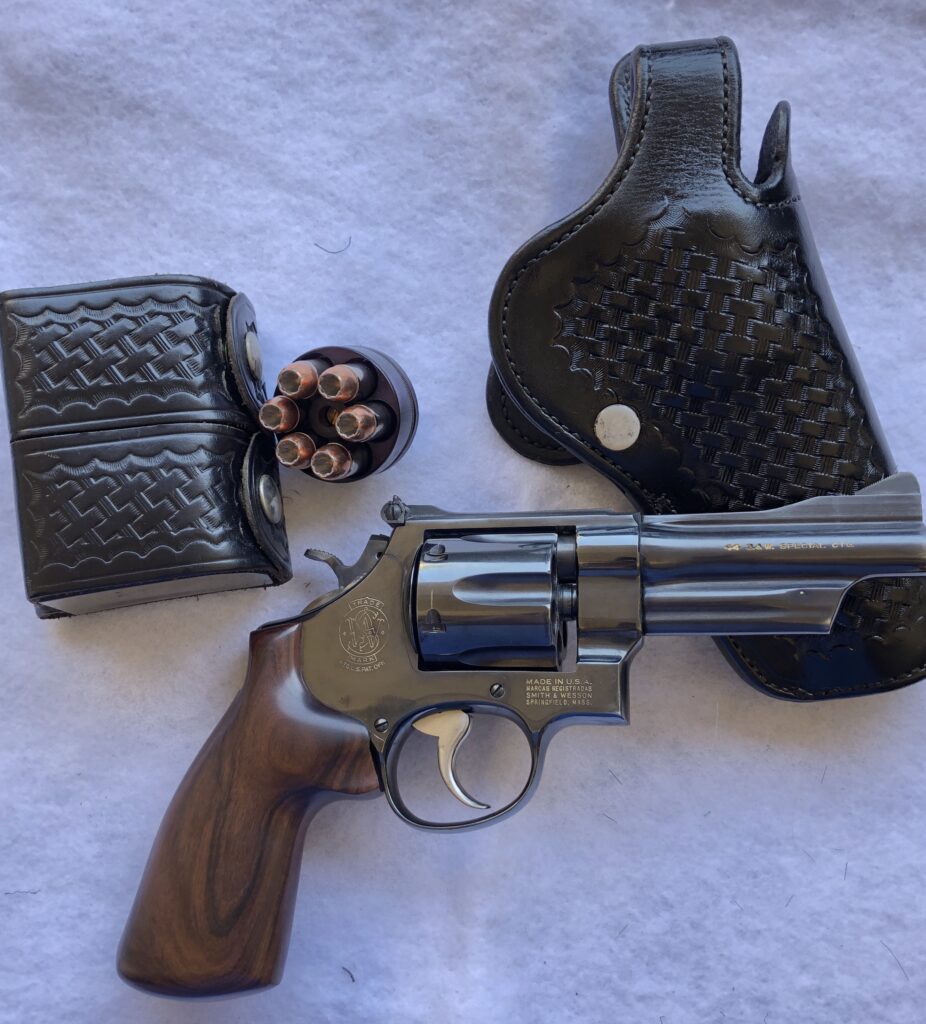
Matt, it appears Dean used a simple can of Rust-Oleum Spray lacquer, shown at the top edge of the feature photo. He notes that Fiebing’s makes a product specifically for leather.
Tanfastic !! Bringing old leather back to life is a joy few can appreciate in these days of plastic guns and plastic holsters.
Real guns deserve real holsters, and real holsters are made from deceased bovine epidermis !!
But, but, but . . . TACTICAL!
Tactical, schmactical . . . okay so kydex may be fine for IPSC, but for everything else, it is (at least to me) akin to having that inflatable latex doll that you ordered from Wanker’s Monthly, and expecting it to be the same as my Costco Fantasy Babe.
I look at the duty gear uniform guys (and gals) are wearing and look at some of my older duty holsters and just have to shake my head.
What a great article! Dean Caputo is a friend and colleague and Gordon Davis made several holsters for me back in the 80s for duty and plainclothes carry. Davis was recommended to me by another legend, Chuck Taylor.
Perhaps we’ve found a retirement gig for Dean with this!
I’ve heard Dean say he would do all your holsters for free, Wayne. Just box them up and send them off to him! ; ^ )
Ha!
Mike, Dean and Red,
Thank you for putting out this information! I have been looking at my holster collection trying to figure out the best way to restore them. Now I know! Did Red offer any suggestions on how to re-align the halves on a Hoyt breakfront? I have one that is a little out of alignment.
No Sir, but I’m sure he’d love to hear from you at:
[email protected]
Tell him we sent you!
Great article. Tan-Kote is a good product. It provides a seal yet does allow some penetration/transpiration to occur, which is important for long-term health of the leather.
I slightly prefer this basic strategy if the holster wasn’t previously finished in a heavy acrylic finish (if it was then I would use Tan-Kote):
Clean with saddle soap and toothbrushes.
Allow holster to dry thoroughly. If there are any overly stiff or “dry” portions of leather apply pure Neatsfoot oil sparingly.
Let dry thoroughly.
Then apply Sno-Seal by heating up the leather with a heat gun or hair dryer slightly (NOT THE SNO-SEAL). You heat the leather then quickly apply the sno-seal with fingers or a rag. This allows the sno-seal carrier to penetrate and distribute the wax deeper than the surface.
Sno-Seal is more moisture resistant than Tan-Kote and after a day or two takes on a duller more satin like sheen which I prefer. It is also far more economical.
Anthony, thank you for sharing this valuable technique with us! I really appreciate it.
Very useful article!
I often buy “new old stock” gadgets, because here is hard to find brand-new, duty-grade, revolver accesories. Some of these items was kept by three decades in stock. Corroded metal parts are frequently found.
Shopkeepers often exposes these items in a box on even a cut-down half oil barrel, with bargain prices like “any item – USD 5″ or less.
A friend has a Taurus 82 with 2 ,5″ barrel. Holsters for 2,5” barrel revolvers are very hard to find here in Brazil – and my friend is left-handed! He never found a decent holster for his gun, but I found one for him in a old stock like these.
My last purchase was a leather service belt, standard for police officers in Brazil between 60`s and 80`s. Its design in a mix between traditional Sam Browne and GI military belt, with metal eyelets both for buckle and hang equipment with metal hooks. I paid only BRL 15 (about USD 3) for it. Like new!
Here, this type of belt is still used by private security personnel and São Paulo Subway Security Corps (that carries only a PR-24 baton, radio and handcuffs).
Was this belt design also used in USA?
If it was used here, it was not used widely, Erick. Our military forces used the canvas web belts with eyelets for the wire hooks on ammo pouches and holsters, but these holsters fell out of favor by the mid-1980s. When the M9 pistol was adopted by the armed forces, it came with a new design holster (Bianchi UM-84) that used a wire loop which went behind the belt, and the ammo pouches used ALICE clips instead of wire hooks.
I don’t recall any civilian police using leather belts with eyelets and hooked holsters.
Here, the traditional product used for leather restoration/maintenance is the neatsfoot oil (I had some difficult to translate it from Portuguese to English).
There´s few saddlery stores in major cities, but we have great shoemaker supplies stores.
I use neatsfoot oil on old holsters and belts myself! It works wonderfully to nourish the leather.
Great article! As an addition, what with the cautionary tales common about working with or in the area of Molds, a person who was involved in optics manufacturing …believe it or not, there is some cross-decking here…said the best way to KILL Mold on, in, and about Photographic equipment is to collect pre-1983 Copper pennies. ’83 was the year pennies were changed from Copper alloy to whatever monkey puke they use now. I have quite a collection.
Copper is a main ingredient in Fungicides, and kills Mold.
Sez he; gather a handful of the coins, put them in a sock, and heat in the oven. Not too high a temp. or too long; socks will ignite. While this is happening, place the fungused objects in a container with a cover, then place the sock in with them.
The fumes from the heated coins will kill fungus, but won’t remove it.
I’d think it would be better to work with dead fungus as it is brushed from whatever object, but, I would go outside and/or use a mask, wet bandana or the like to keep from breathing what comes off.
Anyhow, I hope this will keep Revolver Guys safer…there aren’t that many of us left.
Thanks Carl, that’s an interesting suggestion! Have you tried it previously?