I know cleaning guns is supposed to be one of those chores that shooters hate to do, but I’ve always enjoyed it. Maybe I’m an exception, but I’ve always found a great amount of satisfaction in getting my guns cleaned, lubricated, and ready for work.
Additionally, I’ve always found it difficult to let a dirty gun sit. I guess I was raised to “never let the sun go down on a dirty gun,” but even if I hadn’t been, I’m naturally wired like that. Every one of my shooting sessions usually ends with a cleaning (and I was doing things that way looong before I signed on Uncle Sam’s dotted line, so I can’t blame him for making me like this).
Too Much?
Now, before I get too many complaints from the less industrious among you (grin), I’ll readily admit that my obsession with cleaning guns is excessive. Clearly, a gun doesn’t have to be cleaned every time it’s fired, and in most situations, it won’t hurt a thing if you put a dirty gun away for a while, before you get around to cleaning it.1 You don’t have to be as, um . . . attentive, as I am to cleaning, to preserve the health of your gun.
In fact, you could make a good argument that more guns are damaged through excessive cleaning efforts, than through use. Screw heads get bunged up, muzzles and bores get scratched and worn, finishes get rubbed and scratched, parts get dropped, springs get lost . . . there’s all kinds of ways you can put extra wear and tear on your guns, if you’re not careful about how you clean them. Sometimes the best way to protect a gun is to prevent its careless owner from taking a screwdriver or steel toothbrush to it!
Testing, Testing . . .
You could make a good case for function testing a duty gun by firing a few live rounds through it, after every cleaning, before it goes back into service. The procedure is designed to ensure the gun was reassembled properly, and everything is working as desired, before you rely on it for defense.
I can’t find much fault with the concept, but don’t do it, myself. Instead, I put my guns through a detailed inspection and function check after they’ve been cleaned and lubricated, to verify that everything is working as it should. If the gun passes the function check, then it gets loaded and holstered for duty. It works for me.2
No Squeaky Wheels
Even if you don’t actually clean the gun, it can still be really helpful to lubricate it. Moving metal parts like to be lubricated, and you can keep an incredibly dirty gun running smoothly if you apply a little lube in the right places. In fact, the interweb is chock full of examples of filthy guns that keep running without a hitch, because they’ve been properly lubricated. They might look like the bottom pan of a garbage truck, and fling dung all over the place, like a monkey in a zoo, but they run.3
Some of these “torture tests” are indeed a torture to watch for obsessive gun cleaning freaks like me and Gunnery Sergeant Hartman, but I think you’ll find there’s a happy middle ground somewhere in between the extremes, Private Pyle.
101 Ways . . .
There’s a bunch of ways you can go about cleaning a gun, and a million different products you can use to do it. We all have our favorite methods and tools, and just because I do things differently doesn’t necessarily mean that I’m doing it better.
However, there’s one thing that’s non-negotiable, and it’s safety. There’s no excuse for a negligent discharge while you’re cleaning or maintaining your gun, so you must ensure that your firearm is unloaded, using all the necessary safety protocols, before you do any work on it. This is especially important after the maintenance is done, and you have the gun loaded up again—resist that urge to wipe the little bit of muck or lint off the gun that you didn’t see until the last second. If you have to make a correction, then do it right, and unload the gun first! I won’t give up any names, but I know a person who negligently discharged their .357 Magnum revolver when they were cleaning off the last little bit of schmootz in just this kind of scenario. He got lucky, and only damaged the kitchen table, the linoleum, his hearing, and his pride, but you may not be so fortunate if you do the same.
Speaking of loaded guns, there’s a good argument to be made for loading and unloading your gun in an area that’s separate from your cleaning area. The physical break involved in moving from one location to the other may also promote a mental break that reminds you that you’ve shifted gears from one activity to another. “Gun cleaning is done, function checks are done, and now it’s time to load my gun—I will NOT be cleaning, inspecting, or pulling the trigger from this point forward.”
There are other safety issues to consider, as well. You need to wear suitable eye protection when you’re cleaning guns, to prevent debris from getting into your precious eyes. Flying bits of muck, solvent, bristles, and other garbage can cause permanent damage, as can springs under pressure, so wear the same safety glasses that you do for shooting when you’re doing maintenance on your heater.
Another thing to remember is to keep your work area properly ventilated. There’s nothing that smells quite as good as Hoppes #9 to a gun nerd, but you don’t want to be snorting all those chemical fumes in concentration. Do it too much, and you’ll start voting for gun-hating liberals.
One last, very important thing is to take precautions against lead poisoning. The lead residue from bullets and primers is all over your gun, and you don’t want it all over you. Wear disposable gloves to keep your hands clean, and don’t eat or drink while cleaning, to keep from ingesting lead residue. Thoroughly wash your hands with cold soap and water (hot water opens up the skin’s pores and promotes lead absorption), and wash the areas around your nose and mouth as well, to prevent ingesting the stuff. Take off your range clothes and boots outside, before you enter your home, to prevent tracking lead dust onto your carpets, furniture, and such.
Focus areas
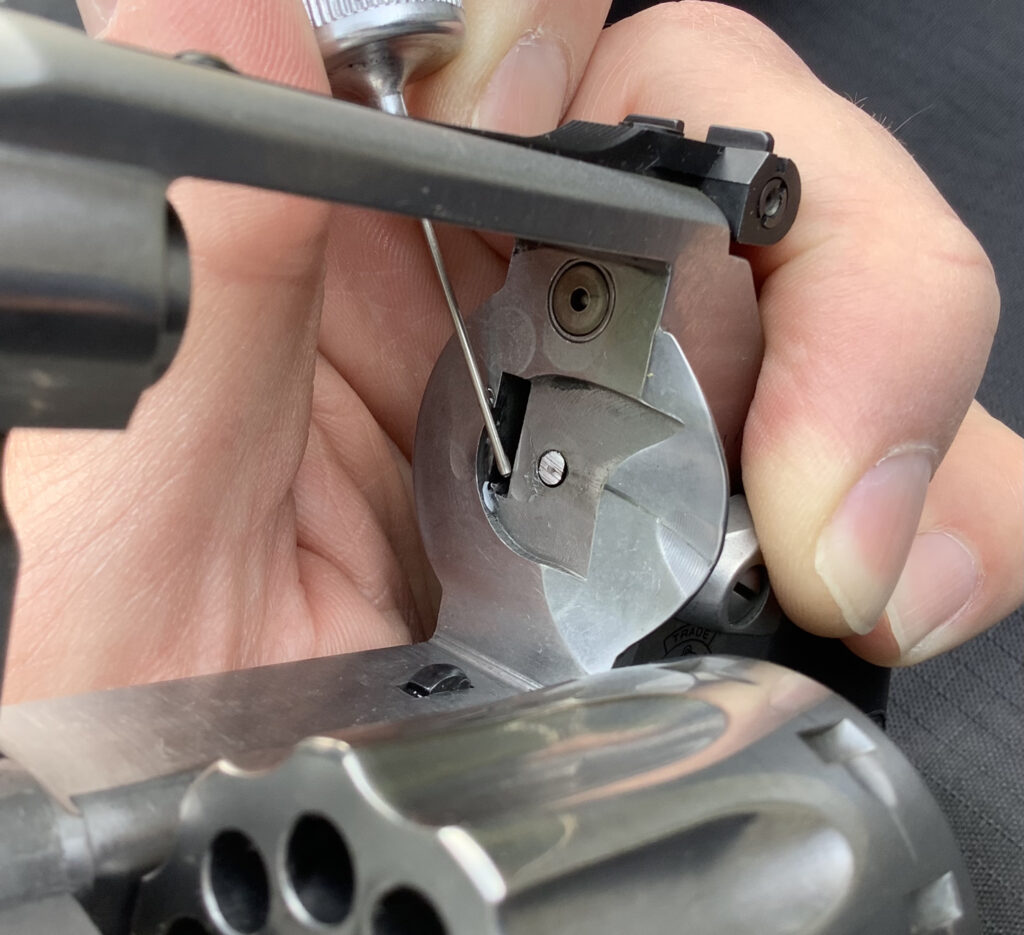
When you’re cleaning a gun, it helps to know the critical areas that deserve the most attention, to ensure the gun functions properly. You can spend all kinds of effort cleaning every nook and cranny, and while the gun may look beautiful when you’re done, it’s not necessary to keep the gun running smoothly.
For example, in the world of double action, swing-out cylinder revolvers, the areas that deserve the most attention include, from front to back:
-
-
-
- The forcing cone / barrel extension;
- The cylinder face and gas ring;
- The yoke / crane;
- The chambers, including any recessed mouths;
- The area underneath the extractor star;
- The ratchet;
- The firing pin channel;
- The tip of the hand / pawl.
-
-
Making sure these areas are clean and free of debris will keep your revolver revolving, so it’s important to spend some time on them, and inspect them closely when you’re finished.

Note that I didn’t say anything about cleaning the bore. It’s not that I think cleaning the bore is unimportant, it’s just not as critical to reliability as those other areas on and around the cylinder. Your gun will come to a grinding halt if you don’t keep those critical areas suitably clean, but you can get away with a dirty bore for quite a while, depending on the ammo you shoot. If you shoot rimfire bullets (always filthy, due to their outside lubrication and soft lead), soft lead bullets, or Magnum rounds which cause excessive leading, your bore will need more frequent attention to preserve accuracy and prevent buildups, but if you’re shooting jacketed ammo, you normally don’t need to spend inordinate amounts of time scrubbing the bore clean. Give it some love, but spend most of your effort on the areas listed above.
A similar philosophy applies to other types of firearms. Every firearm has its own list of critical areas that must be kept clean for proper function, and it’s part of your job to know what those are, as a shooter.4
step by step
Let me walk you through my process for cleaning a double action revolver, to put all these ideas into action:
-
- Don your safety gear (glasses, gloves) and set up your cleaning area (light, ventilation, protective barrier for the table to prevent leaving contaminants behind, etc.);
- Safely unload the revolver and set the ammunition aside in a different location than your cleaning area. Move the gun to the cleaning area after it’s verified unloaded;
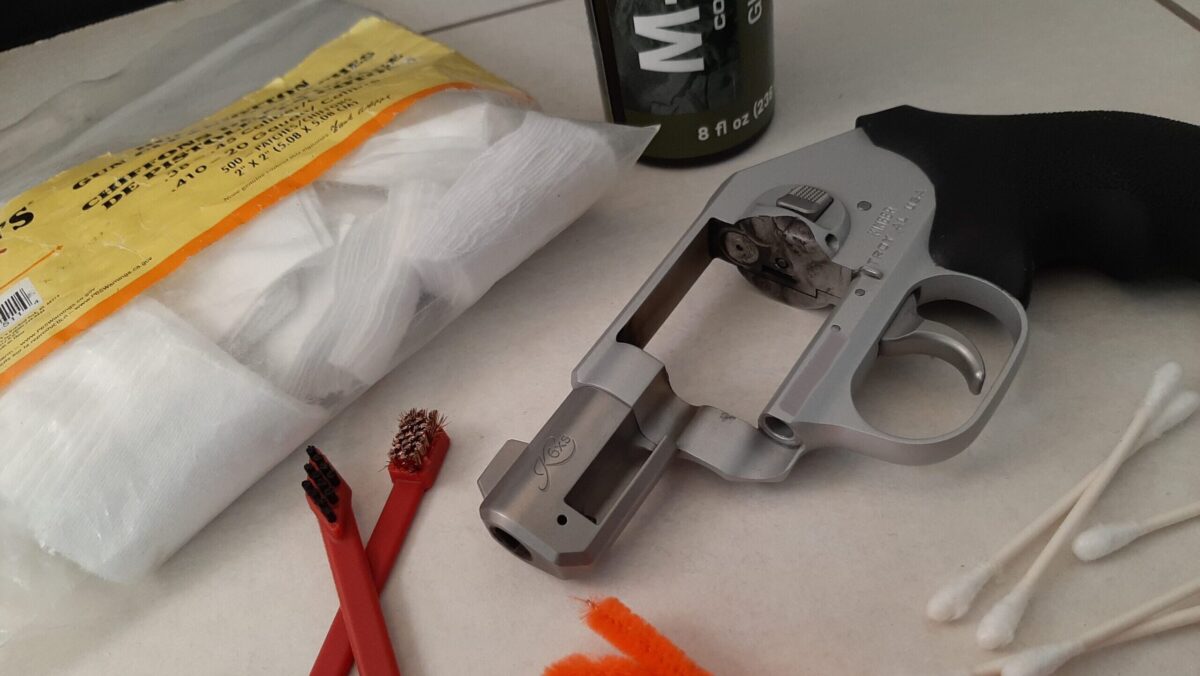
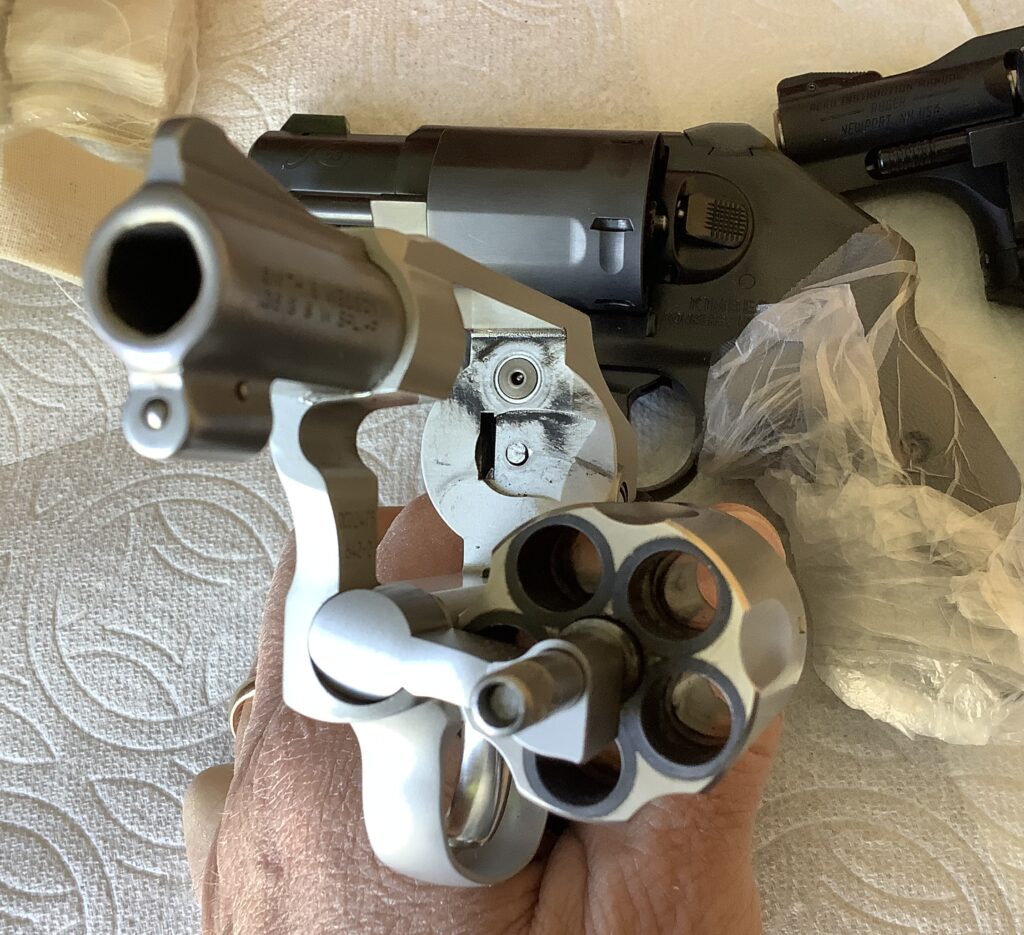
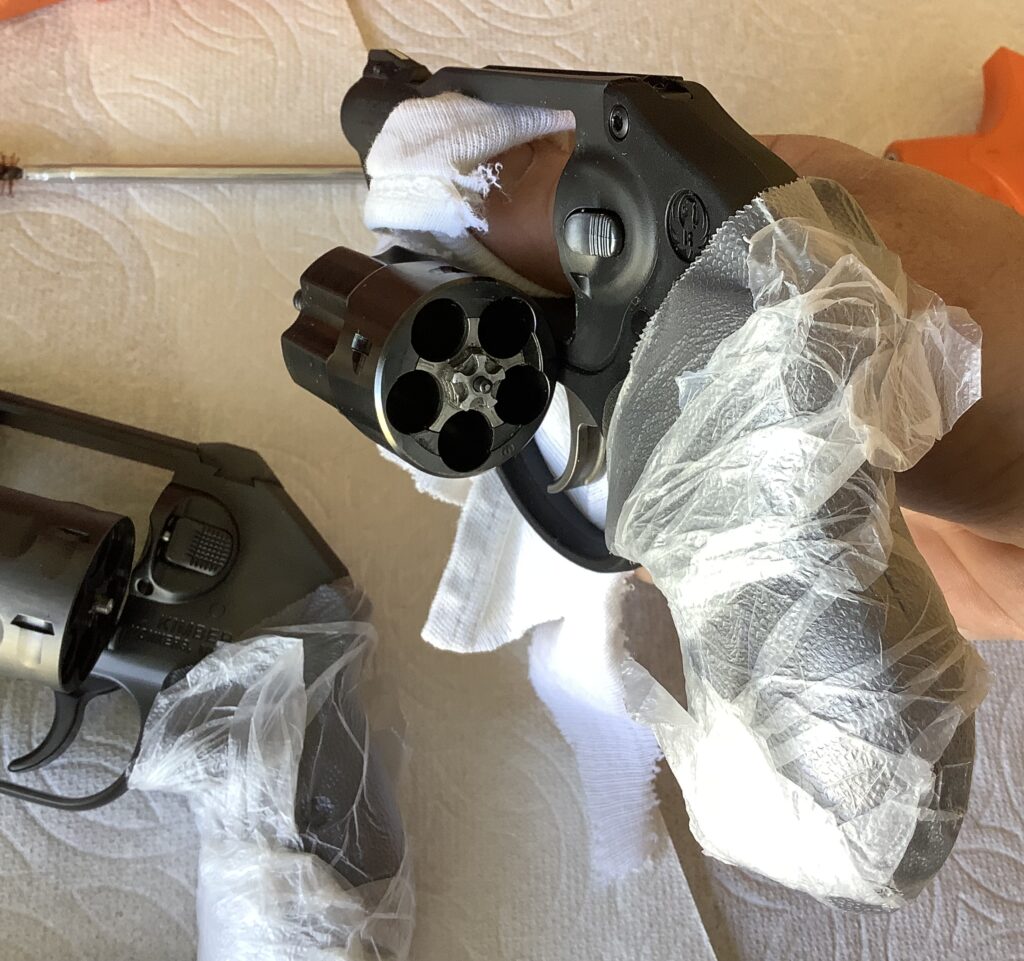
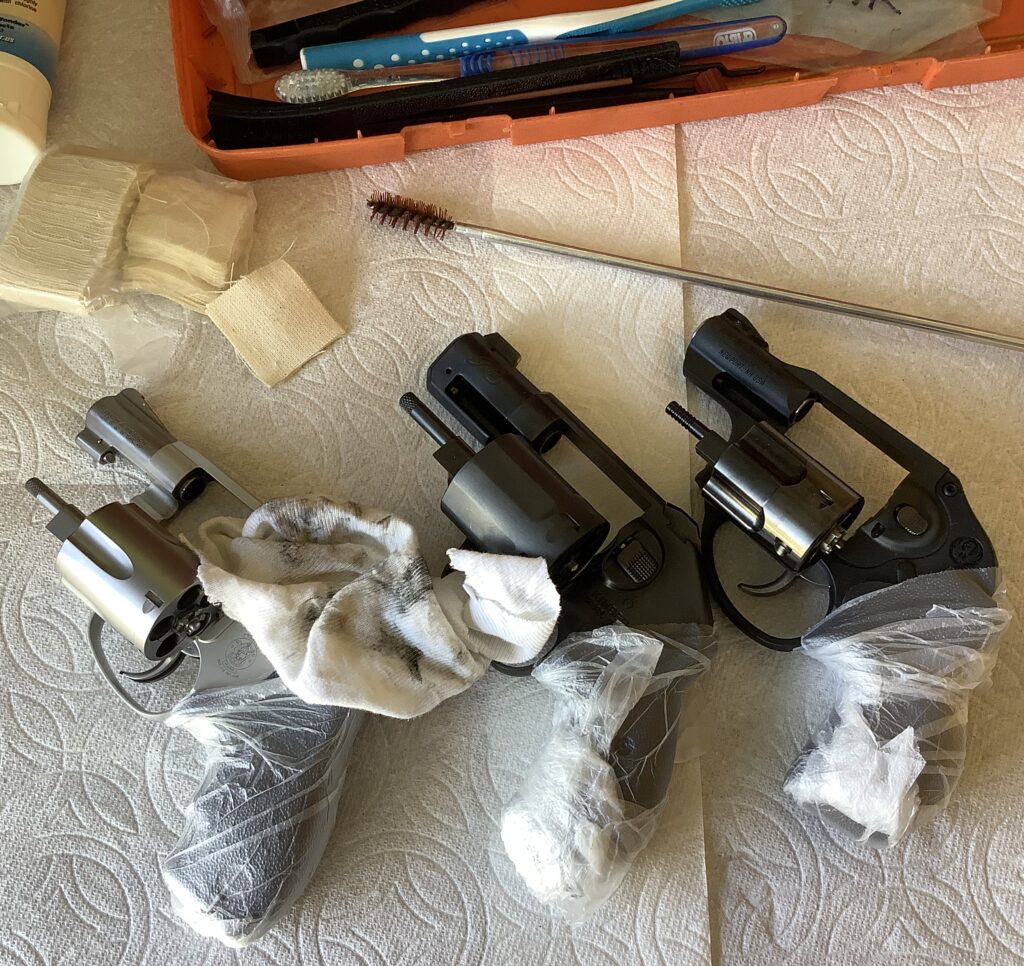
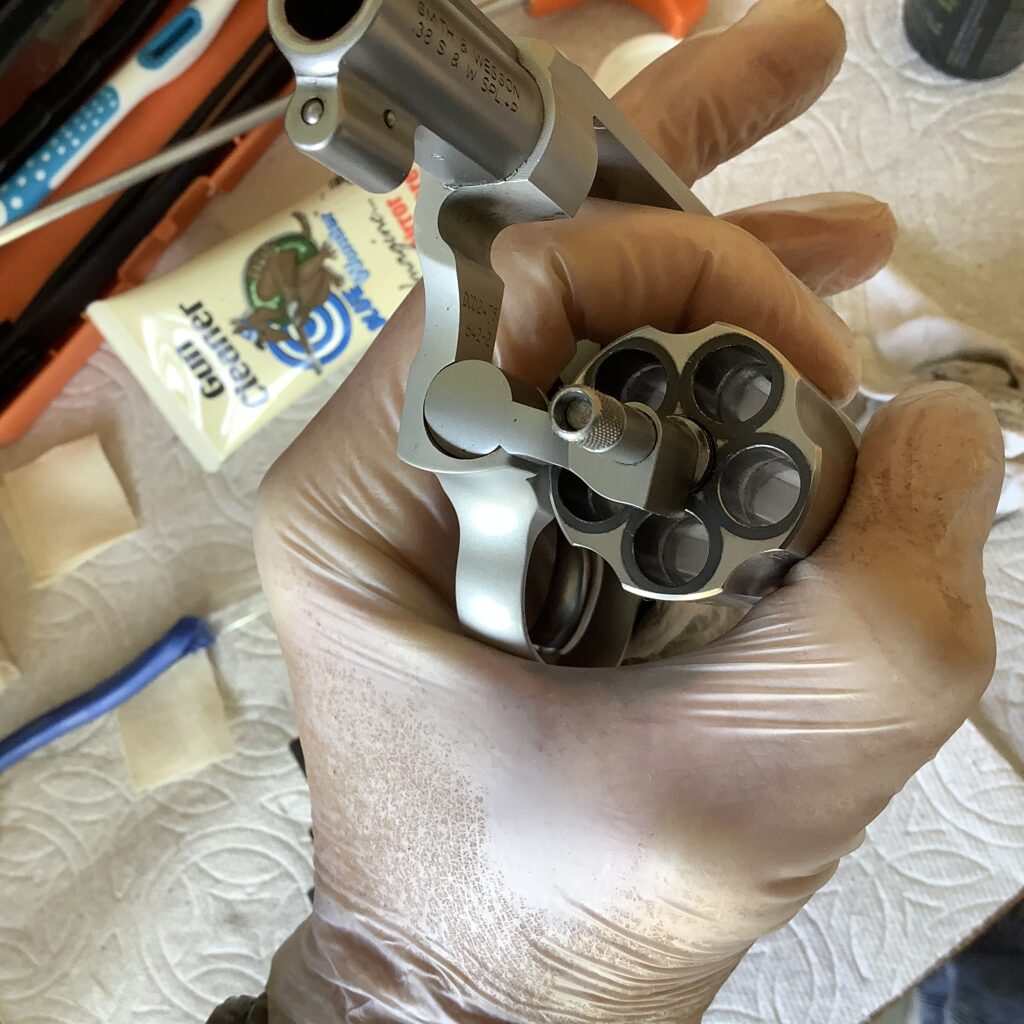
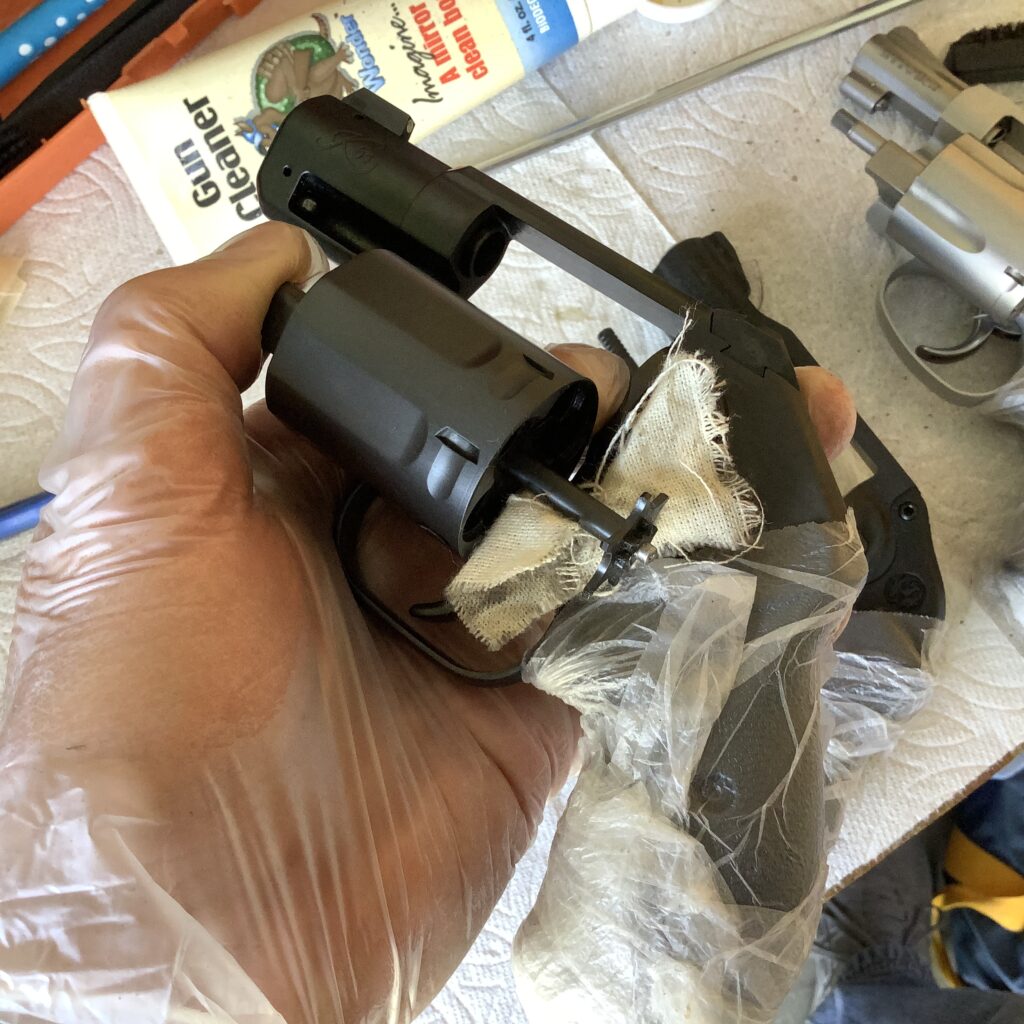
- Disassemble the gun, as required. If the grips are easy to remove, I’ll do that, but if they fit tightly and I’m worried about damaging them, or loosening their fit via repeated removals, I might just cover them up (with plastic kitchen wrap or a disposable glove) to keep solvents and oils off of them. I won’t remove the yoke and cylinder from the frame every time, but will occasionally do it to detail clean those parts, as required;
-
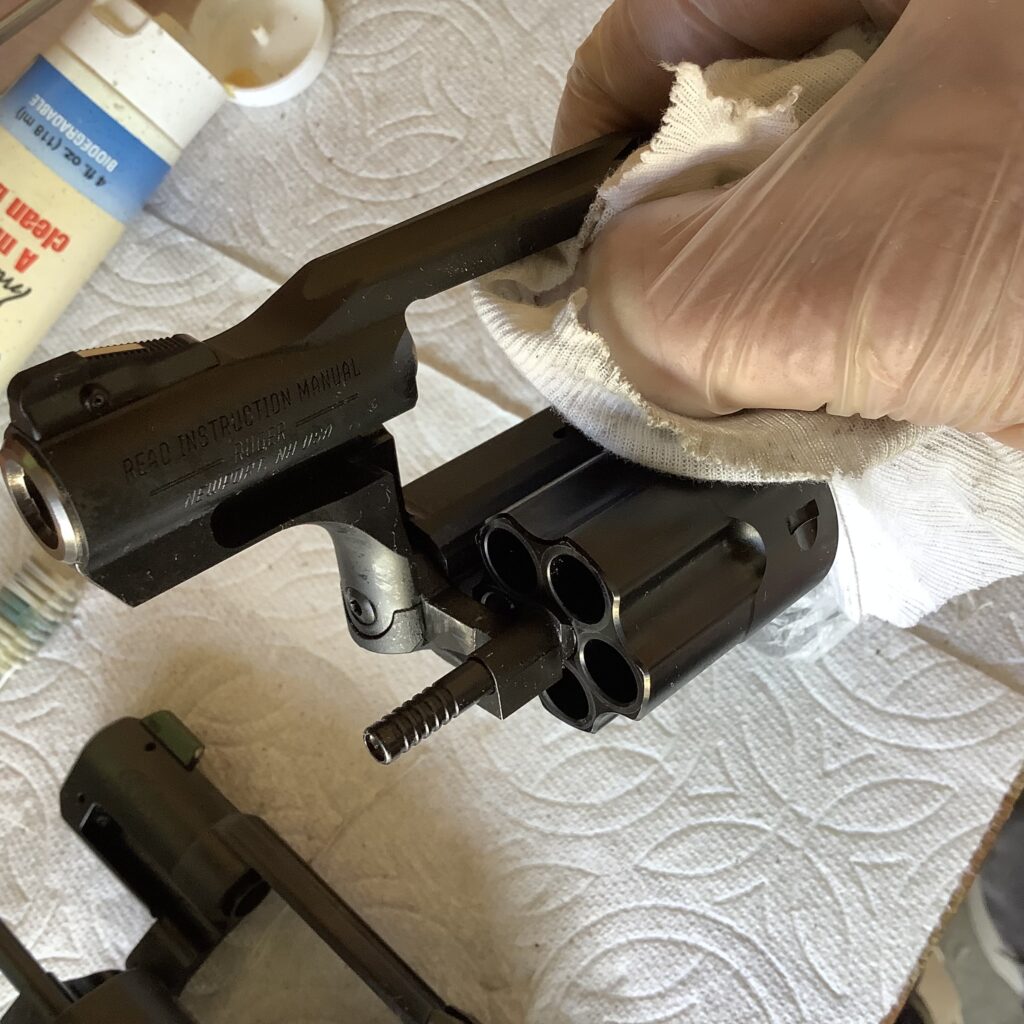
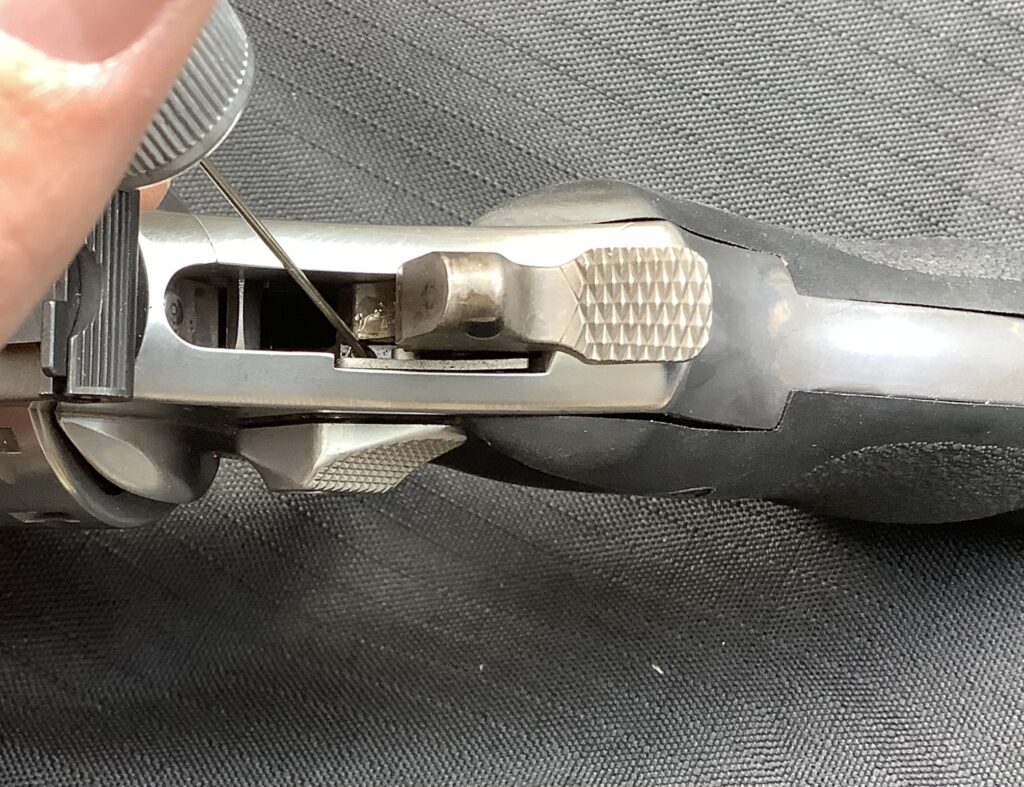
- With a rag or patches, wipe all the extra surface crud off the gun. I like to focus on the muzzle, the forcing cone, the face and sides of the cylinder, inside the frame’s cylinder window, and underneath the extractor;
-
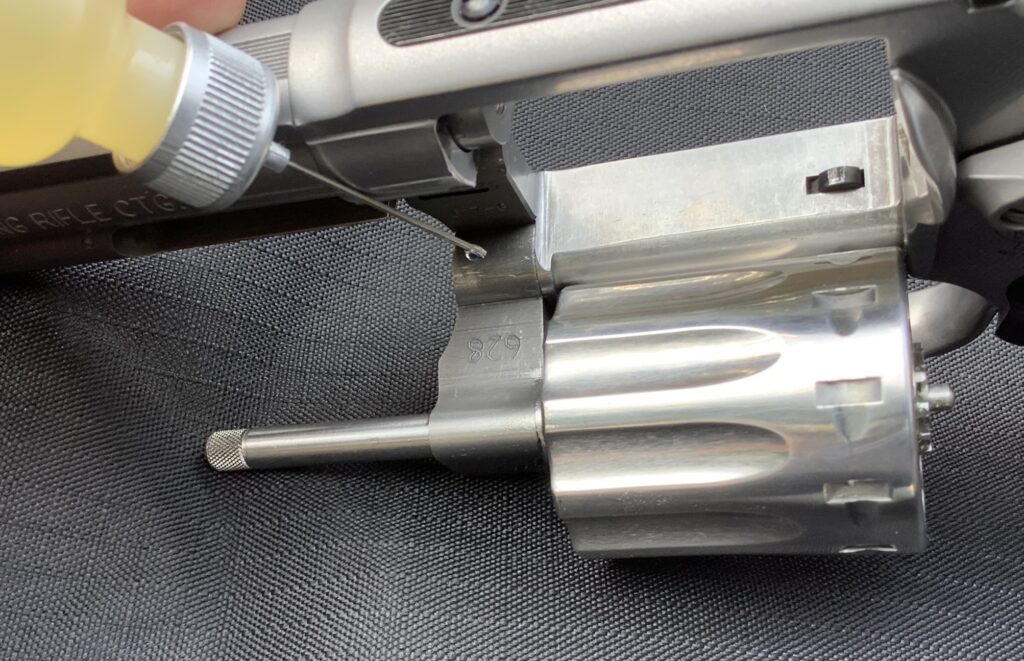
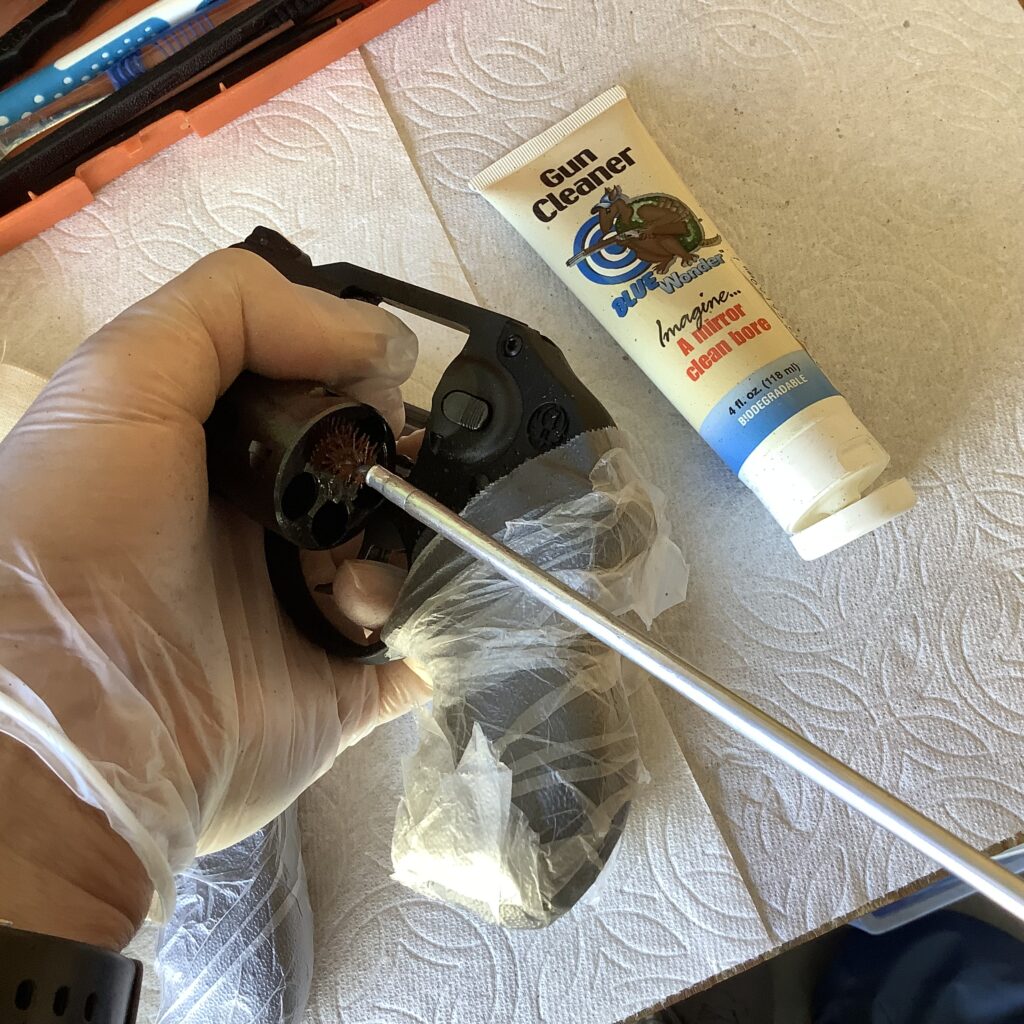
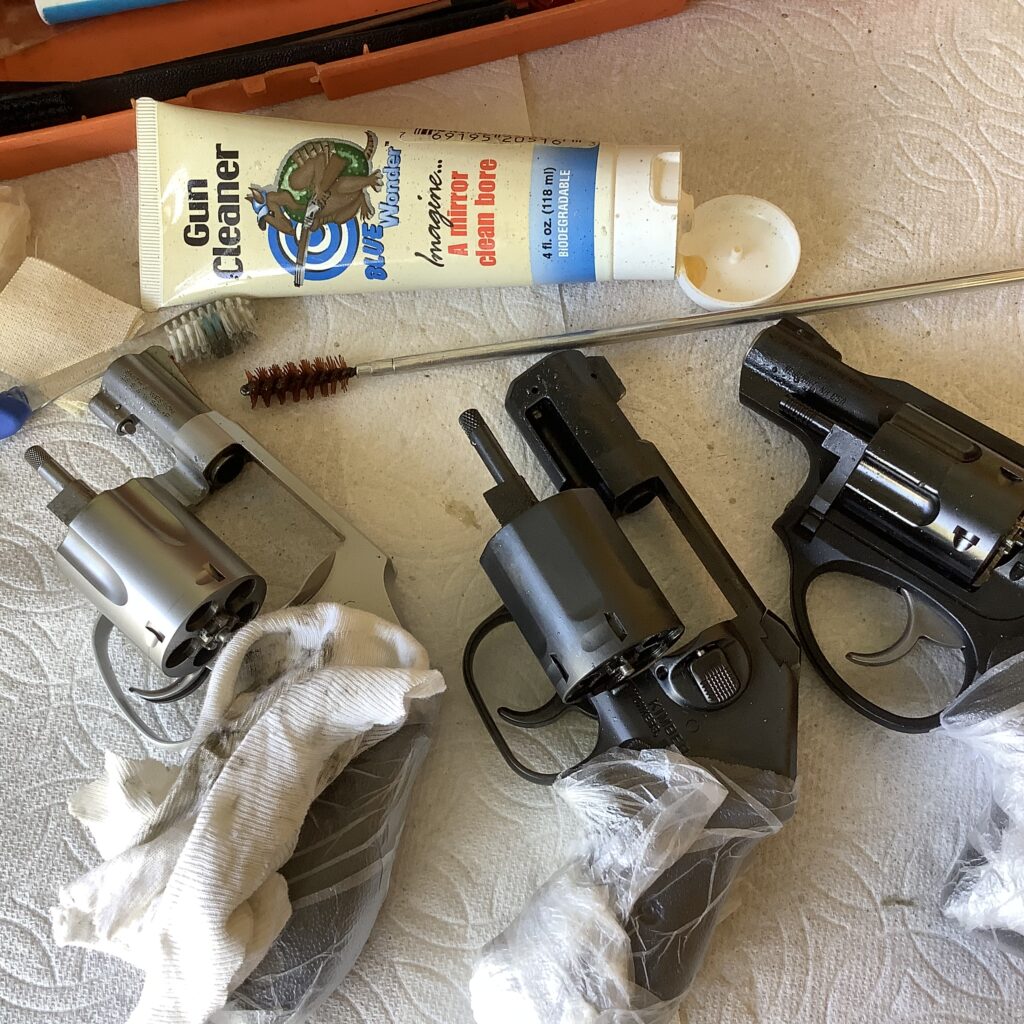
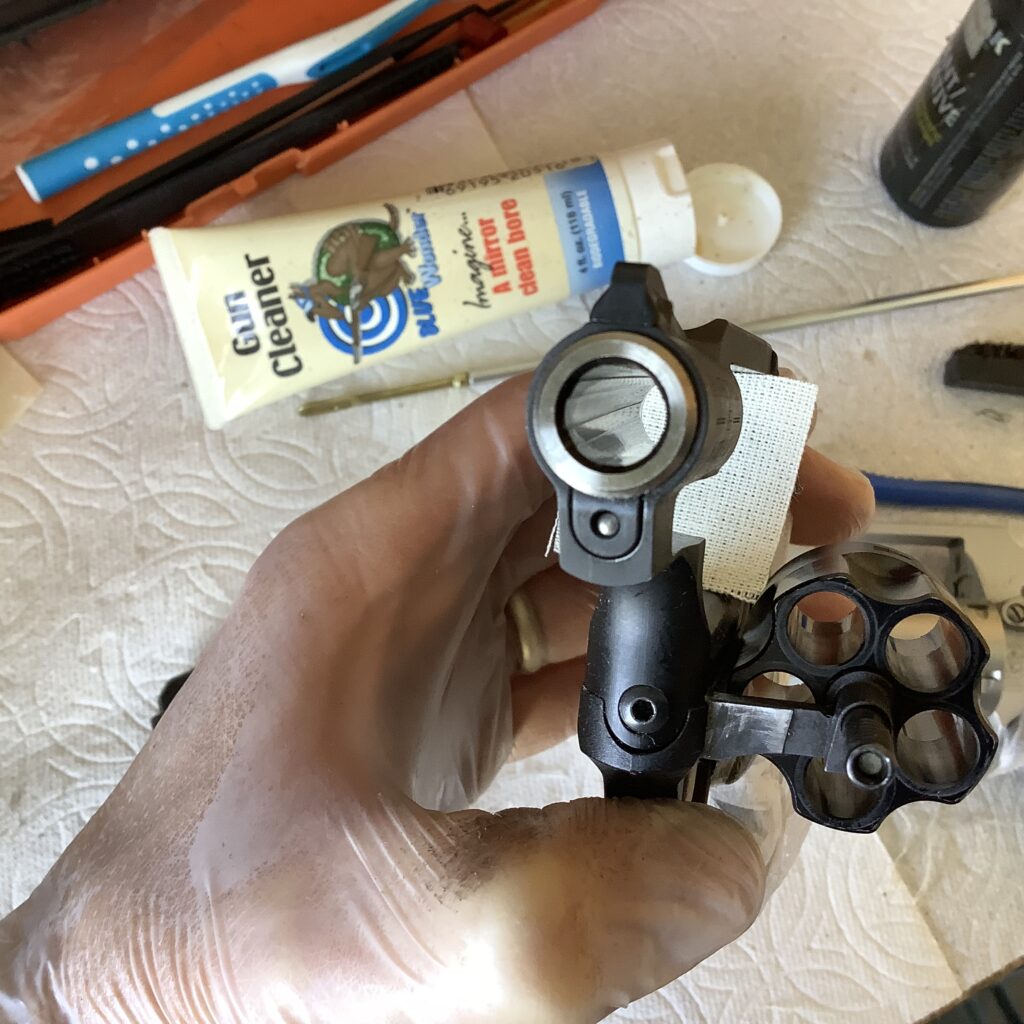
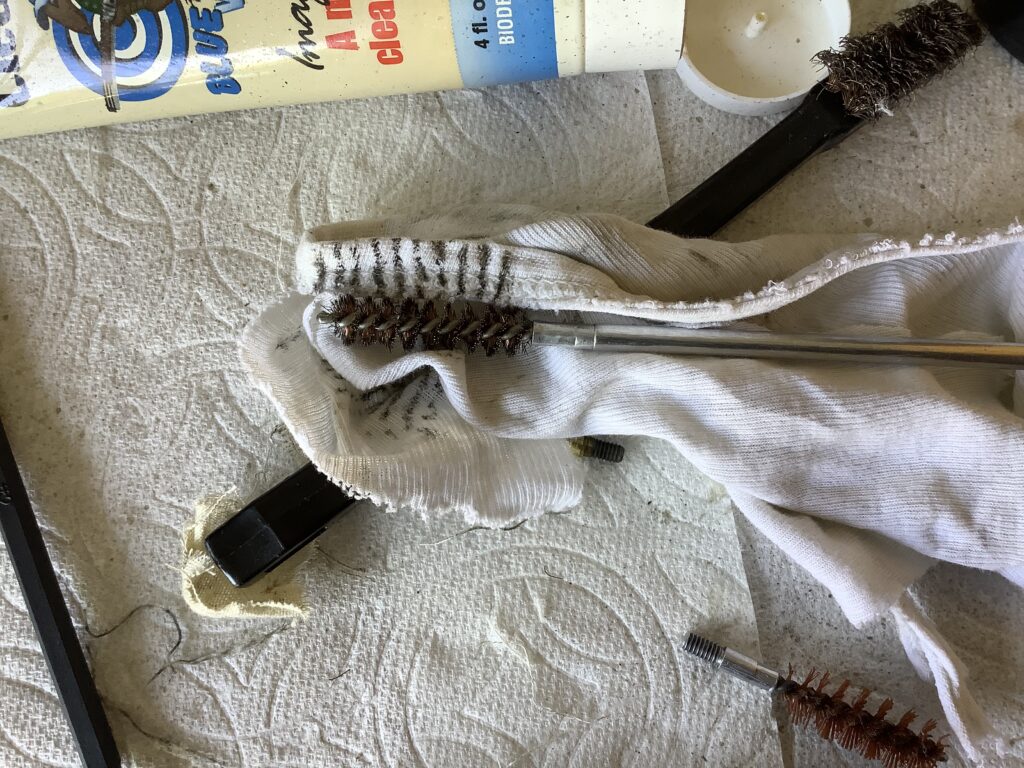
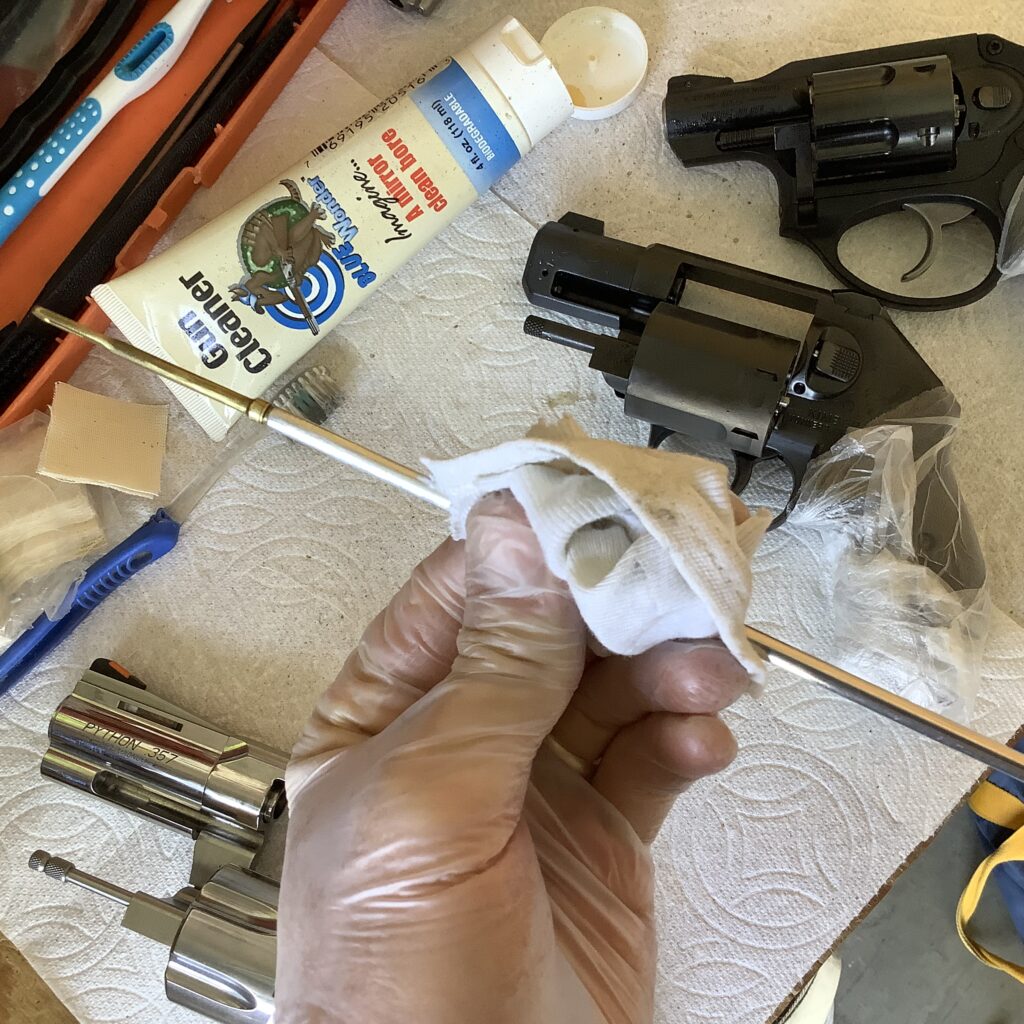
- Put some solvent (my favorite is Blue Wonder Gun Cleaner) on a patch and run it through the bore and chambers. Follow up with a clean patch, to remove the big, surface crud and most of the dirty solvent;
-
- Put some more solvent on a patch (or a suitable bore brush–I have a nylon one that I like to use for this chore), and swab/brush the bore and chambers, to distribute the solvent evenly;
-
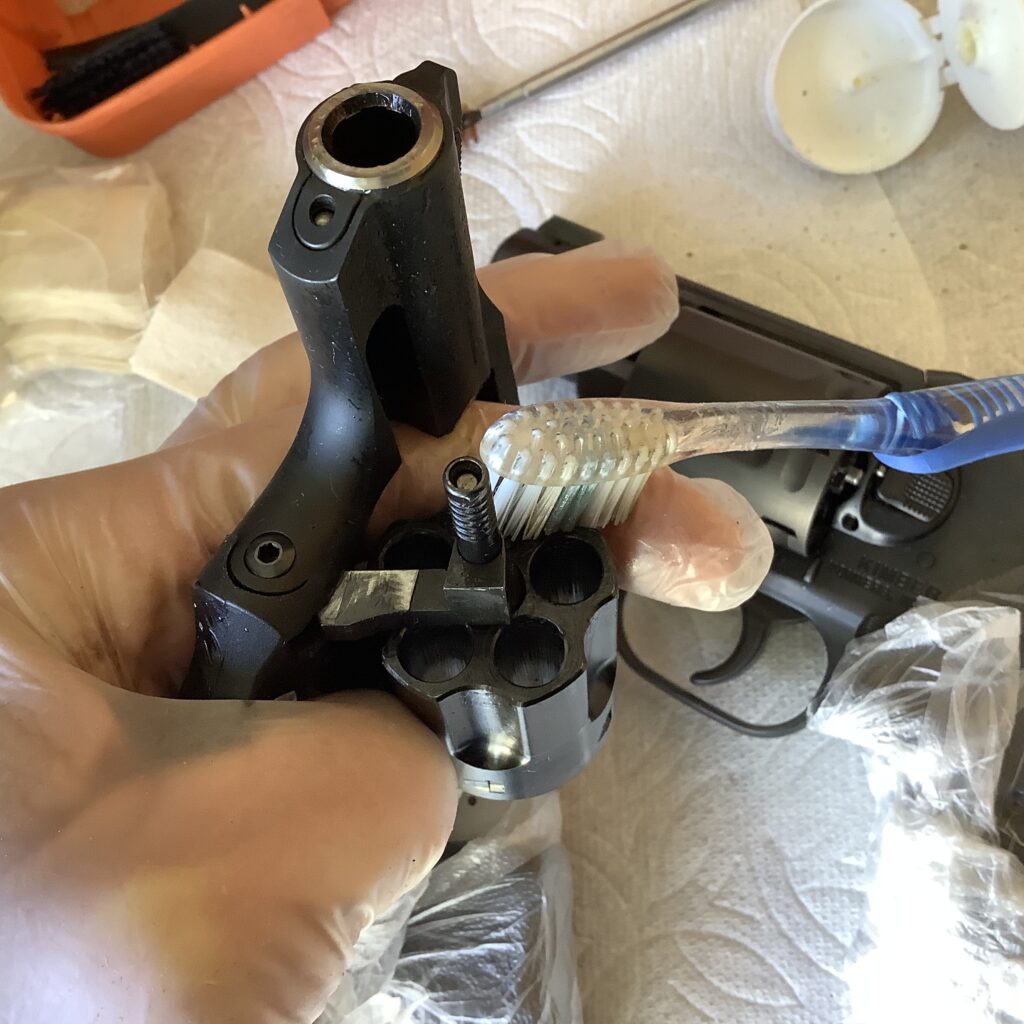
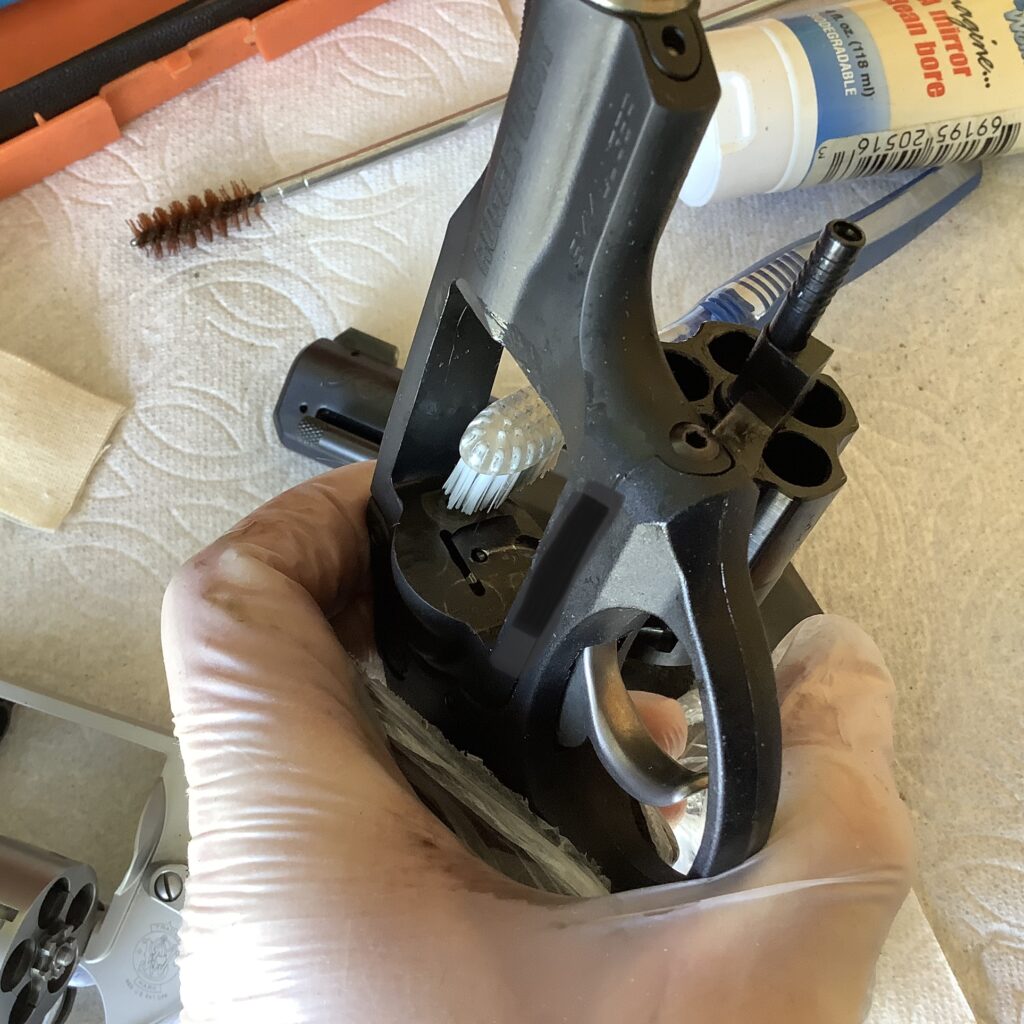
- With a soft toothbrush and a little solvent, scrub any deposits of carbon and lead that you find around the forcing cone, the top strap, the cylinder face / flutes / stop notches, the ratchet, the breech face, inside the cylinder window, and around the muzzle. Scrub with the muzzle down, to prevent excess solvent from leaking into the action through the holes (for the firing pin, hand, bolt, and stop) in the frame and breech face. Wipe these areas with a rag or patch occasionally, to remove anything you broke loose. Brush a little more solvent onto these areas after you’ve wiped them off;
-
- Set the gun aside for a while, to let the solvent do its job. With a product like the Blue Wonder Gun Cleaner that I prefer, the solvent will start to chemically break down the lead, copper and carbon deposits, saving you from a lot of scrubbing. Some other solvents may not be as efficient as the Blue Wonder product, but they’ll still benefit from having some time to “bake in” and attack/soften/lift the fouling. If you’re using a low-viscosity solvent (like the traditional favorite, Hoppes #9), rest the gun so the excess won’t run/flow into the action through the holes in the frame and breech face (another reason I like the Blue Wonder product, because it’s a viscous gel and will stay where it’s put, instead of running off or pooling);
-
- While you’re waiting for the solvent to do its work, use the time to clean and inspect your holster, ammo pouch, loaders, ammo, grips, and other support gear. Check/tighten screws on your holster and pouch, and clean the inside of them out. Check the ammo for corrosion, dents and other defects, and replace as necessary. Wipe off the inside of the grips, to clean any salts that may have built up from your perspiration. Check and/or change batteries in your LaserGrips, flashlight, etc.;
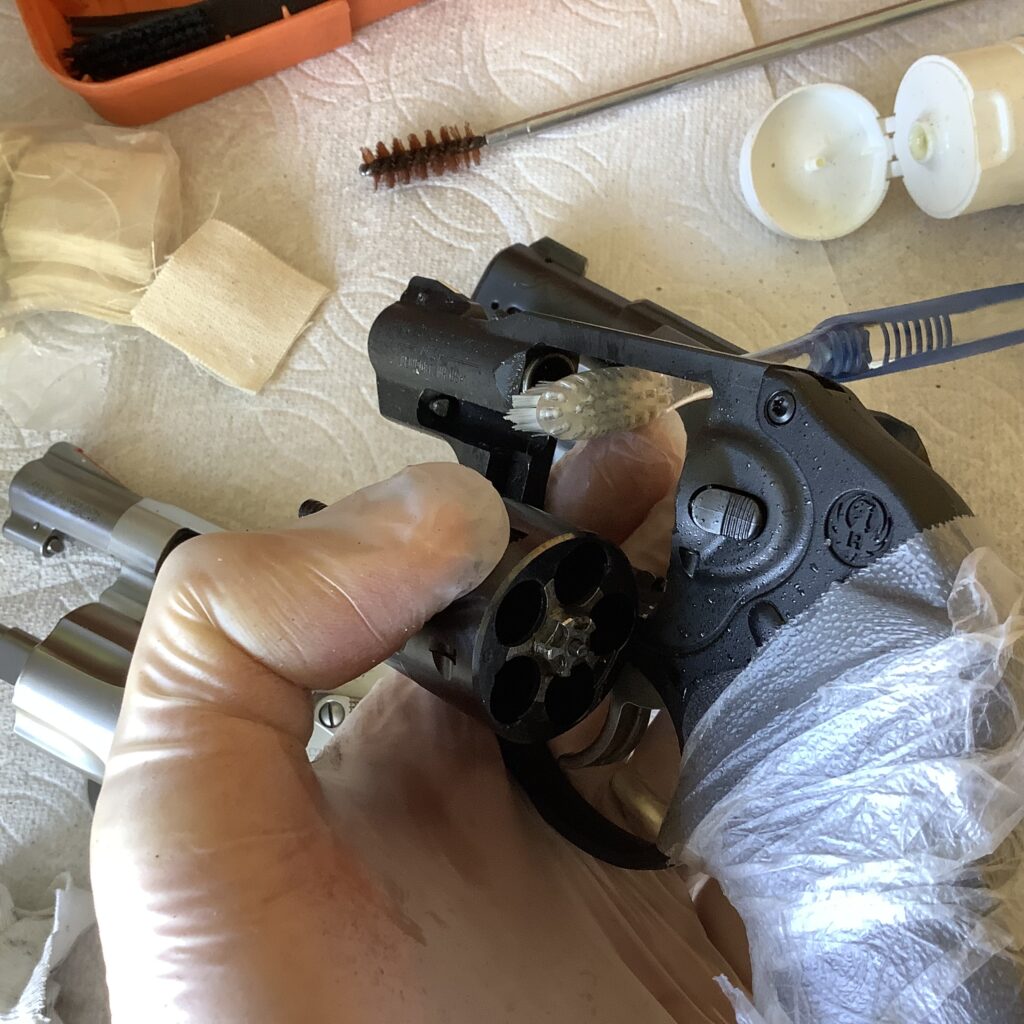
- After the solvent has had sufficient time to do its work, wet the bore brush with a little more solvent and give the bore and chambers another quick scrub, to knock loose all that fouling that’s been softened;
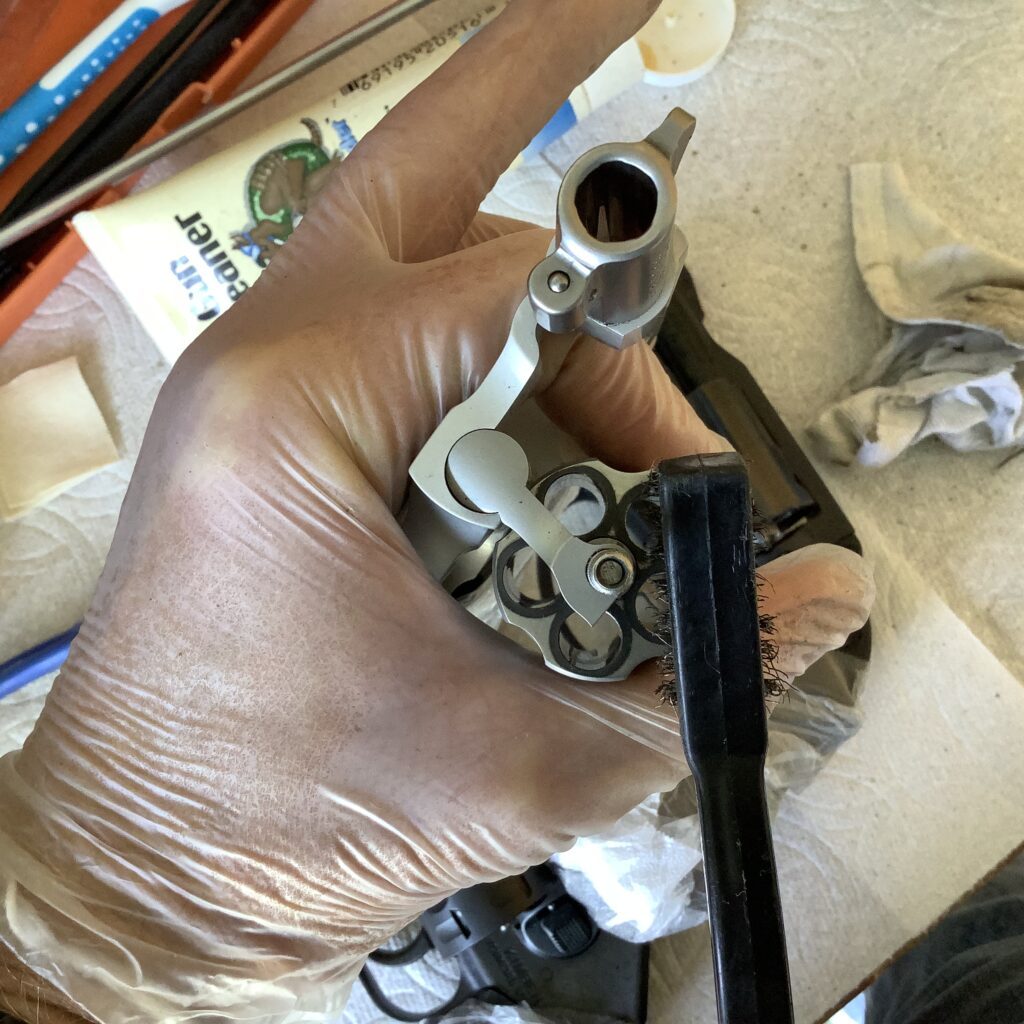
- Wet your soft toothbrush with a little more solvent and scrub the areas on the frame and cylinder that you hit earlier. Heavily-leaded areas, like the area around the forcing cone and top strap, may require you to use a bronze toothbrush (not a steel one, please!), or a pick or scraper if the soft toothbrush isn’t doing the job. I like to use plastic tools for picking and scraping, but sometimes use a smashed brass cartridge case (I find a brass .223 case works well) that has been shaped into a scraper for the really heavy stuff. Don’t use steel tools because it’s easy to damage the gun with them;
-
- Use a rag or patches to wipe that gooey mess off! Try to get most of the solvent, fouling and goop off the external surfaces of the barrel, frame and cylinder. If the cylinder face has stubborn carbon/lead rings, brush them off with solvent and a bronze toothbrush, or use a lead remover cloth (best reserved for stainless guns only—on my blued guns, I just use the Blue Wonder cleaner, which is blue-safe), then wipe clean with a dry rag or patch;
-
- Once the external surfaces are relatively clean and dry, use dry patches to get the bore and chambers clean. If you discover that you still have residual fouling in the bore and chambers that you want to get out, hit them again with the bore brush. A little extra scrubbing usually gets the rest of the soaked, softened fouling out. If it’s stubborn, repeat the soak-wait-scrub-patch process.5 Your objective here is to have clean, dry chambers and bore;

-
- Pulling those dirty patches out of the bore and chambers probably sprayed some junk around. With a rag or patches, detail clean all the external surfaces of the barrel, frame and cylinder, so everything is clean and dry. This is the time I start wiping down the nooks and crannies, like the hammer, hammer nose, and hammer channel, the area under the extractor, the center pin hole in the breech face and the slot for the hand, the crevices around the yoke, recessed chamber mouths (a toothpick is useful, here), the sights, etc.;


-
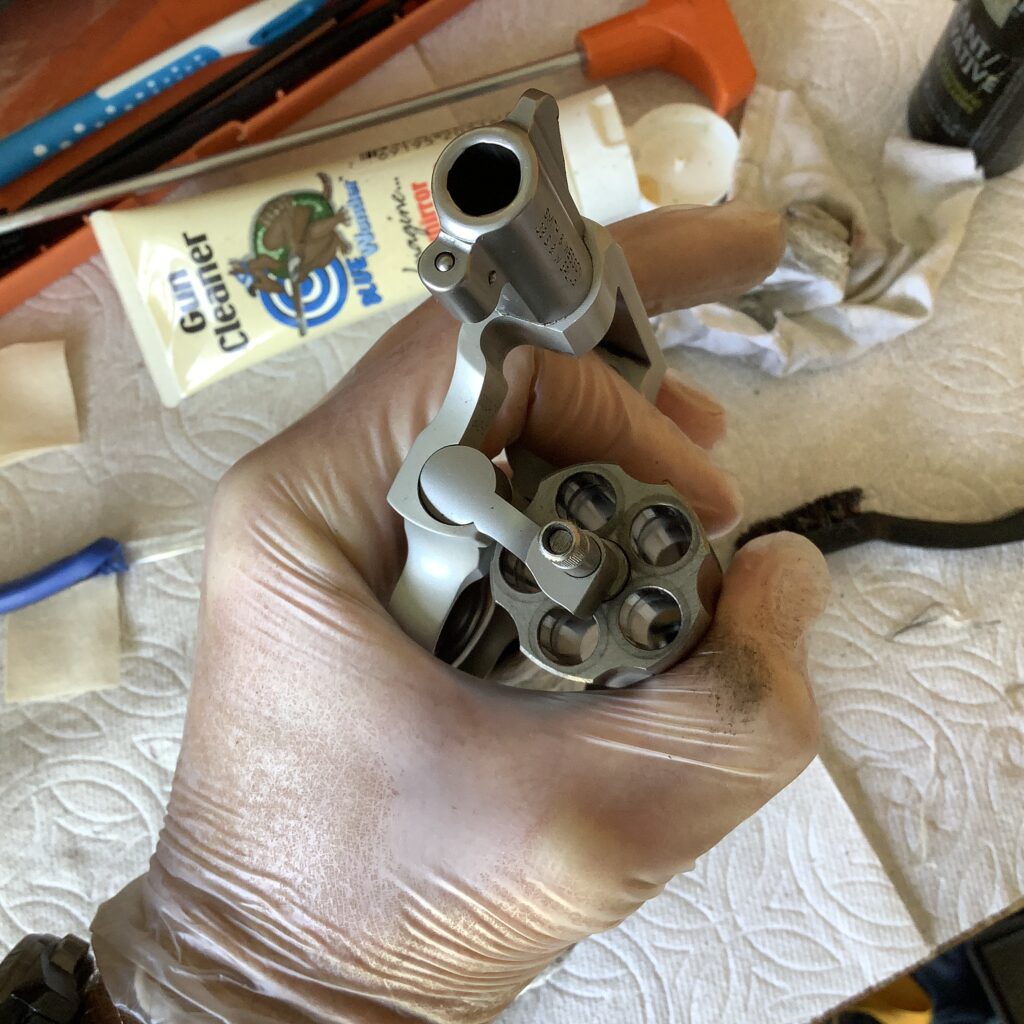
- At this point you’ve got a clean, dry gun. Inspect it for damage and defects, like erosion, cracks, broken or worn parts, etc. Pay close attention to the critical areas we discussed earlier. If everything looks good, reassemble it, as required (put the yoke and cylinder back on the frame, put the grips back on the frame, etc.), and/or check all screws to ensure they are tightened;
-
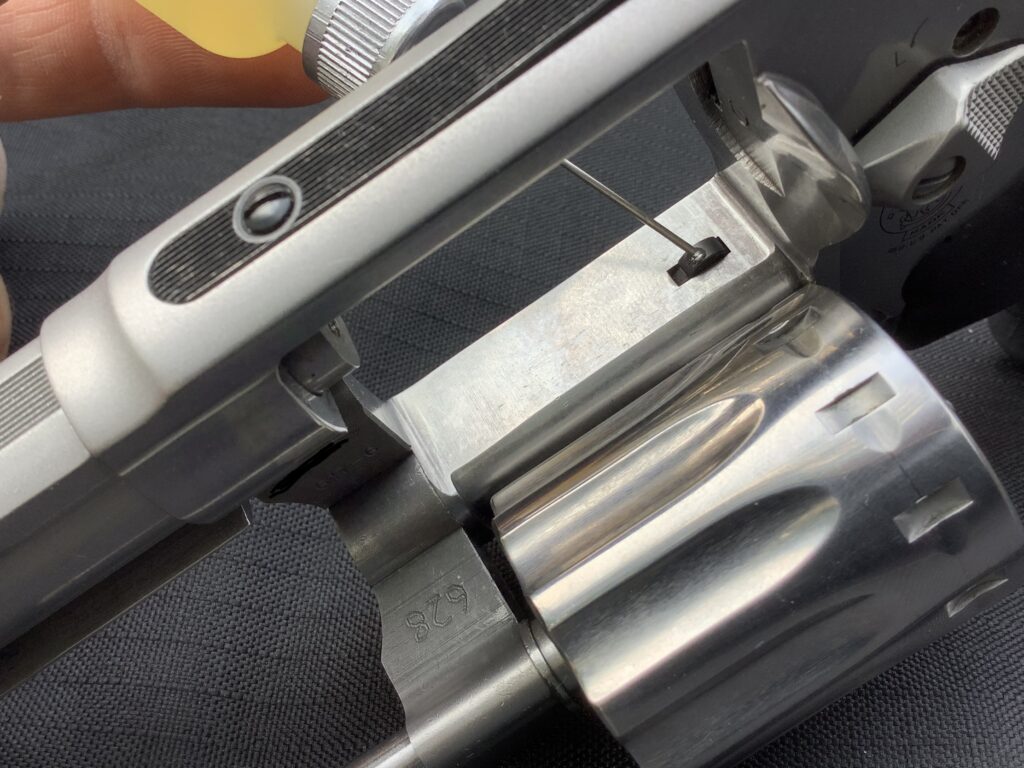
- Lubricate the gun with your favorite product. I like to use grease in many applications, especially on my semiautos, but for my revolvers I prefer to use a thinner oil. I’m partial to products like Lubriplate FMO Gun Oil, Slip 2000 Gun Lube, Lucas Oil Extreme Duty Gun Oil, and good old Break Free CLP (they’ve got a dedicated gun oil product now, but I’ve been using the Break Free CLP as oil since the late 1970s and it’s always treated me well), but I know there’s lots of other good products out there. I like to use a needle oiler to apply these, so I can put the right amount of oil exactly where it belongs. Areas to lubricate include:
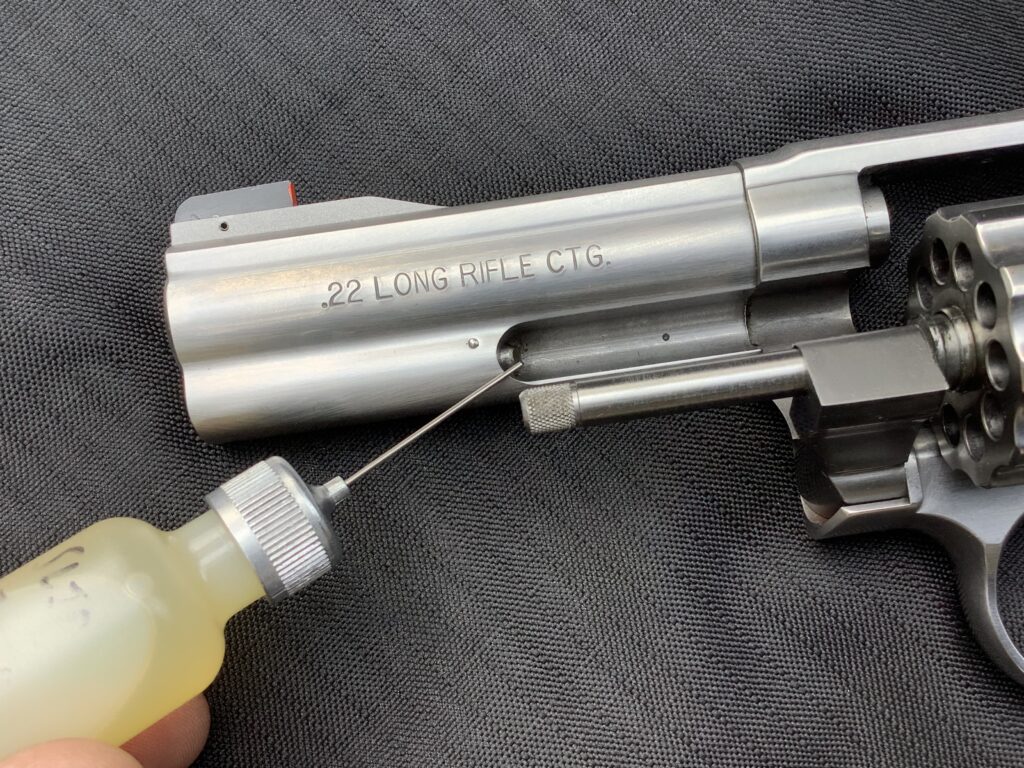
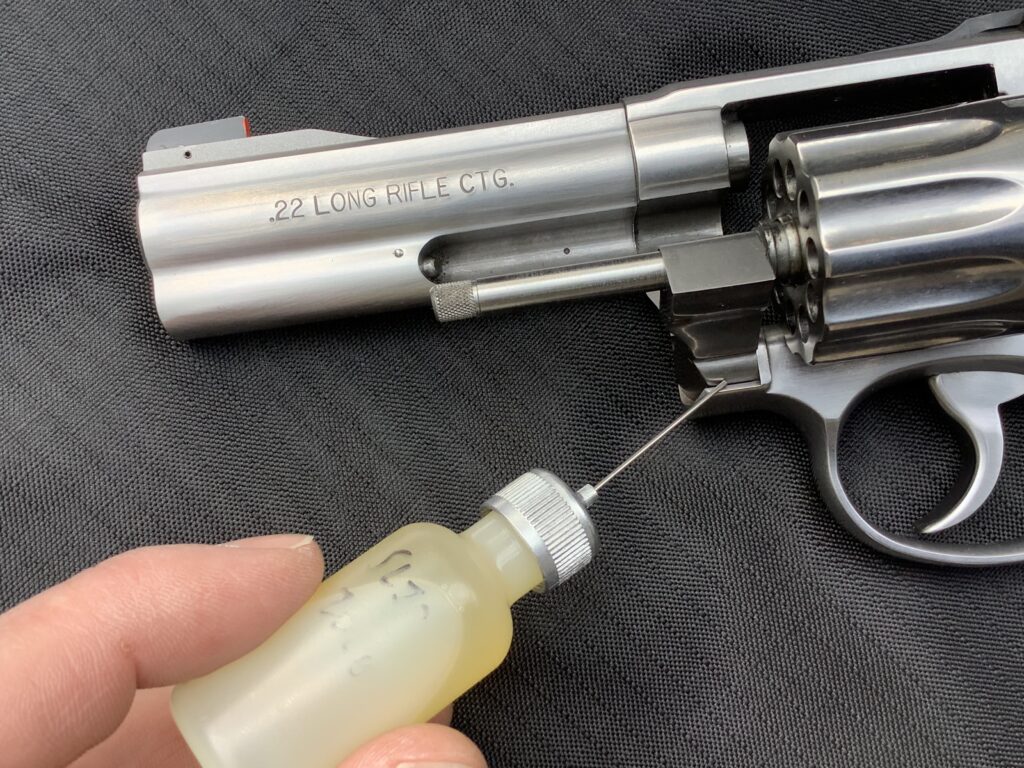
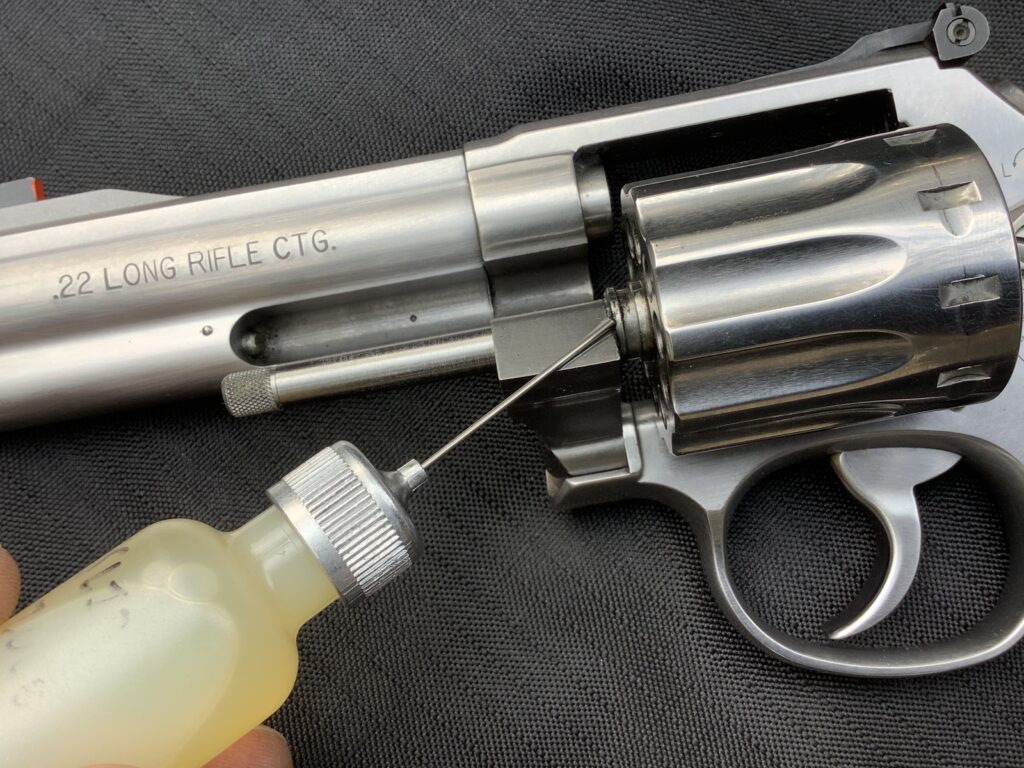
Other areas to lubricate could include the thumb piece and either side of the trigger (invert the gun, put a small drop on either side, let it flow inside, then wipe off the excess);
-
- When you’re finished lubricating, verify the gun is unloaded, then close the cylinder and cycle the action several times to distribute the lubrication;
- Conduct a function check to ensure the gun works properly;
- Wipe the gun down with a silicone cloth, or a lightly oiled cloth (Break Free CLP works great for this, in my experience), to remove residual fouling and excess oil, and clean and protect the finish. Don’t leave the gun excessively wet, as that will just attract dirt. All you want to do is get the fingerprint acids off the steel, and give it a thin film to protect against corrosion. Those of you who live in a very humid environment might want to use a more robust preservative to combat corrosion, like Birchwood Casey Barricade, or Sentry Solutions Tuf Cloth, to keep the rust off your gun;

-
- Take your gun to the loading area and tell yourself, “I am now loading the gun,” then load it. Place the gun into storage or holster it, as appropriate;
- Clean and pack up your tools and supplies, clean up your work area (I hope you didn’t spill solvent on the kitchen table, because your spouse will be M-A-D!), safely dispose of the contaminated cleaning materials, then wash up and change/launder clothes, as required.
Extras
That’s a pretty good outline of my typical cleaning chores, but sometimes there’s more to do on a really dirty gun and I’ve got to use other tools, products and methods to finish the job. The process I described will take care of most of your cleaning requirements, though.
Periodically, I’ll remove grips that haven’t come off in a while, to ensure there’s no corrosion forming, underneath. I will also periodically remove the side plate and do a full disassembly and cleaning of the gun’s action, then apply some grease to the right places, like the hammer and trigger studs, coil mainspring struts, etc. I’ll also evaluate if it’s time to clean the forcing cone with my Lewis Lead Remover (which usually isn’t necessary unless I’ve been shooting large quantities of soft lead bullets). This kind of disassembly and maintenance is beyond the scope of this article, but I mention it so you can appreciate that occasional “heavy maintenance” is required. You may want to enlist the help of a gunsmith if you’re not comfortable with diving deep into the guts of your revolver.
mistakes and pitfalls
There’s a number of cleaning and lubrication traps you can fall into as a RevolverGuy, but the good news is that they’re easy to avoid, if you know what they are. Some of the biggies include:
-
- Failure to keep the critical areas clean. A revolver can look really gross, but run just fine, if you keep the critical areas clean. We discussed those earlier, but we’re basically talking about the cylinder and the axle it rides on. If you can keep the barrel/cylinder gap free from obstruction, ensure the cylinder can spin freely and pivot into/out of the frame, ensure the chambers are clean, and keep the extractor star and ratchet clean (including underneath), you’ll keep your revolver running. Ignore these areas at your own peril;

-
- Shooting dirty ammo. Shooting soft lead bullets without a coating or jacket will contaminate your revolver relatively quickly. Lead deposits will build up in the bore, in and around the forcing cone, on the gas ring, and on the cylinder face, if the revolver is not occasionally scrubbed clean. These deposits will eventually effect reliability and accuracy if left unattended. Additionally, ammunition which doesn’t burn clean may leave excessive soot or unburned powder granules behind that can foul the gun. You can greatly relieve your maintenance burden if you just feed your revolver some clean shooting ammo to start with;
-
- Careless use of the bore brush. It doesn’t take much to damage the barrel crown and/or muzzle on your revolver, so you need to be gentle in this area with your cleaning rod and brush. Keep the cleaning rod centered and don’t push or drag it along the side, where it can cause uneven wear. Make sure the bore brush is in good shape, and the steel wire at its core will not scrape the crown, muzzle, or bore. Push the brush all the way through the bore before you change direction;
-
- Failure to remove grips. If water gets underneath your grips, it can promote corrosion on the frame, mainspring, and other parts hidden underneath. Perhaps the most insidious source of water is your own sweat, which adds corrosive salts to the mix. To avoid rusting your gun underneath the grips (or rusting the grips themselves—the old Pachmayr grips, for instance, had a steel skeleton that could rust if not properly cared for), take them off occasionally and wipe down the metal underneath with a silicone cloth or a lightly-oiled cloth. I’ve even applied a thin coat of car wax to the frame of guns that are going to be carried close to my body, and subjected to lots of perspiration (especially in the summer months). It’s always a sad day when you pop your grips off and find the demon rust, so stay on top of it.
One other thing about grips—if you’re going to leave them on the gun while it’s cleaned, cover them up to protect them from getting splattered with solvents and debris, or soaked with oil. I like to cover them up with an extra disposable glove, or some plastic wrap from the kitchen, so I can handle the gun without transferring goop to the grip;
-
- Not reading the label. Some cleaners can be harmful to blued or nickel finishes, and should not be used on those guns. Others can be harmful to the steel if left to soak too long, or if residue is left behind (such as ammonia-based cleaners like Sweet’s 7.62). Read the label, and use the products as directed to protect your gun;
-
- Using too much cleaner and/or lubricant. Using too much of these products may cause them to collect and pool inside the gun. In turn, this may lead to other problems like ammo contamination, fouling or gumming up the action, or damaging a leather holster. Use cleaners and lubricants sparingly, only apply them where needed, and be sure to wipe off any excess. If you need to use a spray can to dispense a cleaner or lube, spray it onto a cloth, patch, or brush first, not directly onto the gun, to avoid getting it in the wrong places and getting too much of it on the gun.
Got something to add?
So, that’s about it for basic cleaning and lubrication. If you caught something that I forgot, or have a good cleaning tip you want to share, please let us know in the comments. I’m always open to learning something and picking up a good trick.
Additionally, if you’ve got some favorite cleaning products you want to tell us about (like your special formula for Ed’s Red, or your favorite weight of Mobil 1), let us know that, too. I mentioned some of my favorites, but I know there’s a lot of good products out there that I haven’t tried, yet.
Thanks for reading, be safe, and get out there and get those guns dirty!
endnotes
-
-
-
- There are obvious exceptions to the rule, of course. A gun that’s so dirty that it may affect reliable function needs to be cleaned, and there are some contaminants (blood, acids, solvents, water, corrosive ammo residue, etc.) that need to be cleaned off right away, lest they promote corrosion or other damage–especially if the storage environment is humid. Duty guns that are really filthy from practice should be attended to before they go back into service—wipe off the big stuff in the critical areas, and put some lube in the right places, at the very least. A full cleaning is even better. You can be more casual about your recreational guns, but the guns you rely upon to keep you and your family safe deserve timely attention.
- Honestly, I’m not aware of anyone who routinely does this with their handguns. I’ve seen it done once or twice by law enforcement snipers who want to “foul” their rifle bores, for consistency, and have heard stories of it being done in wartime military service, but most folks simply don’t clean their weapon at the range, then shoot it again before they leave. Maybe some of the benchrest rifle shooters do, but that’s for sporting purposes, not for duty purposes. I never saw it in my own LE/MIL experience—the cleaning areas at our training locations were always separate from the range, and there was never an opportunity to return to the range to fire the necessary function test shots. I don’t suppose most civilian ranges are set up to support the practice, either. I’m not saying it’s a bad idea, only that logistical considerations usually prevent people from doing it;
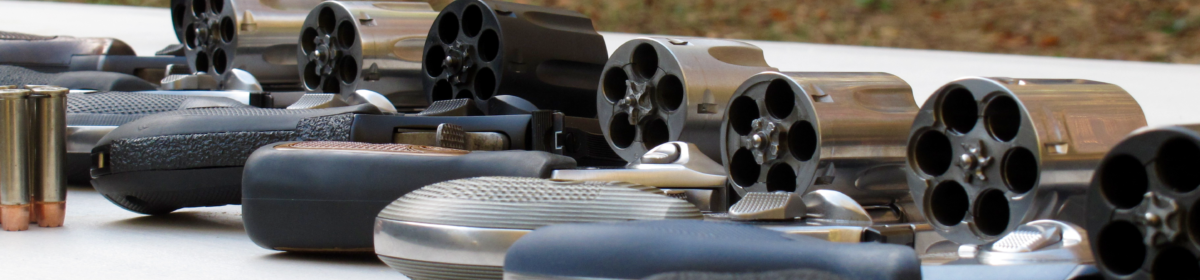
- Most of these are semiautos, but there’s some pretty nasty looking revolvers out there, too, like the Kimber K6s that we ran for 464 rounds before it couldn’t go any further. The revolvers will typically fail before the semi autos if proper cleaning and maintenance is neglected, due to their closer operating tolerances. Revolver ammo is often dirtier than semiauto ammo, too, especially if unjacketed lead bullets are used, which can dictate a shorter cycle between cleanings;
- On autoloading pistols, my critical item list includes the chamber, feed ramp, breechface, extractor, barrel hood, rails, and magazine, for example;
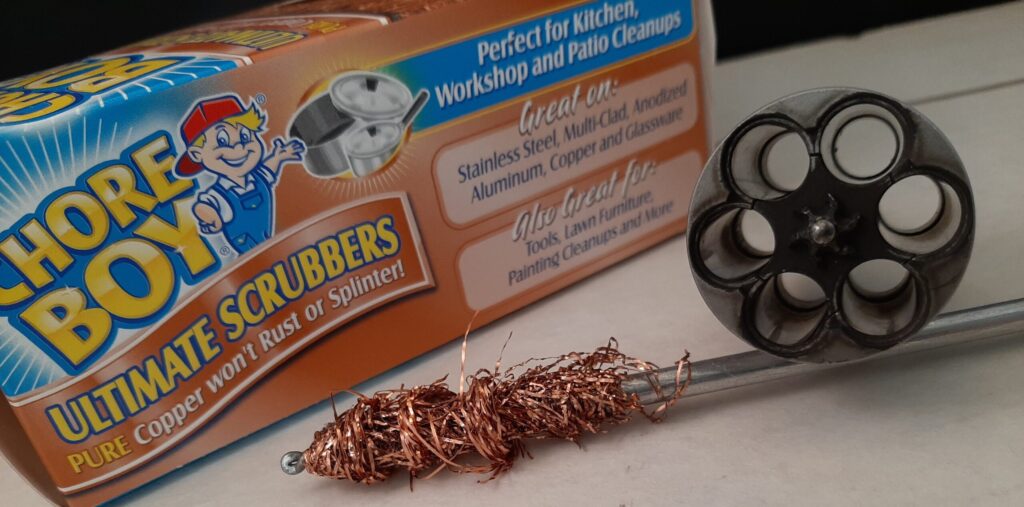
- Stubborn deposits in a heavily-leaded barrel may require overnight soaking, or more aggressive means to clean them out. One trick I’ve seen is to chuck a cleaning rod and brush into an electric drill, and brush out the barrel with the power tool (go easy on it!). Another I’ve seen is to pull strands off a copper kitchen scrubber pad, and wind them around your bore brush to clean the bore more aggressively. Frankly, my favorite technique is to just use the Blue Wonder product I’ve mentioned previously–that stuff is chemical magic in a bottle, and makes short work of even the worst fouling, while being both biodegradable and non-toxic. It works like oven cleaner for you gun–smear it on, let it sit, wipe it off. Easy. It’s great stuff, and will save your elbow from a lot of scrubbing work;
-
-
Thank you for the detailed cleaning tips. Your cleaning routine is very close to mine. I do shoot a lot of lead bullets and usually have to resort to a Lewis Lead Remover, which works great. I will try some of the Blue Wonder. One note, be careful with the copper scrubbing pads. Some of them are steel with a thin copper coating. Don’t ask me how I know. Stick with the Chore Boy pads and check them with a magnet. Happy shooting!
Matt, that’s great info about the copper-coated, steel scrubbing pads! I didn’t know that. Thanks for sharing that tip!
Very early in life I didn’t know how to properly clean and care for my firearms and relied on the advice of supposedly experienced shooters. But as it turned out, most of them didn’t know much about gun care either and polluted my thinking with their ignorance. The detailed information in this article would have saved me, and my firearms, a lot of grief had I read it many decades ago.
Thanks Spencer, hopefully we can save the next generation from making the same mistakes. I think most of us have some cringe-worthy moments from our gun cleaning past that we’re not proud of!
Oh, the joys of cleaning up after making a mess. Guns are a lot like children, pets and Harley-Davidson motorcycles – you always have to clean up after them.
Colonel, this was an excellent and extremely well written and illustrated article that should be a must read, particularly for newcomers to the revolver world, as well as a reminder to some of us that grew up in the black powder era. Kudos to your writing and photos.
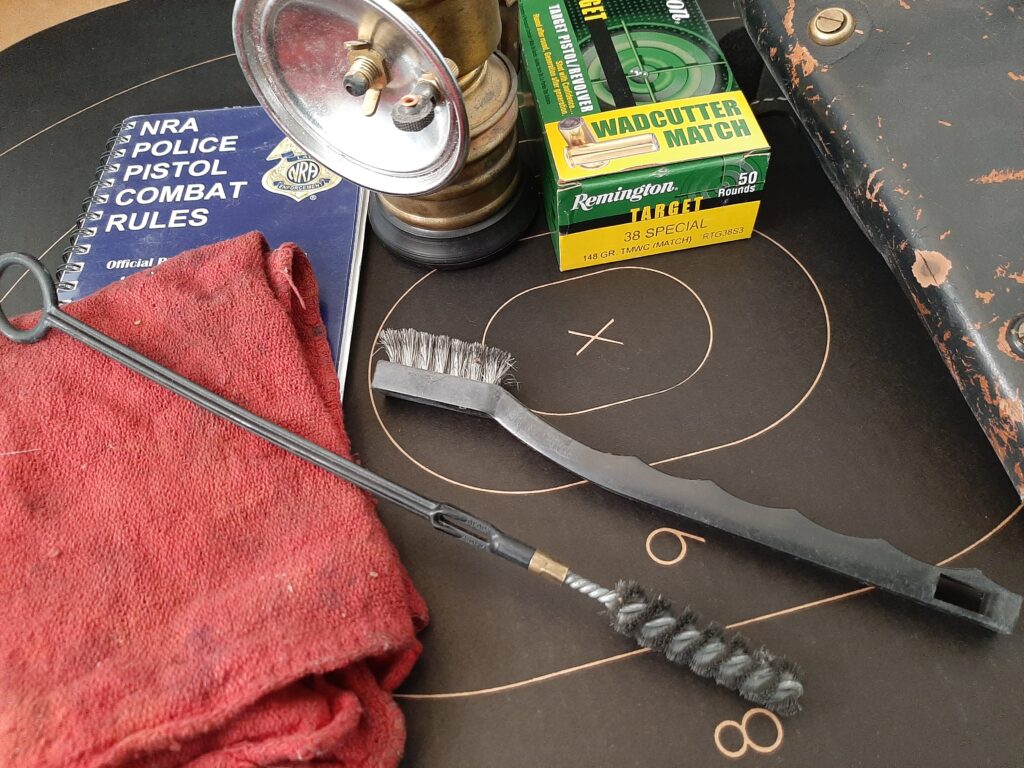
Getting rid of powder residue is fairly straight forward. Getting rid of the bullet residue, not so much. J-B Bore Paste from Brownell’s applied to a brush and attached to a drill set to a LOW speed works wonders for getting powder burn ring and bullet residue out of cylinder chambers, and even obstinate forcing cones. It also works for getting the powder ring off the face of the cylinder as well. CAVEAT, you don’t want to use J-B Bore Paste on blued steel cylinder faces … stainless only, please. And you sure don’t want to leave Hoppe’s #9 on nickel plated guns either (ask me how I know ! lol)
As I get closer to residing in dirt, I’ve become inherently very lazy. Having to clean an M14 until you could eat off it was fine for a few months, after that time, I don’t think so. (The ’14 will run even when extremely dirty) You mentioned fouling the bore in your end notes, and there’s a whole ‘nuther discussion on that one.
For years I’ve used the home grown formula for Ed’s Red, and its essentially the same formulary Mike highlighted in this article. A gallon lasts a LONG time. I have a very large and deep pyrex dish that I fill with the solution. I remove the grip panels, remove the cylinder and yoke assembly from the frame, and place everything except the grip panels (duh) in the dish, put the glass cover on it, wash up, and let chemistry do its thing for a few hours, or even overnight. After a time the solution goes from cherry red to dark yuck as all the powder and primer residue dissolves. Usually a bore brush to the barrel and cylinder chambers does the trick, and a GI M16 brush to parts like the extractor, cylinder window and any other places where crud hides. Those with AR platforms, Ed’s Red does a nice job of cleaning out the BCG and gas tube as well.
To rinse and clean, Berryman’s Brake Cleaner in the aerosol can (yes, outdoors) gets liberally applied, and it washes away the cleaning solvent and dirt and dries very quickly. Add lube to the places that need it, put everything back together and we’re ready to roll.
Lubricant – Being the old fud that I am, I still use LSA, MIL-L-46000B, for lubrication. It’s a lithium based semi-fluid that dates to the 1960s (developed for the M60 GPMG), and was used on the M60, M16, the Ma Deuce, and about everything else that went bang. Given that I still have about a half gallon of the stuff, and it never seems to go bad, I’m probably all set through World War IV.
To clean or not to clean, that is the question – When I was in trooper school, I cleaned my revolver every night, but it wasn’t a detail clean, but enough to get through the range time of two weeks. As Mike pointed out, we shot a nothing but dirty .38 Spl lead wadcutters like every other academy in the country during that era, and I suspect the powder used in our pipe cloggers was Hercules Unique. For final qualification before they turned us loose on the general public, it was full power .357 rounds.
Once on the street, every time I shot any of my guns, whether for qualification, for recreation such as IPSC, IDPA, SASS, IDONTCARE, etc., they got cleaned down to the core – with one lone exception. That exception is a Glock 17 Gen 3 that I have used in training classes, both as a student and as an instructor. It hasn’t been cleaned since the late 20th Century (that’s the 1990s for those in Rio Linda). Reason ?? I just want to see how long it will go before it chokes. I do wipe down the exterior so I can actually get ahold of it, but inside, it’s just as she was. (I also don’t stake my life on that gun either.)
A clean gun is a happy gun, and a happy gun runs as it should ! Well done, Mike !!!
Thanks for the tip on the JB Bore Paste! I haven’t used that before, nut have heard good things about it.
I really like the idea of cleaning my AR BCGs using the Ed’s Red formula. That sounds like an easy way to get that job done. I hate scraping those with tools.
Rio Linda. God bless you for that one! I loved it! We sure could use a dose of El Rushbo these days.
Good stuff, Mike. I am on the hunt for some Blue Wonder now, too. I typically use M Pro 7, but it comes in a spray bottle and is harder to keep concentrated geographically than a gel would be. I always remove stocks when I clean, that’s a neat tip about covering them in plastic wrap. My shooting buddy is a perfectionist, he has rubbed off on me to some extent- it bugs me to have dirty revolvers. I clean them as soon as feasible after shooting and get them at least “functionally clean”; but rarely inspection clean with respect to things like burn rings on the cylinder front. I habitually remove cylinders and yokes when cleaning, unless it’s a Ruger LCR. Having the cylinder removed just makes the revolver more user friendly to clean. The Colt AR15’s we were issued in NMSP recruit school had the civilian dual screws up front instead of a push pin, so we had to clean them with the upper and lower receiver connected by that #$%*!!! screw. It was a recipe for pinched fingers, blood blisters, really bad language, etc. I never understood why Uncle Sam could trust his Marines not to lose their uppers when they broke the gun into two parts, but baby state cops had to have theirs meaningfully connected. I like to avoid that drama when cleaning revolvers when feasible. Yes, demand Chore Boy! Don’t settle for some cheap generic scrubbing pad like Matt H. mentioned. Chore Boy is 100% copper- it helps cut lead and carbon deposits but won’t score the steel in the chambers and bore. Rah.
Kevin, I agree about the gun being much easier to clean properly with the cylinder removed, and had to chuckle about your AR-15 story, because I’ve had to do that myself and it’s a giant pain in the keester! Many pinched hands and bad words, indeed! ; ^ )
I think you’ll love the Blue Wonder gun cleaner when you try it. The stuff works really great! I haven’t used M-Pro 7 to compare it to, but it’s 10X better than the traditional solvents like #9.
Great article Sir! I find gun cleaning to be sort of theraputic.. but I dont always get into those detailed deep cleanings unless I know I have fired a lot of soft lead or dirty ammunition. Ive used Militec oil for years and it seems to work fine for me. I also use a bore snake on my revolvers for a quick cleaning of the barrel and to reduce the amount of times I put a rod down the muzzle. The snake allows me to clean from the forcing cone to the muzzle.
Ill also function check before I reload and stow away. In addition to cleaning my precious revolvers, ill also inspect and brush out my safafiland speedloaders, load them with snap caps and function test them as well before reloading them for carry. Thank you again for great information!
Glad you mentioned the bore snake, Mark. Those can be really useful, especially on rimfires!
It’s also great advice to clean those speedloaders. They can really get caked with pocket lint, and such. Do it while you’re waiting for the solvent to do its job.
Uncle Sam taught me how to clean guns. Yeah, push ups for any hint of carbon residue.
Nowadays, your method is exactly the way I clean my revolvers! However, I don’t do it until they need it. Yes, they get wiped down with a lightly oiled rag before they go back in the safe.
When do they need it? They tell me! I perform this level of maintenance typically every 1000 to 2000 rounds fired depending on the gun. Hey, I’m a shooter, not a collector! If everything is working fine, wipe it down and keep shooting. If something is squeaky or problematic, yeah, now it gets a full cleaning as you described.
Once you get to know what your revolvers prefer then you can clean them just before they complain!
Jim
That’s fair, Jim. You certainly don’t need to do this level of cleaning every time. If you’re tuned in to what your gun is telling you, you can safely push it off for a while.
I’m just one of “those guys” who seems incapable of doing it!
A carbide lamp!
First thing I noticed when Kevin sent me that photo!
I too cannot bring myself to put away a dirty gun, though I do much less bore cleaning than I used to and rarely use a bore brush. I will typically check zero on my deer rifles and leave the bore alone until the end of the season. I will use a treated cloth to remove the burn rings on stainless revolver cylinders and clean the chambers with an oversized chamber brush. One pass is usually enough. I do not miss the days of using a Lewis Lead Remover at lunchtime to scrape the lead out of my revolver during the police academy with their soft lead reloads.
Makes a lot of sense to leave the deer rifle alone for the season. Hopefully it’s not seeing more than a handful of rounds, anyhow.
I like using an oversized chamber brush too. A .40 caliber brush works pretty good for my .38 Specials, but I do notice that they break down a little faster, and start to lose bristles.
All my firearms get used, so they all get cleaned, lubed, and protected. Since the early 1970s, the first thing I do upon acquiring a firearm is to disassemble and thoroughly clean every metal surface, then to work molybdenum disulfide into every surface. This often changes the color a bit, but protects steel from rust amazingly well, as well as providing lubrication. As far as cleaning after every use, how many time have you bought a new firearm, only to find that it was test-fired by the manufacturer, then packed up and shipped “dirty”? Yeah, more often than not.
Molybdenum disulfide—neat tip, Jay. Thanks!
I always clean my revolvers after I shoot them. I use Ballistol for everything, because that’s what Hickok45 uses, and I just followed his example. I like that it’s non-toxic and comes in aerosol cans. Very convenient.
For my leverguns and my shotgun, I just run bore snakes down the barrel and call it a day. Same thing with my SKS and bolt-actions, although I wipe down the bolts too. With the SKS, I only clean out the gas tube every now and then.
Ballistol is good, but don’t use it on nickel plated guns, and keep it off rubber grips.
Wasn’t that stuff originally made to preserve leather boots?
Why? I’ve gotten Ballistol on rubber grips before, never intentionally, and I’ve not noticed any issues. All my rubber grips are still in good shape.
Axel, I haven’t used it before, but I do see a warning on their site:
“Ballistol is safe on most plastics. Caution should be used when using Ballistol on soft and/or non-oil resistant plastics.”
They say it’s safe on rubber, but a lot of what we call “rubber” grips these days, are just soft plastics.
Huh. Do Pachmayr grips count as rubber? Those, and my French Trausch grips on my Model 10s, are the only rubber(?) grips I currently use.
The factory grips on new S&W revolvers like the 610 are probably not rubber.
I’d definitely count the new S&W grips as polymer. Pachys are probably rubber . . . at least the older ones. I haven’t purchased any new ones in a while, but I’d guess they haven’t changed much.
My Star Firestar grips melted a little… Maybe their stuff wasn’t solvent resistant or something.
Note that optical fiber doesn’t play well with solvents – especially acetone based. If you have fiber optic rods in your sights be VERY careful to only wipe them clean with a dry rag. Worse case there will be no visible damage at the time but the rod will just fall out un-noticed and not be their for your next flash sight picture!
An excellent point, Thomas! Thank you!
Ok, showing me age here; going back to when the model 10 s&w was the standard after we qualified at the range it wasn’t uncommon to have half drums filled with gas to soak them in minus their wood grips. Was that wrong?
Let’s just say there were better options available!
I know diesel was a popular way to strip cosmoline from guns in the military, but that more an issue of expediency and resources than best practice.
Dunking your M10s in gasoline probably helped to soften/remove the carbon but I’m guessing it didn’t do much for leading. It certainly would have stripped any trace of oil from the guns. Hopefully they were properly lubricated afterwards?
Not always. I read a graphic novel (name long forgotten) about an M-8 Greyhound crew in the last weeks of WW2 in the ETO. The novel is based on the author’s grandfather’s story. They cleaned the M-2 .50 in fuel to remove the Cosmoline. It fired a few rounds in combat and locked up.
They never got spares before the war ended, so they were stuck with a .30, small arms, the the M-8’s .37 mm gun, which they did fire once at German snipers in a house, who surrendered quickly when the upper story blew up over them.
Great information in your article regarding revolver cleaning and lubrication, plus all of the advice offered by fellow Revolver Guys.
I just qualified under LEOSA yesterday with my S&W Model 10. Range personnel were intrigued with my six shooter, speed loaders, dump pouches and ammo loops on my 43 year old leather gun belt. My “old school” equipment was of far more interest than my score, although it was passable.
Back to cleaning: never used a lead removal cloth until Colonel Wood suggested it to me recently. Wow! What a difference on my stainless 642. It’s hard to add to the vast knowledge shared here but I’ll add my 2 cents anyway.
– I’ve been using BreakFree CLP for 35+ years. Years ago when I went to make copies of currency for a buy operation, I thought the Xerox repair guy swiped my CLP. He didn’t. He said that was the only lubricant that he knew of that could stand up to the heat of a copy machine.
– I still remove all ammunition from my cleaning area and ensure that no live rounds are in the same room.
– After cleaning I wrap a silicone cloth around the handgun before locking it up in a safe. In the Academy we were advised to never leave our revolvers in our leather holsters. The leather will trap moisture and cause the gun to rust, especially if one just spent 8 hours walking a foot post in the rain. One day I’ll try Kydex.
– I have Pachmayr grips on my revolvers and remove them once a year to check for rust. I wipe down the steel handle a light coating of CLP. So far, so good.
Mike, thanks for another informative article. I think I need to increase my Patreon donation!
Thanks for the kind comments and helpful tips! Glad you found the lead remover cloth to be helpful!
I’m chuckling thinking about the young kids looking at your revolver and support equipment like they were strange artifacts from “The Olden Days.” I wouldn’t feel poorly armed with a Model 10 on my hip, backed up by a few speedloaders, if I was on uniformed duty these days, particularly if my partners thought and operated like 60s-90s era cops. Mindset and Tactics trump equipment, any day.
A previous comment referenced kydex holsters which brings up a question. As everyone else, I know not to store firearms in leather, and actually,
I don’t store them in any type holster, but what about kydex?
(I have a habit of re-reading these articles months later, like refresher courses)😁
I’ve done it for years with no issues, Jim. Just wipe it dry, inside and out, before storage.
Very nice, detailed article.
Something I find helpful is to begin the cleaning process before I leave the range, while the gun is still warm. If you have time run a brush or patch wet with solvent through the bore and chambers, and wipe off fouling before you go home. The warmth may help the chemicals be more effective and in any event, you’re getting a head start on your soak time.
Great idea, Dave!
Good, common-sense article! I may be foolish, but I am a bit lacksadasical when cleaning my revolver. I do use the Chore Boy trick whenever necessary, and also my Lewis Lead Remover. As for oiling. I prefer to use a dry lube, which won’t attract dirt when dry.
But! what gives me fits is the carbon ring around the cylinder mouths! Even the gun cloth requires massive scrubbing, and it still leaves a ring.
Maybe I’ll try the Blue Wonder. One more “magic” potion on my shelf will surely not hurt!
Something I tried once was Wipe Out. I wet the barrel well, and was surprised when it showed traces of blue-green, where it had removed jacket material off the bore. Who knew? Oh, well, live and learn! Keep the good stuff coming!
Thanks Carl, glad you liked it. I’ve had excellent success with the Blue Wonder and think you’ll love it. I’ve also had great success with the lead remover cloths, by wiping the cylinder face with the cloth and letting it sit for a while, so the acid could attack the lead. Used in conjunction with a bronze toothbrush, the lead remover cloths make quick work of the carbon rings on stainless cylinders (don’t use them on blued guns, though—that’s where the Blue Wonder cleaner really shines).
Hi Mike! I was born in the mid 70’s and learned to love and appreciate wheelguns as a young nacho on the block! Love your website btw and on various gun forums I have seen it mentioned so I am hoping you get tons more traffic! Anyway, I have some tips that might not be for everyone but just wanted to share:
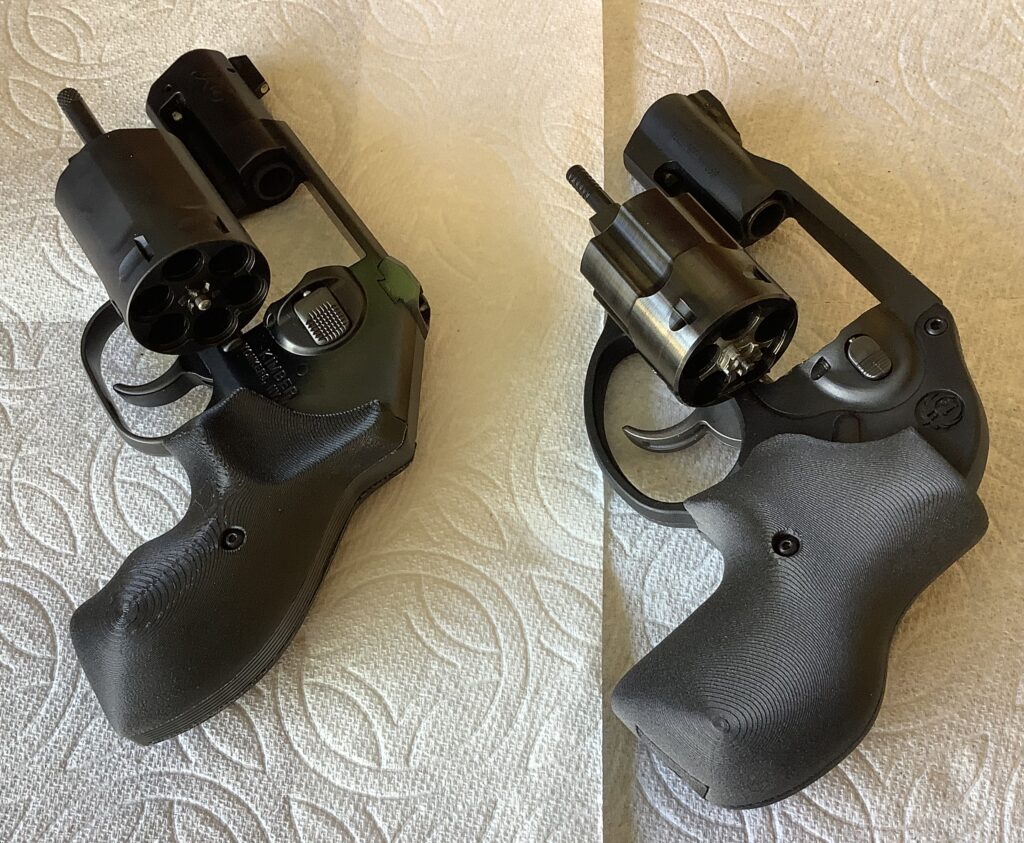
1. Buy 2 of the same model gun that you use for CCW purposes. For me I have a 642 and 442 J Frame. This may seem out of the budget for some folks but it completely pays for itself by never having to worry about carrying a dirty gun. At the range after I am done running a few cylinders of one gun, I take out the other fresh clean gun and only run 1 cylinder to function check it and holster up and am good to go until the next range visit
2. At the grocery store visit the clearance section and purchase some of the discount dog wee wee pads. I use these as a placemat when cleaning my guns and dispose of it after. As you mention in your article, I too believe in minimizing lead particles on my skin, clothes as much as possible. I have young kids at home so I want to protect them too. Like you, I also wear nitrile disposable gloves when cleaning
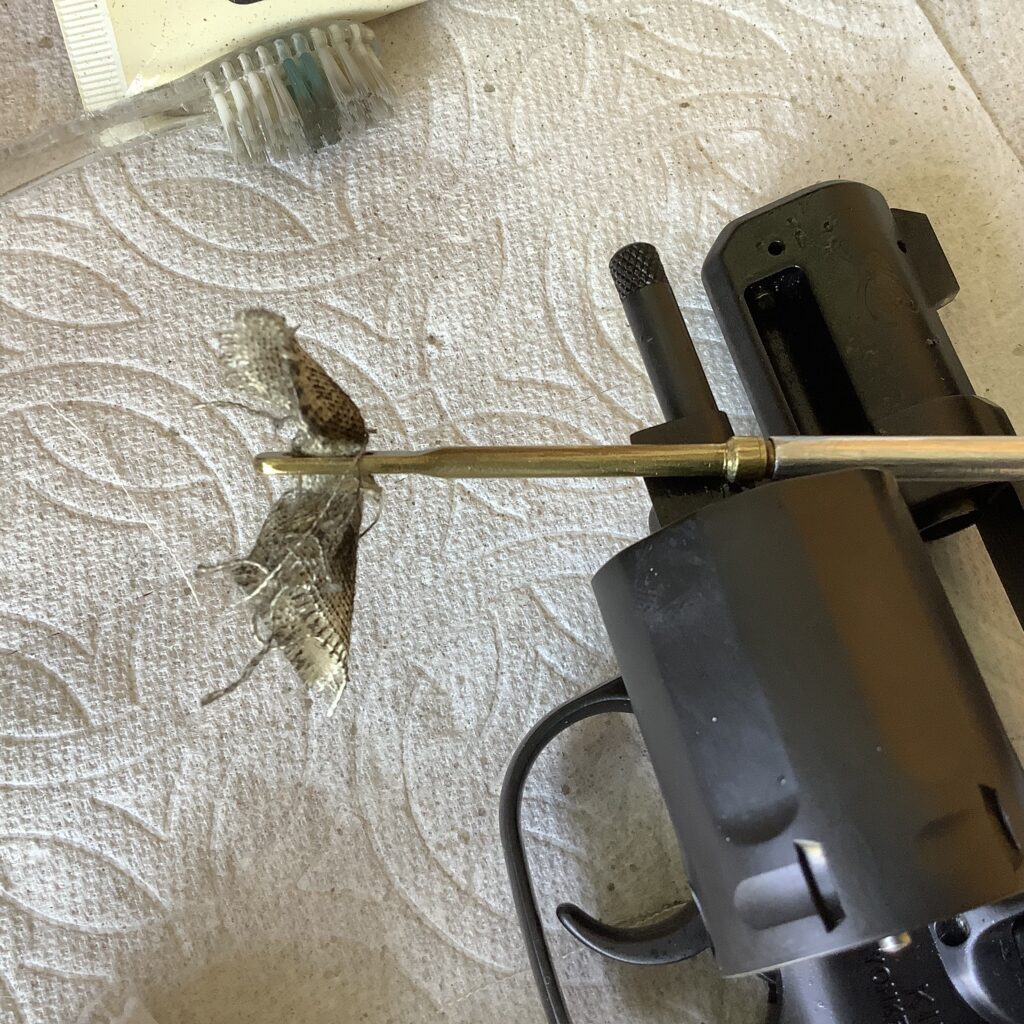
3. Use Q-tips soaked in solvent for the “naughty bits” like under and around the star extractor. If you need to scrape at built up carbon you can also break the Qtip and use the wooden handle as a gentle scraper. Wood can’t scratch steel.
4. Use of a bore snake in the bore and charging holes after the solvent has sat a few minutes. This really helps scrub everything and after a few passes I run a dry patch and everything is usually spotless
5. I also focus on scrubbing the forcing cone and the carbon rings with a brass brush soaked in solvent. Usually after 5 minutes it looks almost new. Some folks run aluminum wheel mag polish for really stubborn carbon that won’t come off
6. I really enjoy cleaning my guns indoors and because of my family I have switched to odorless products. Currently the MPro-7 solvent and oil is what I am using. They work wonderfully and are truly no odor. I DO keep an old rag that was soaked in Hoppes9 tucked away in a ziplock bag that I break open for a whiff sometimes – just don’t tell my wife!
Thanks again for the entertaining site and awesome content! Perhaps some meat target testing is on the docket for future articles??? Hmmmm 😉
Nacho! Welcome aboard, amigo, and thanks for the EXCELLENT list of tips and suggestions! I really like those, and appreciate you sharing them! I’m definitely gonna look for some of those dog pads at the store.
I really like using bore snakes on my .22s, since it’s tight to get a rod and patch in there.