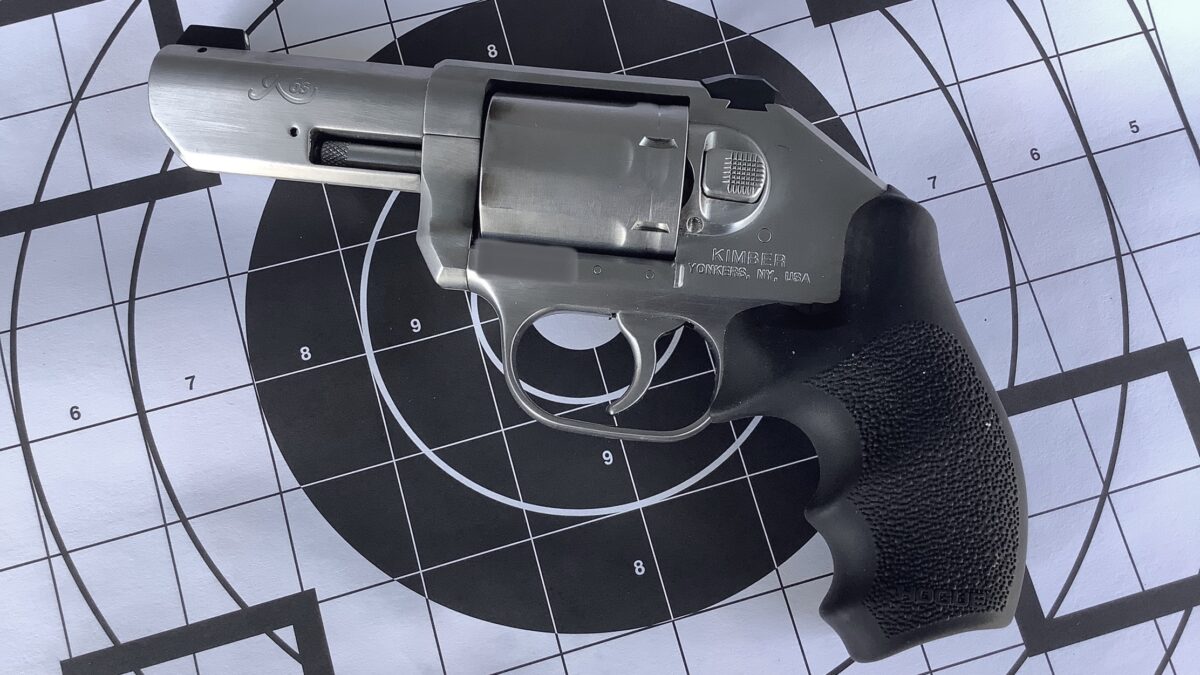
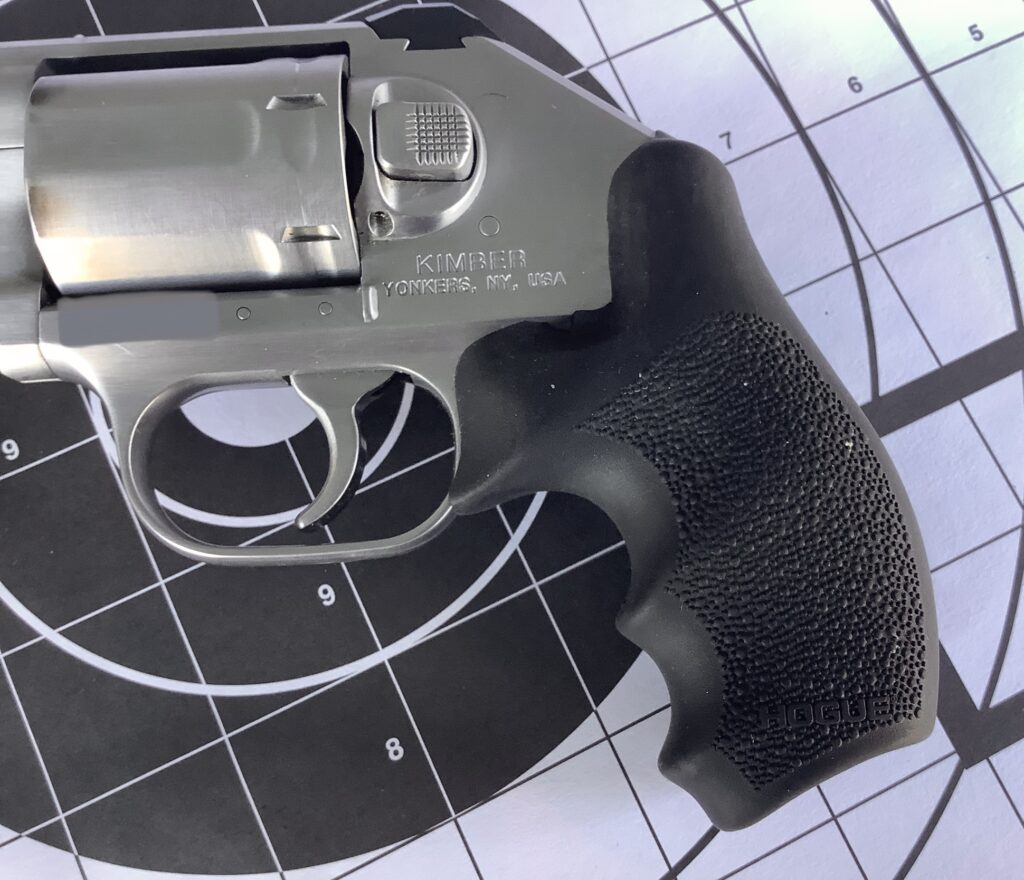
A few weeks back, I detailed some fixes and modifications I’d been working on for my set of Kimber K6S revolvers. One of these was the addition of a set of Hogue rubber Bantam grips for my three-inch stainless model.
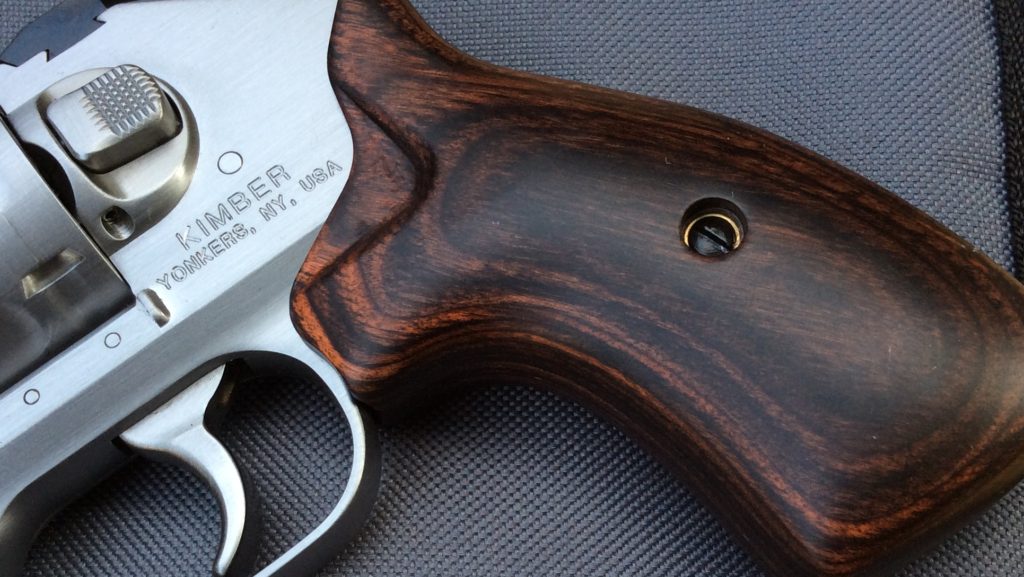
The overmolded rubber Bantams were a big improvement over the smooth walnut stocks that came with the gun. The walnuts were attractive, but they didn’t fill my large hand very well, and their smooth, glossy surface also didn’t offer much traction.
I was interested in another option, but was hesitant to spend the money on some of the more expensive alternatives, like the attractive Boot and Altai grips from Altamont, or the G10 Bantam grip from Hogue. Those looked like promising designs, but I didn’t want to spend that kind of money without first giving them a try in my hand. I’ve been bitten before by grips that looked wonderful in a catalog, but proved to be disappointing once I wrapped a paw around them. “Try before you buy” is definitely good advice, when you’re shopping for grips!
A 90% solution
RevolverGuy Dean Caputo came to the rescue with an extra set of the rubber Bantams, and I was glad to give them a spin. I’d “tried them on for size” in the booth at SHOT Show a while back, and walked away with a favorable impression of them. When I received them from Dean, I put them on my three-inch stainless K6s right away, and I liked how they felt.
At the range, the rubber Bantams offered excellent control of the gun, and the soft rubber also ate up a lot of the recoil, making it reasonable for me to shoot .357 Magnums in the gun–something that wasn’t pleasant with the OEM wood stocks. The “grippy” rubber stocks made it a little harder to draw from concealment at times, with my shirt getting snagged on the tacky surface (proving a big advantage of wood or hard plastic grips, which allow clothing to slide across them much easier), but with some extra attention to how I cleared my cover garments, it was easy to work around that.
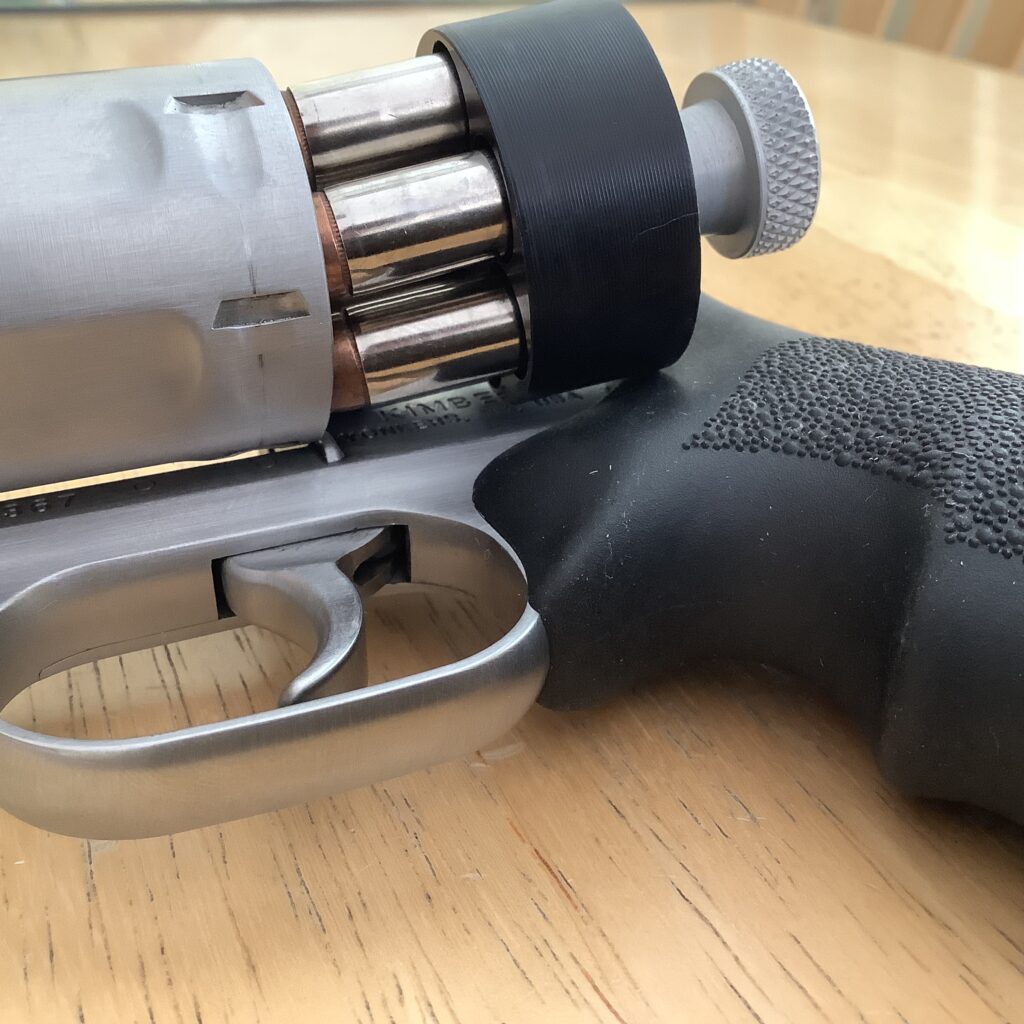
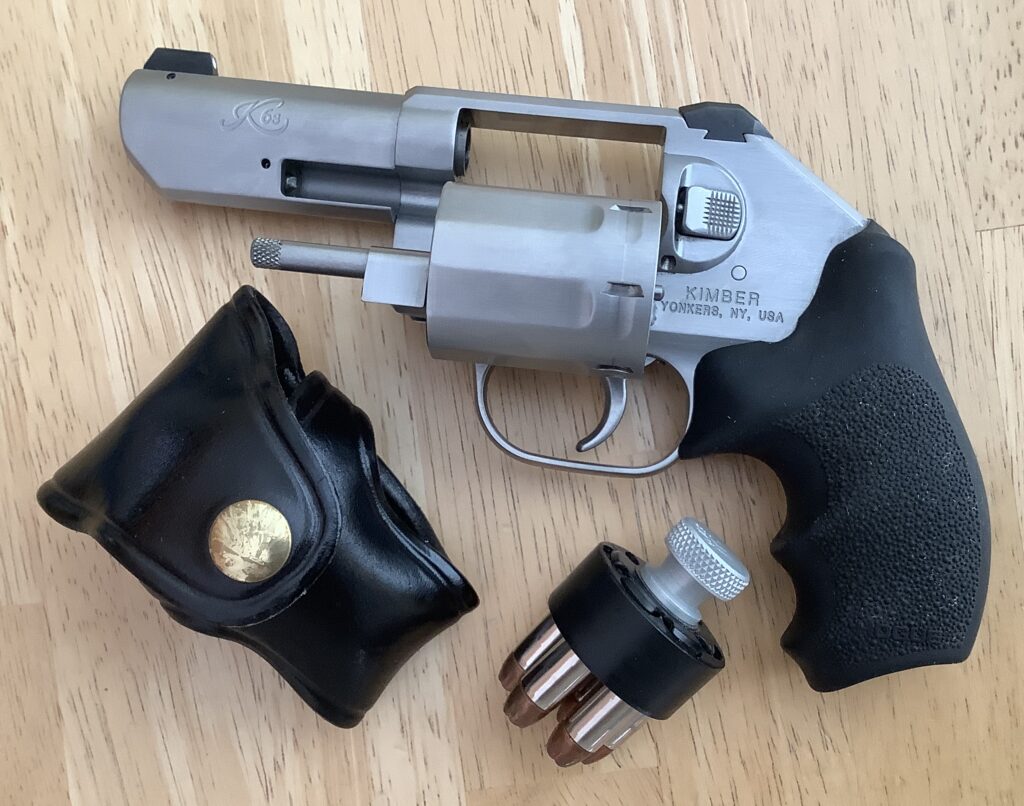
Unfortunately, though, the speedloader relief on the Bantams wasn’t generous enough to allow me to use my HKS DS-size speedloaders without interference. That was something I’d definitely need to fix if these grips were going to have a permanent home on the gun. I couldn’t live with grips that were a roadblock to a smooth reload.
Dusting for prints
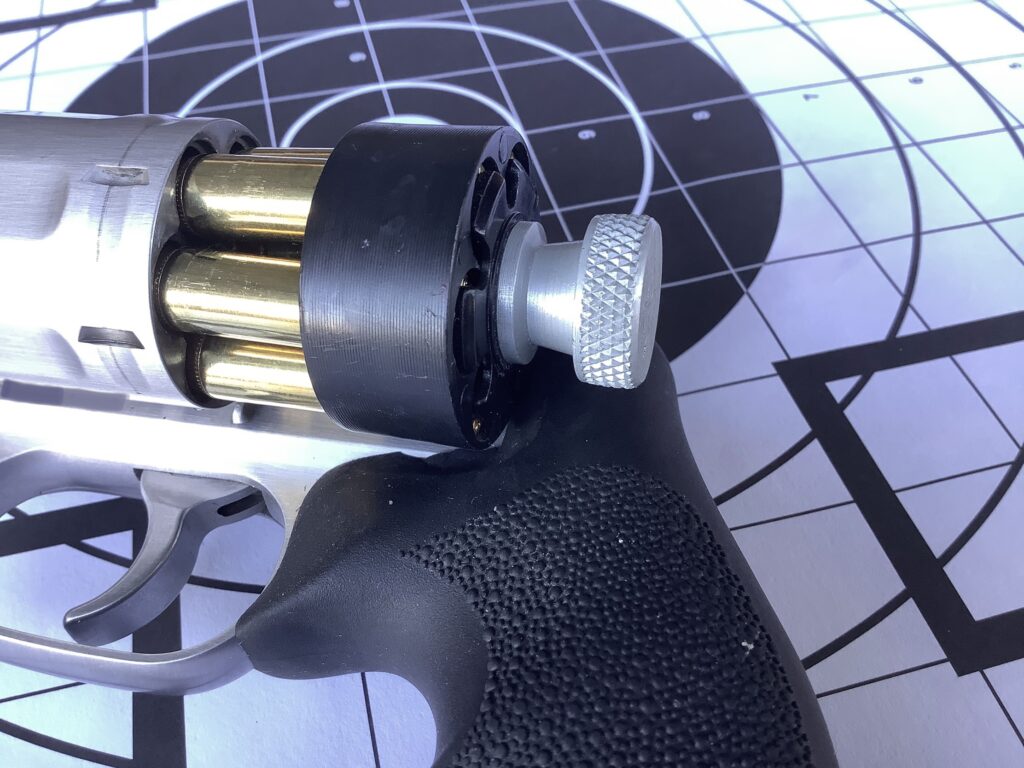
There wasn’t much contact area between the speedloader body and the rubber grip, but there was just enough to cause some nagging interference and gum up the works.
In an effort to identify the offending area, I worked the loader in and out of the cylinder, in the hopes that it would leave a mark on the rubber. That didn’t work so well, so I started looking for a better way to map out the area that I’d have to relieve.
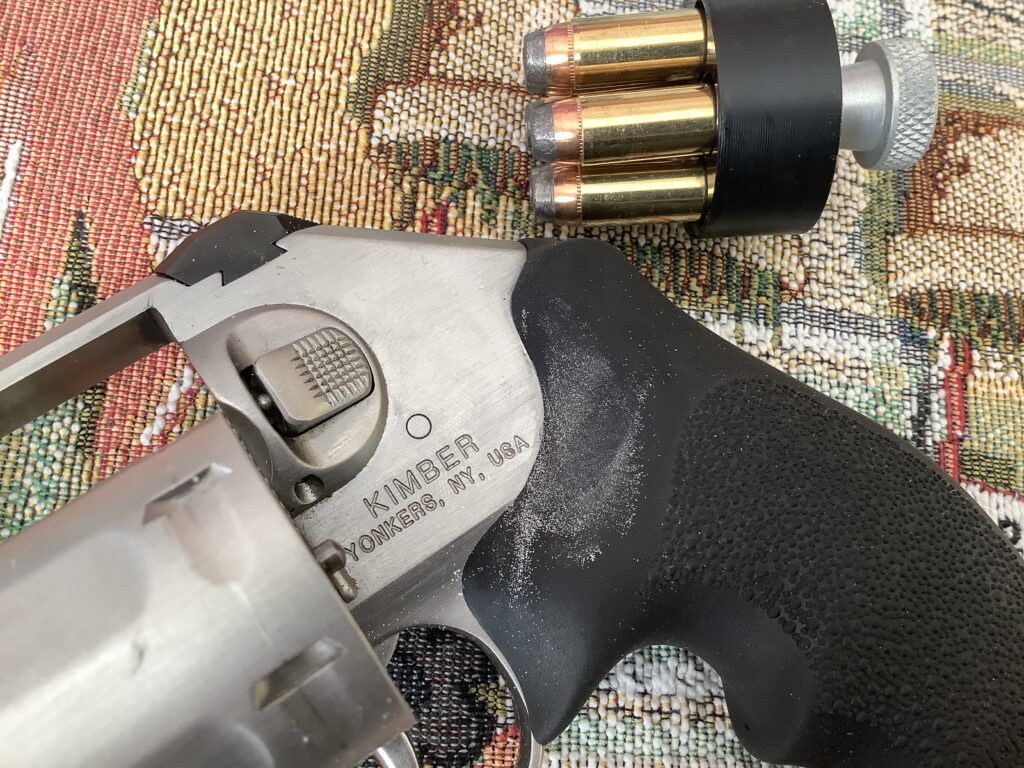
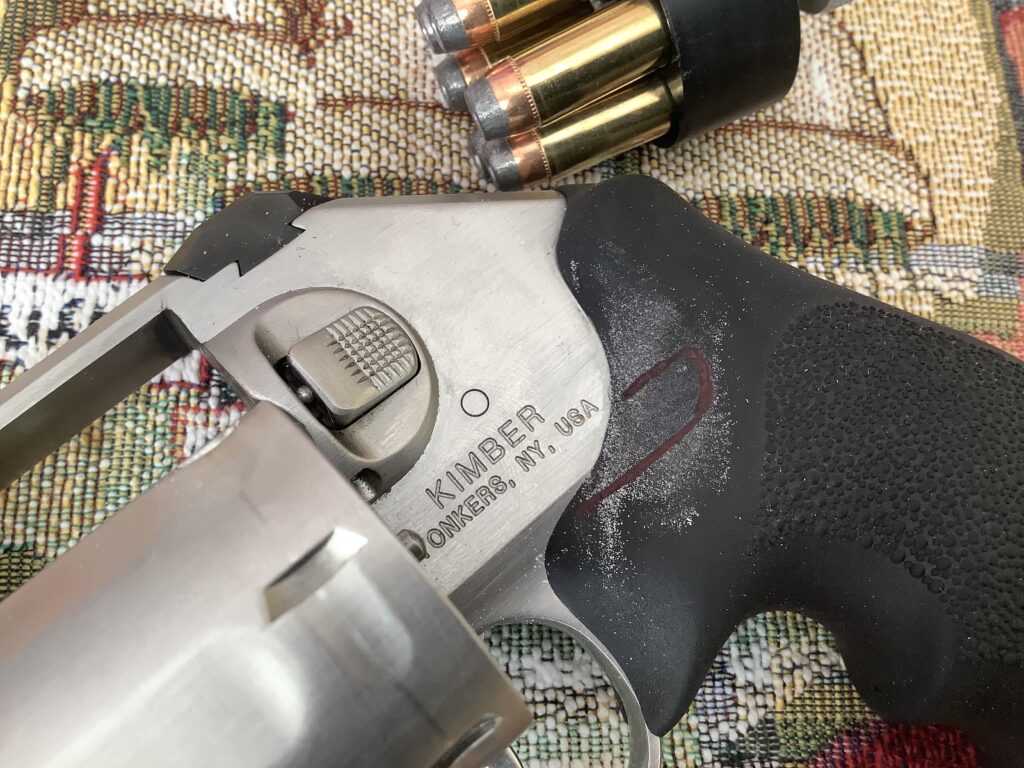
I was going to use some chalk, but that was all the way out in the garage, and I was feeling lazy. While sitting there at the kitchen table, I realized a pinch of flour from a nearby shelf would allow me to dust the grip well enough that the loader body would leave a trace as I worked it in and out of the cylinder. I loaded the HKS with some long, 158 grain .357 Magnums (the longest cartridges I was likely to ever shoot in the gun), and worked the loader back and forth. It worked like a champ, and after it was clear where the contact area was, I marked it with a ballpoint pen to make it a little more durable.
bad words
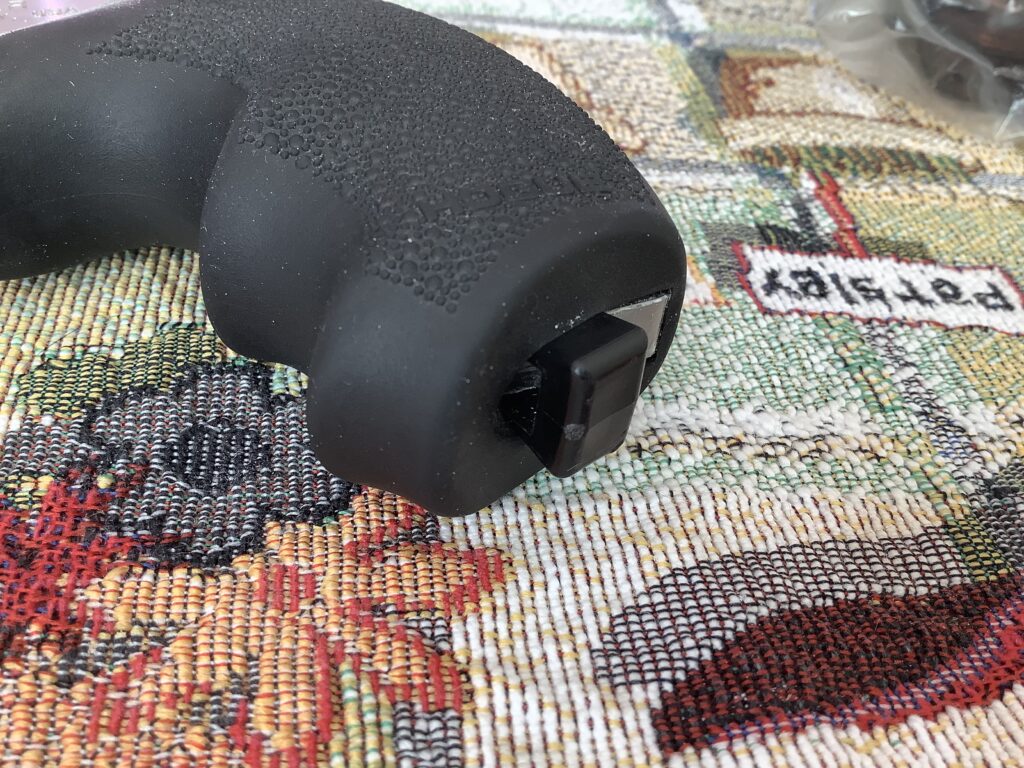
The Bantams mount to the K6s in a unique fashion, without any screws or additional hardware to hold them in place. Instead, the cross-pin at the bottom of the K6s frame, which is used to locate and secure the grip panels of the OEM stocks, rides in a curved track inside the Bantam grip, and snaps into a recessed hole at the end of the track, to hold the unit in place.
The arrangement works well to hold the grips in place securely, but it’s a real pain in the neck to remove the grips for routine cleaning and service. Hogue provides a small plastic tool that you can wedge into the bottom of the grip to spread it apart just far enough to let you get the frame’s cross-pin out of the recess inside the grip, but it takes a lot of pulling, twisting, and bad words to get the grip off the frame.
I was able to do it without breaking the hard skeleton frame of the overmolded grip (a danger, if you try to spread the grip too far apart), but it wasn’t a lot of fun. I was glad I had marked the offending area with a pen before pulling the grips off, because the flour footprint wouldn’t have survived the removal effort.
Mr. dremel
At Dean’s recommendation, I threw the grips in the freezer for an hour to harden up the soft rubber for the grinding I was about to do on them. That turned out to be an excellent idea, and I’d highly recommend it for anyone who plans to do a similar operation.
Once I had a Hoguesicle, it was off to the workbench in the garage, to introduce the grips to the tool that has ruined so many guns in the wrong hands (and kept so many professional gunsmiths in business) . . . the dreaded Dremel!
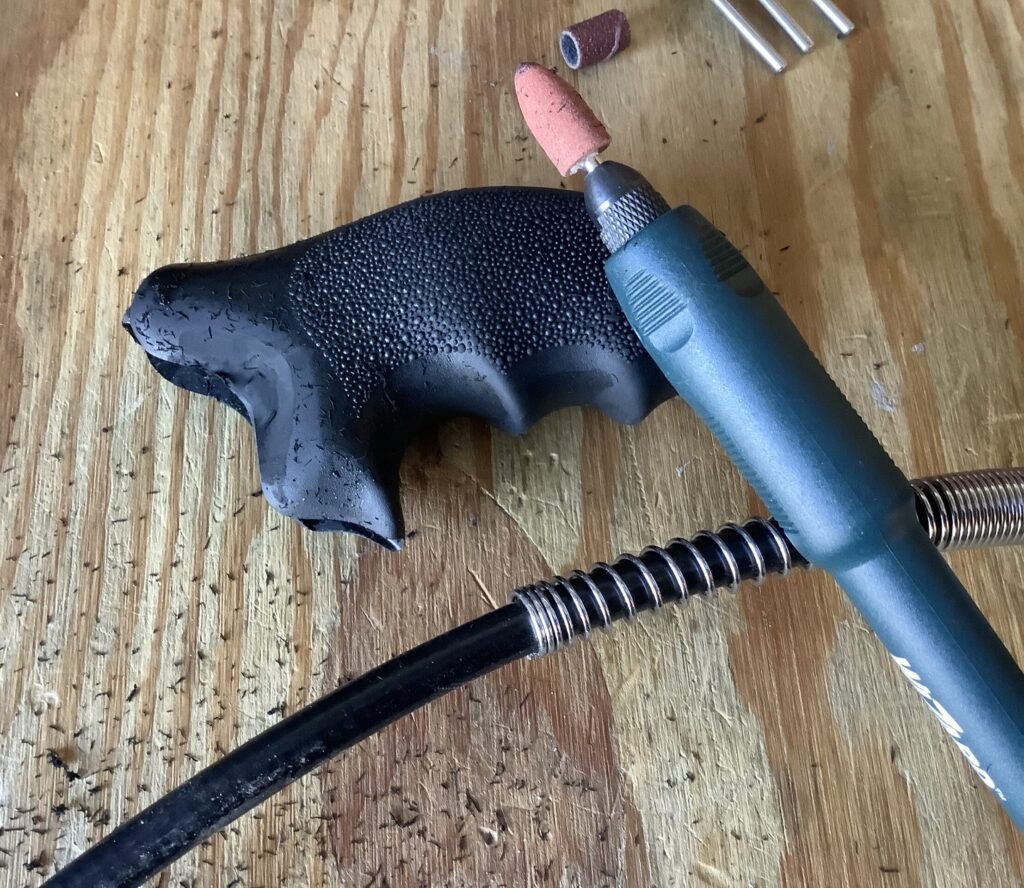
I chose a smooth, bullet-shaped tip for the job and within a few minutes, I’d ground away the marked area on my grip, and smoothed out the edges, to form a nice transition. That freezing trick really made a difference here, allowing me to remove the material cleanly, without melting it from the friction.
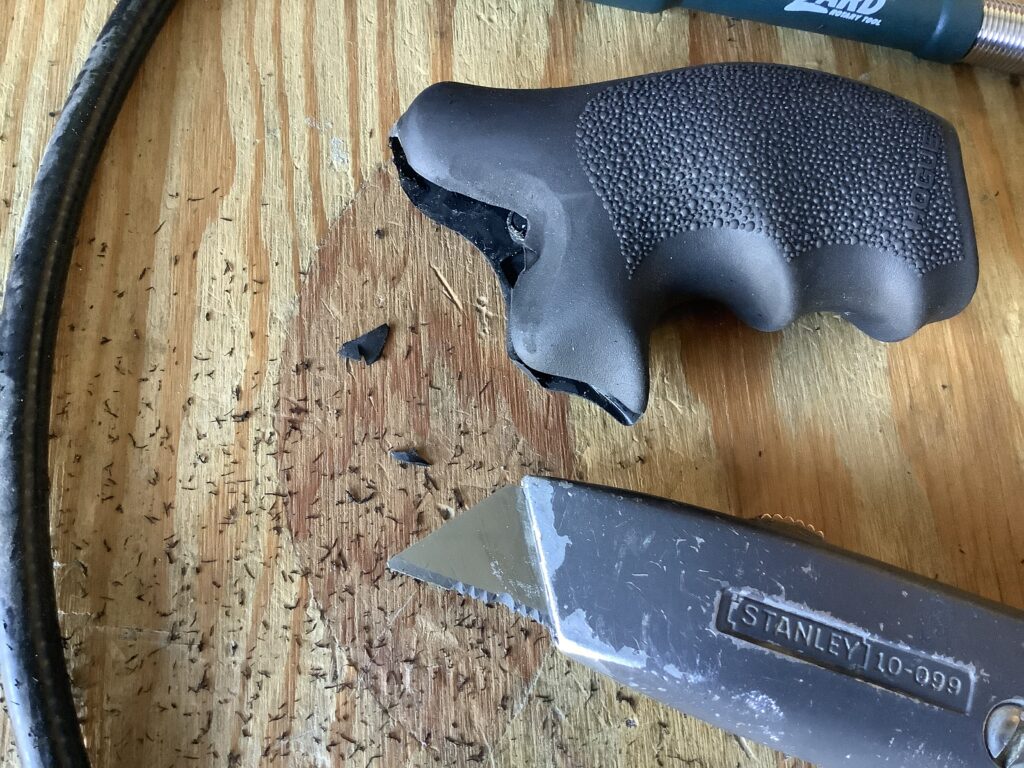
There was a thin web of rubber left inside the angle of my cut that wouldn’t last long before it would tear, so I trimmed most of it off with a razor knife, relieving the entire area at a right angle. The material is still a little thin at the bottom edge of the relief, and there’s a small tear in it that I couldn’t avoid, but it’s small enough that it doesn’t draw attention and I don’t think it will be a problem.
Fit and finish
Knowing how difficult it was to remove the grips, I didn’t fancy the idea of doing a lot of testing and removing to fine tune the fitting, so I tried to eyeball things without mounting the grips to the frame. I made a few tweaks here and there, and smoothed out the edges so it would look good and feel comfortable when my right thumb found that area as part of my grip.
When I was satisfied that I’d removed enough material, I waxed up the stainless frame of the K6s with a little more automobile paste wax, to provide a protective layer that would prevent rust from forming underneath the rubber grips (a common malady with these, unfortunately–especially on the old Pachmayrs, with their steel frame). I knew I wasn’t likely to remove them frequently, so that seemed like an especially good idea. Because the wax hadn’t dried and hardened yet, it “lubricated” things and made slipping the grip onto the frame easy work, when I got to that step.

With a “pop,” the grip was locked into place, and I wiped away all the extra wax and rubber dust to give it a whirl with my HKS loader. The moment of truth had arrived . . . would I have to arm wrestle with the grip again, to get it off the frame and tweak it some more, or did I get it right the first time?
victory!
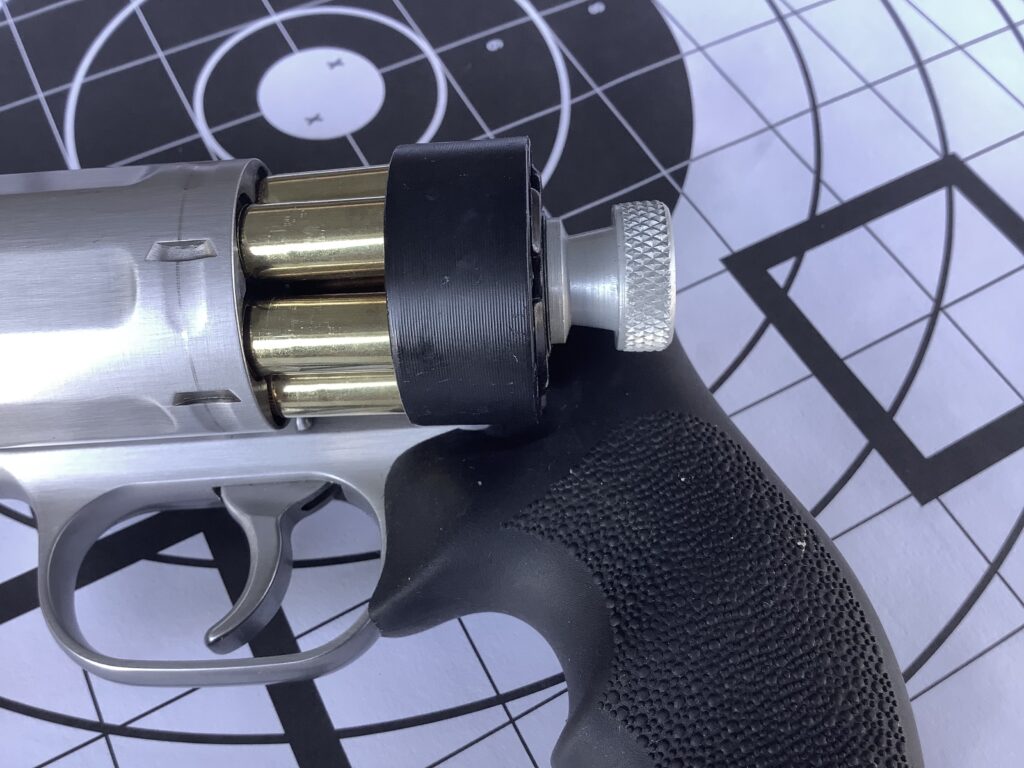
I needn’t have worried. I was really pleased to see that I could get the loader mated up to the cylinder without any interference now, even with the longer Magnum cartridges in the HKS.
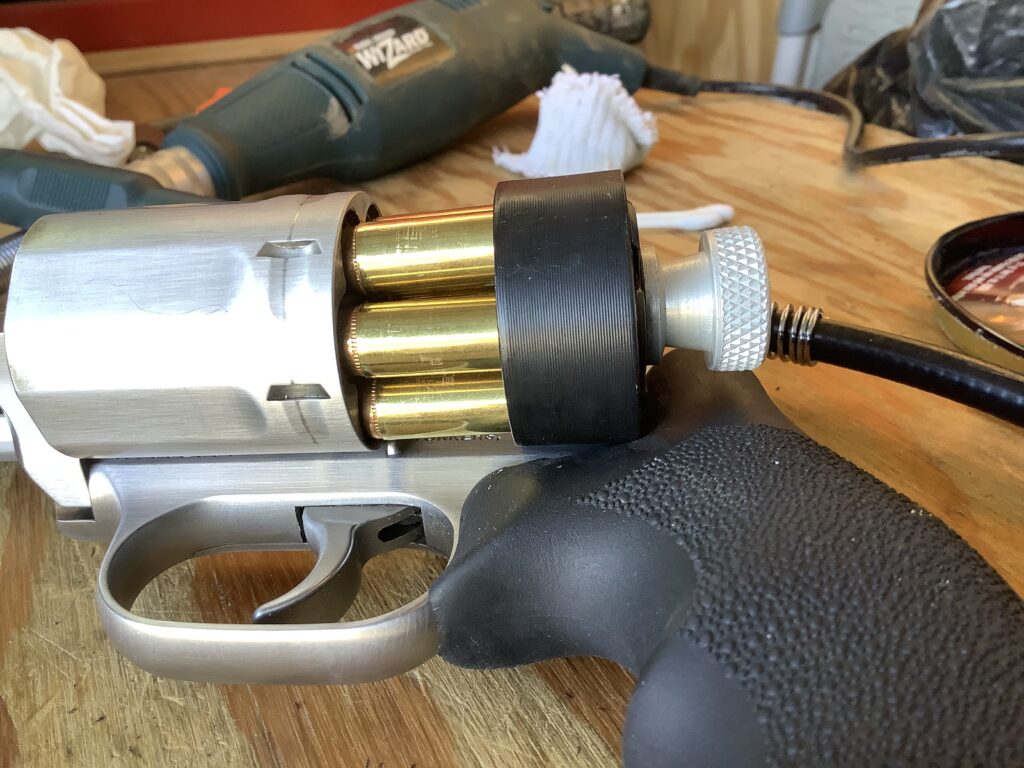
In fact, if I lined the tips of the bullets up properly with the chambers, I could let go of the loader and it would freefall into place, via gravity. Now THAT was the kind of fit that I wanted for the round body loader! A little twist of the release knob, and the cartridges found their home right away, without any hesitation from being bound up by a loader body that was angled from its contact with a proud grip panel.
get busy!
A trip to the range the next day verified the work. I was able to keep the little K6s topped off quite nicely with the HKS loaders, as I made my way through the defensive shooting drills a fellow instructor ran us through. It was just a small tweak to the grips, but it made a BIG difference in the performance.
I’d like to encourage all of you who might be living with “90% grips” to try your hand at fixing them, like I did. If you’ve got a finger groove that isn’t working for you, or a speedloader relief that isn’t good enough for the job, then get busy with your Dremel or some sandpaper wrapped around a dowel rod, and make them right!
Remember the freezer trick, if you’re working on rubber grips, because it works like a champ. If you have yours out on the workbench too long, you might even want to toss them back in for a while, to harden them up before you finish the work. Let me know, here in the comments, how it worked for you.
Be safe out there everyone, and a MERRY CHRISTMAS to you all!! I’ll see you again in 2022!
Thanks for sharing the freezer trick. I have done some work with Hogue grips before (removing finger grooves and even modifying LCR grips to fit an SP-101). What I did worked out, but I did have to deal with the melting issue. The freezer trick would have saved me some headaches, as well as probably speeding up the process and making it easier to see exactly what I was doing. I don’t know if I will be working on any rubber grips again in the future, but, if so, I will be freezing them.
You’ll be pleased with the results if you do!
I also went to the Hogue Bantam grip on my K6S DASA 2″. While the OEM walnut grips looked great, the Bantam fills my hand much better and provides way better control and recoil absorption with the Underwood +P loads I prefer to run in this revolver.
Btw, I’m using the 5-Star K6 speed loader with it, and it works perfectly with the Bantam grip as-is.
Good info, Hammer, thanks. Those 5-Stars seem to fit most grips pretty well as is, but I’m afraid this old dog has trouble with them twisting the “wrong” way. Hard to learn new tricks!
Sandpaper has solved a lot of “chainsaw traction” pain that some of the more aggressive G10 grips offer. I highly recommend the Hogue G10 grips on the K6. The finger grooves actually align to a human hand’s fingers, and the pinky groove really anchors the K6 recoil impulse. I use speed strips, not speedloaders, so I don’t know if an HKS will clear the side.
I got the Hogue G10 with Piranha texturing. A little select smoothing on the sides to avoid imprinting a hex pattern on my palm turned them into comfortable, highly controllable, and good-looking grips. I primarily carry a 3” DOA K6 while working outside, but a 2” model with these grips still fits in a larger front pocket.
Thanks Anner. I had to do the same with the VZ Stipple grips, to make them useable. I’m glad to hear the Hogue G10s fit so well, and will try to get my hands on some at SHOT.
Hoguesicle… Good one, Mike! Nice work with the Dremel, too. I have the pair of Hogue G10’s that came on the 2″ K6s TLE. They are properly relieved for magnum rounds out of the Kimber branded 5 Star or HKS #10’s (but not HKS DS, oddly). I hope Hogue takes your labors as a hint that they should properly relieve their rubber Bantam grips for speedloader clearance with the K6. The left panel of the G10 grip has a chamfer that they should be able to replicate on the rubber grip, I would think. Thanks for the info.
Great info on the loaders, buddy! It’s certainly strange that the HKS K-Frame loader works, but not the D-Frame. There’s always some unique twist, isn’t there?
I recall a piece you guys did on loaders from zeta6. Wonder if their K-CLIP would work with your Kimber and an “unsicled” Hogue grip. I’ve had good results using their K-PAK loaders in my six-shot revolvers.
Affirmative – the K-Clip works just fine with an unaltered Hogue Bantam on the K6S.
Thanks Hammer!
The blue rubber boot grips that came with my Kimber work fine for me, on an early production K6S
Zeta 6 K-Clips work great with it. That is now my go-to for the gun.
Hoguesickle . . . love it !! I’ve had a set of bantams on my 3″ S&W M65-5 and 2.5″ M66-3 and they are great on K/L-frame concealed carry guns. I might have to try the Hoguesickle trick on square butt Hogues – which are just way overdone.
Nicely done! And, I really liked putting the grip (stock – sorry, Old Old School) in the freezer beforehand. That one is going in my bag of tricks.
Anyone have a valid link to these grips?
I can’t seem to find them anywhere online.
Thanks !
Here’s the link on the Hogue site. They currently seem to be “out of stock” on the black ones, but have the brightly colored ones available (gee, surprised?):
Kimber K6s Bantam Grip
Thank you !
Nice article. Any idea where I can find the U shaped wedge tool you have shown in one of the pictures ? You say Hogue provided it but I can’t find it anywhere on their site. Any info would be appreciated. Thanks -Lee
Lee, it was included with the grips. I bet if you called their Customer Service, they would probably send you one. Ask for some extra frame pin cups, while you’re at it, because they don’t last.