If you’ve been hanging around RevolverGuy for a while, you probably recognize the company name, TK Custom. We featured TK Custom as part of our Gunsmith Roundup series last year, but even before that, Justin was writing in these pages about their excellent moon clips and tools, which really set the standard for RevolverGuys who shoot auto cartridges out of their round guns.
We’re big fans of the work that gunsmiths Tom Kilhoffer and Eli Johnson are doing at TK Custom, and were very excited to get our hands on one of their latest new products, a spring kit and replacement firing pin for the Kimber K6s revolver.
The “What if?” Game
We’ve done a lot of coverage of the Kimber K6s here at RevolverGuy. We wrote the most in-depth articles on the development and inner workings of that gun that you’ll find in print, and also ran a very detailed field test of the K6s, that highlighted both the pros and cons of the revolver.
While there’s a lot to like about the Kimber, one of the things that concerned us was the early reports about firing pin failures in the gun, several of which happened to a member of our test team. We had detailed conversations with Kimber about that, and they got to work on a fix, which partly involved changing firing pin materials from titanium to steel. The new design, steel firing pin was incorporated into all K6s models (both DAO and DASA variants) in the 2019-2020 timeframe, to remedy the issue.
That’s excellent news for new buyers of this gun, but those of us with older guns were still left a little unsettled. While it appears the older, titanium firing pin failures were a rare event, and it was unlikely most of us would ever have a problem with our guns, there’s still that nagging doubt that can be hard to dismiss. You can live with a recreational gun that might have a hidden flaw inside, which can pop up without notice, but you can’t go heeled with a gun that you don’t have 100% confidence in.
TK To the Rescue
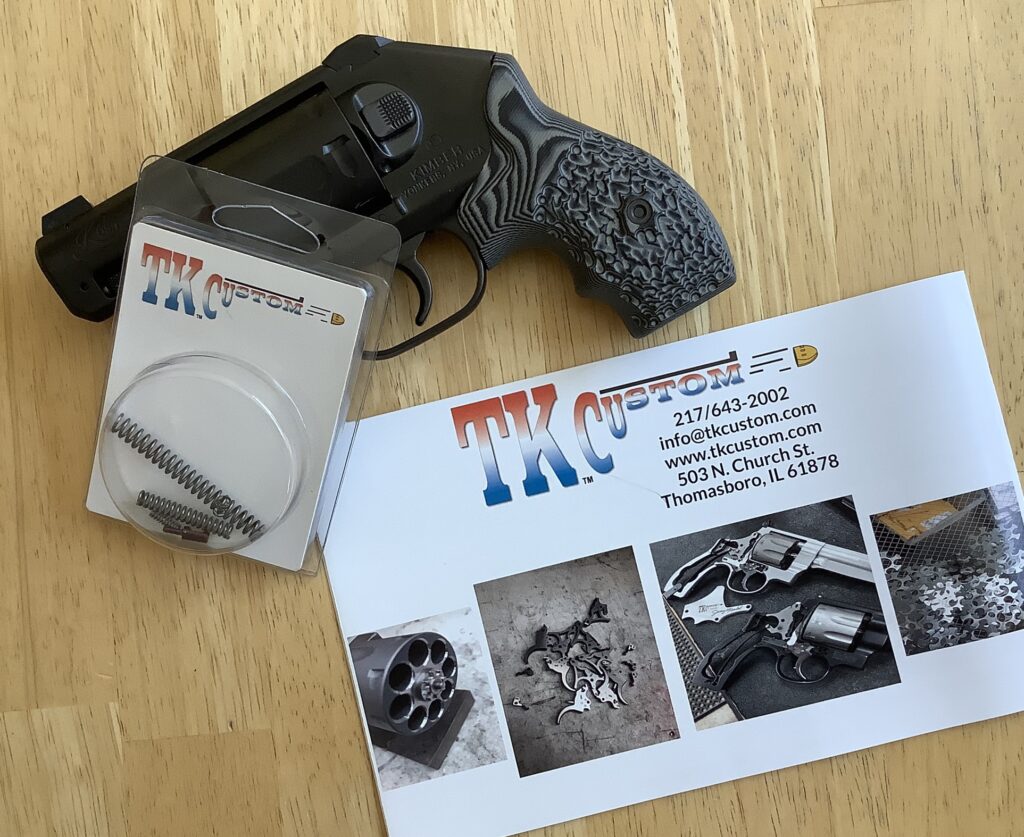
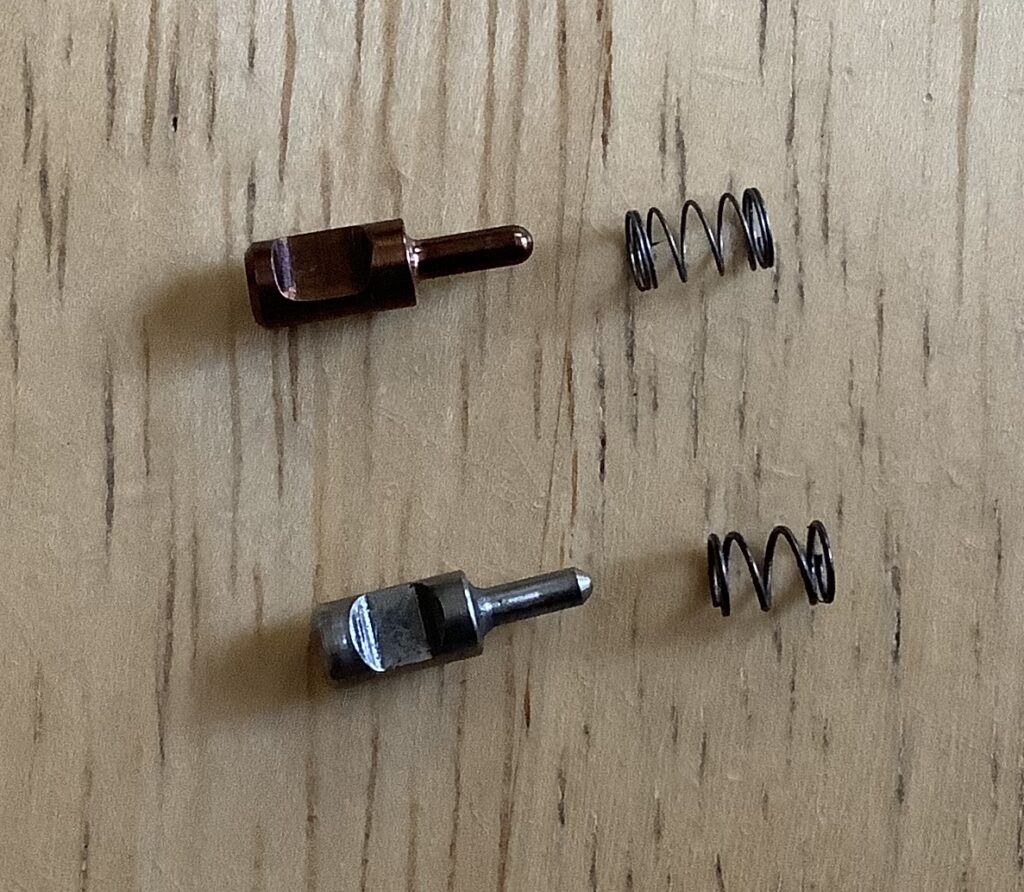
Well, worry no more, brothers and sisters, because TK Custom has the solution to our problem. With their new spring and firing pin kit for the K6s, you can now swap out your OEM titanium firing pin for a TK Custom extended firing pin, made from 17-4 heat treated stainless steel, and put your mind at ease.
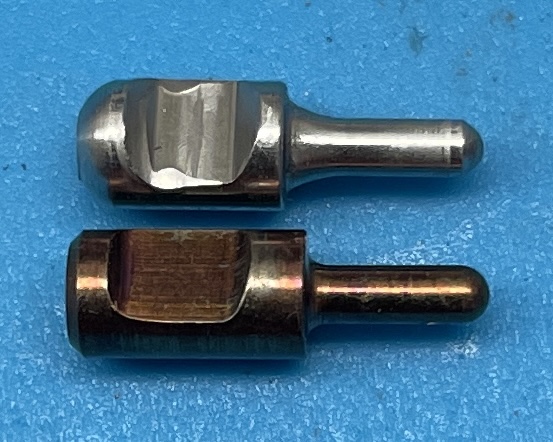
Rest assured that TK Custom is rolling their own firing pin—this is not a part being purchased from another vendor. We know that other outfits are offering replacement firing pins for Smith & Wesson revolvers that are similar, but the TK firing pins are not a repurposed S&W part. TK Custom gunsmith Eli Johnson advises that the TK firing pins were specifically designed for the Kimbers, and have a few thousandths of tolerance to ensure they’ll work in all Kimber revolvers, since there’s some variance in the factory specs. With over 500 of the kits already sold at the time of our interview with Eli, he hadn’t received a single complaint about the firing pin fit, and our samples worked great, too.
Springs and things
At the same time you’re replacing your firing pin, you can upgrade the springs in your gun with TK Custom springs that will reduce the factory weight of pull down to about 9 pounds.
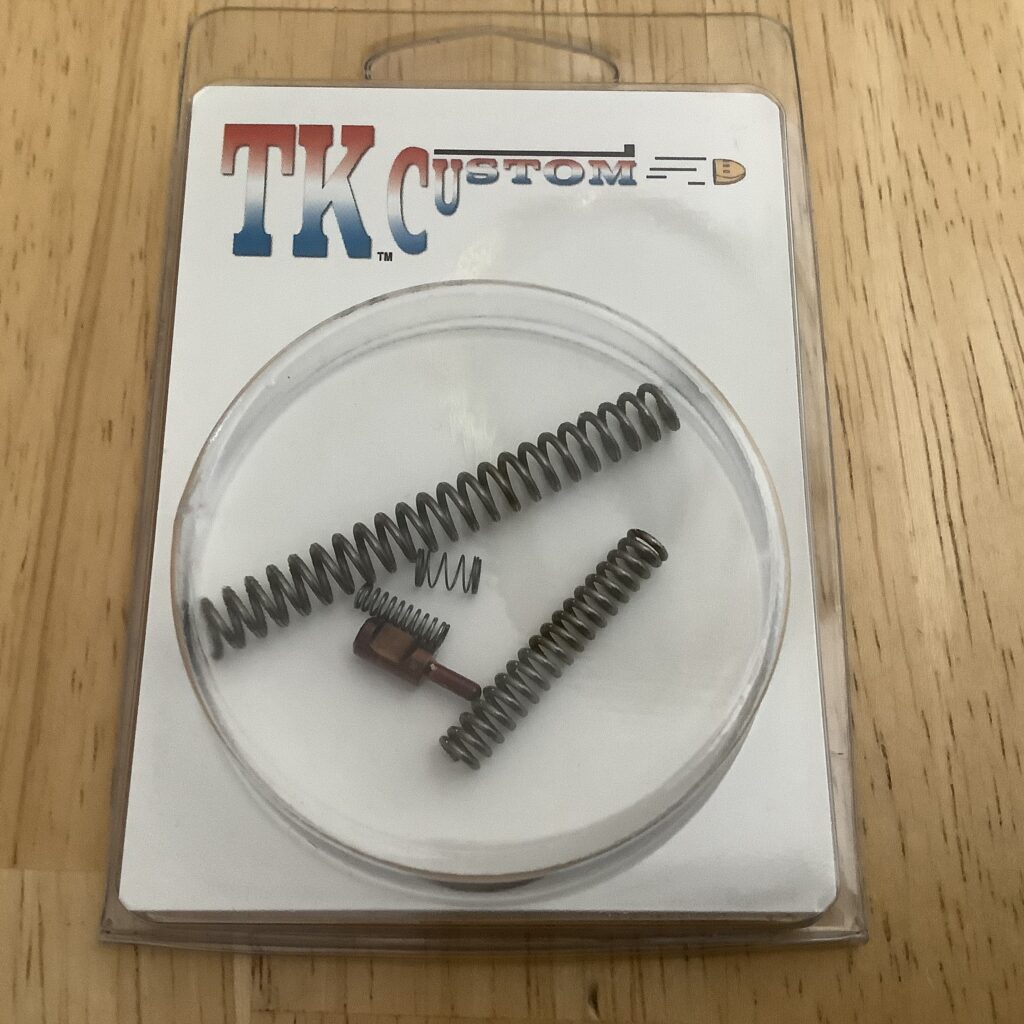
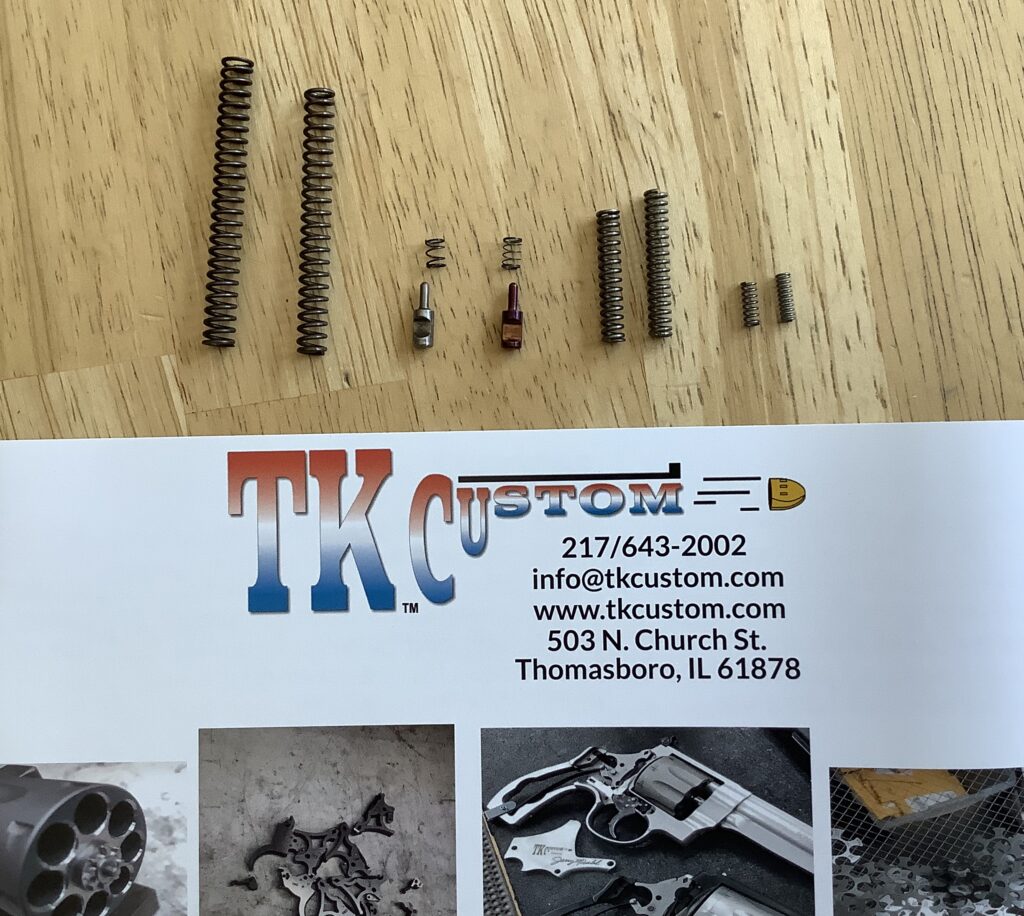
The TK Custom spring kit includes four different springs: A firing pin spring; A mainspring; A rebound slide spring, and; A cylinder bolt spring. Comparing these to the OEM springs reveals that the TK firing pin, rebound slide and cylinder bolt springs are longer than their factory counterparts, while the mainspring is slightly shorter.
Eli advises that the greatest reduction in the trigger pull weight comes from the TK rebound slide spring, not the mainspring. He said that using the OEM mainspring would probably give about a quarter pound more pull weight than the TK replacement part, but their rebound slide spring is what really makes a difference. We’d agree with that assessment, based on our experience with the kit.
Interestingly, Eli told us that he feels the OEM cylinder bolt spring places too much tension on the bolt, which causes it to drag excessively on the cylinder, as it rotates. As a result, he includes a lighter spring in his kit, to help alleviate this. He reports no issues with the reduced spring rate failing to hold the bolt in place, when it’s time to lock up the cylinder.
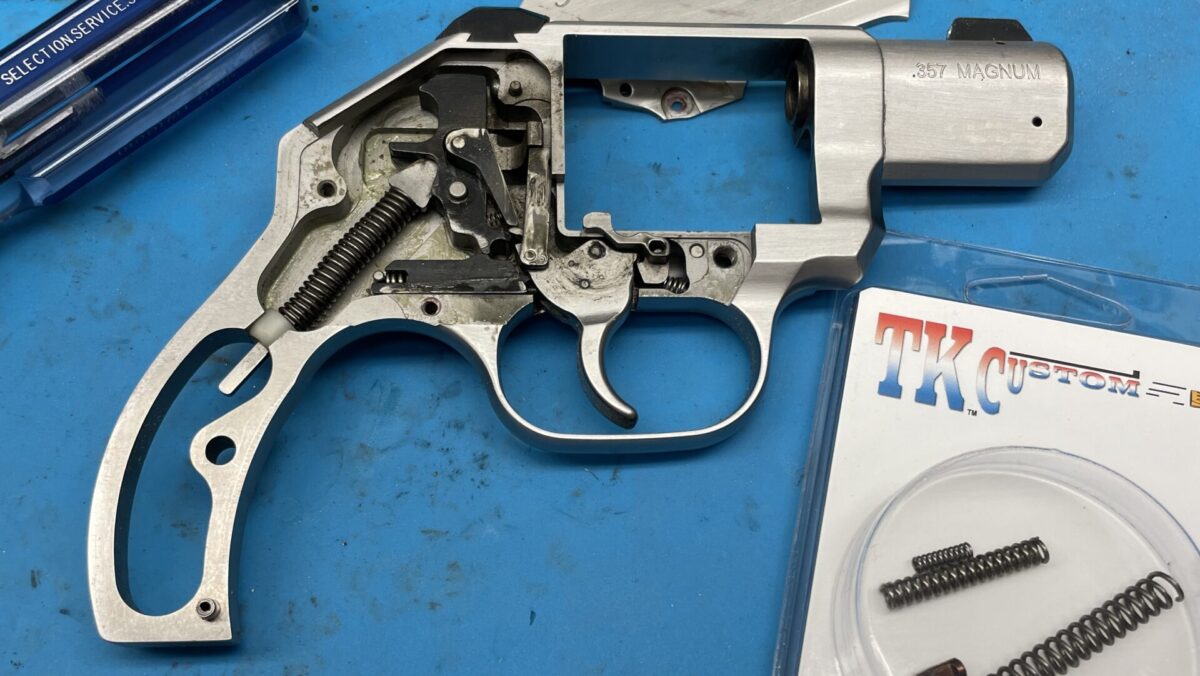
Installation
If you know your way around the inside of a Smith & Wesson already, it will be a cinch for you to install the TK Custom spring kit in your Kimber K6s. If you’re not comfortable with taking the sideplate off and getting under the hood, then it won’t take your favorite gunsmith long to change everything over for you. The gang at TK Custom will be happy to do the job for you, too, if you want to send your gun to them (and take advantage of their other custom services, while you’re at it—machining, barrel venting, chamber honing, refinishing, etc.).
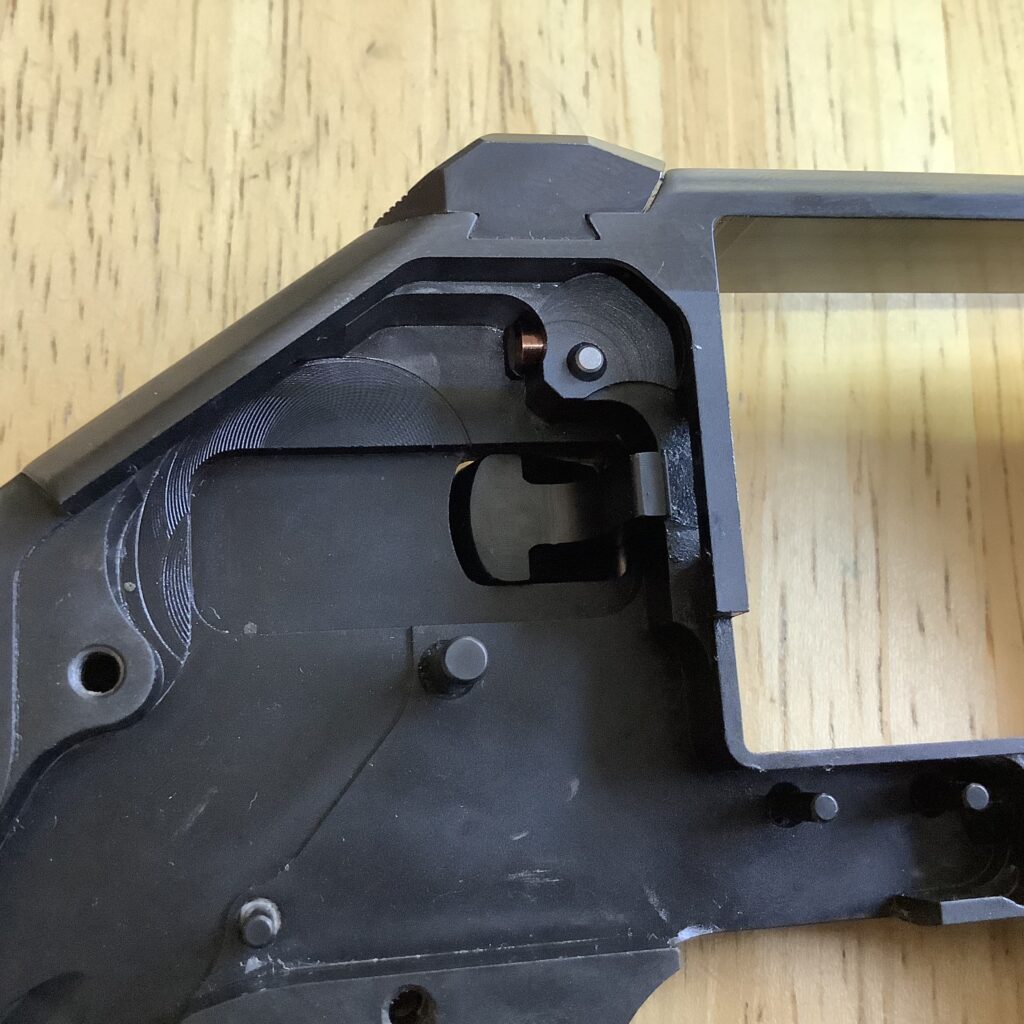
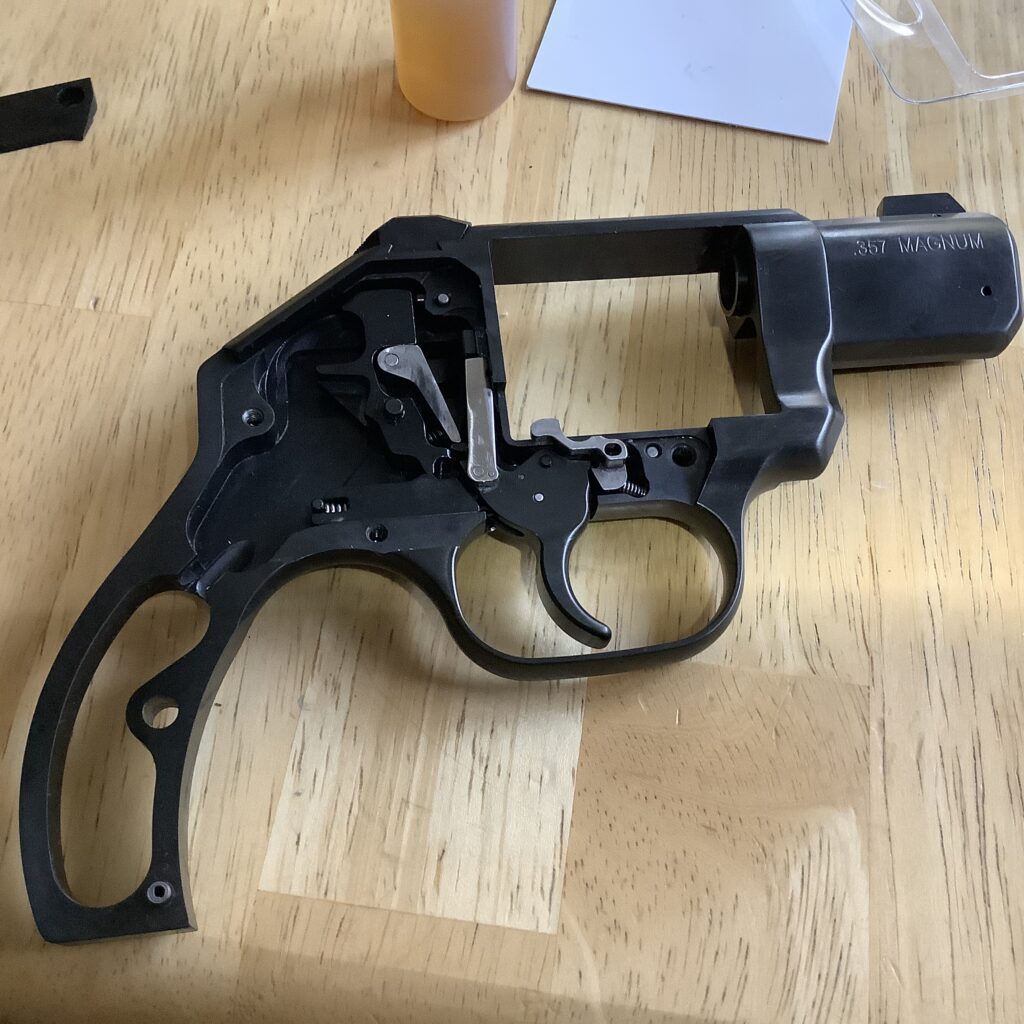
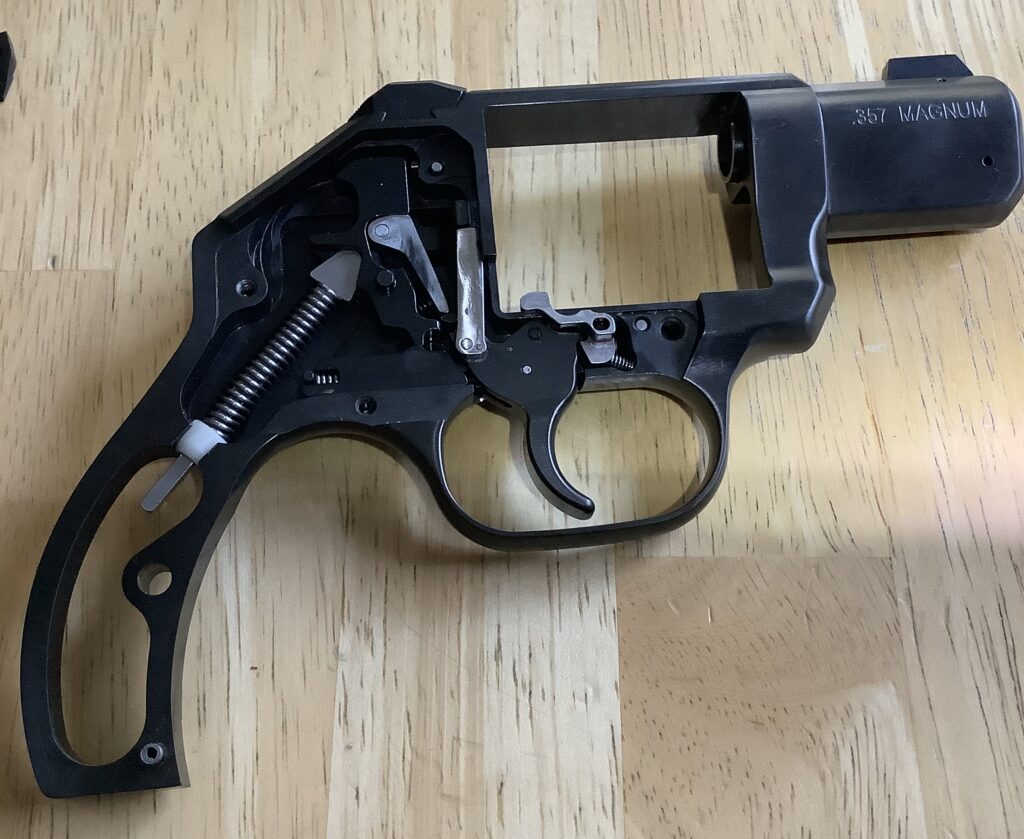
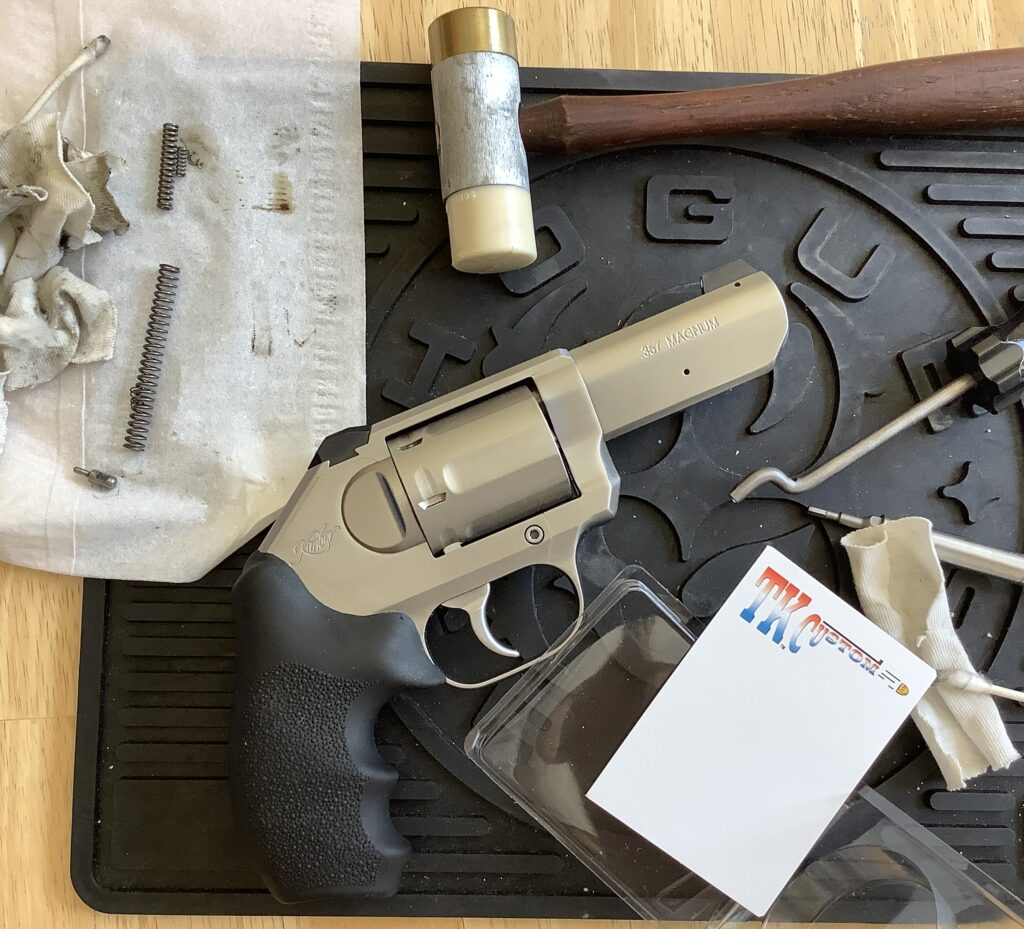
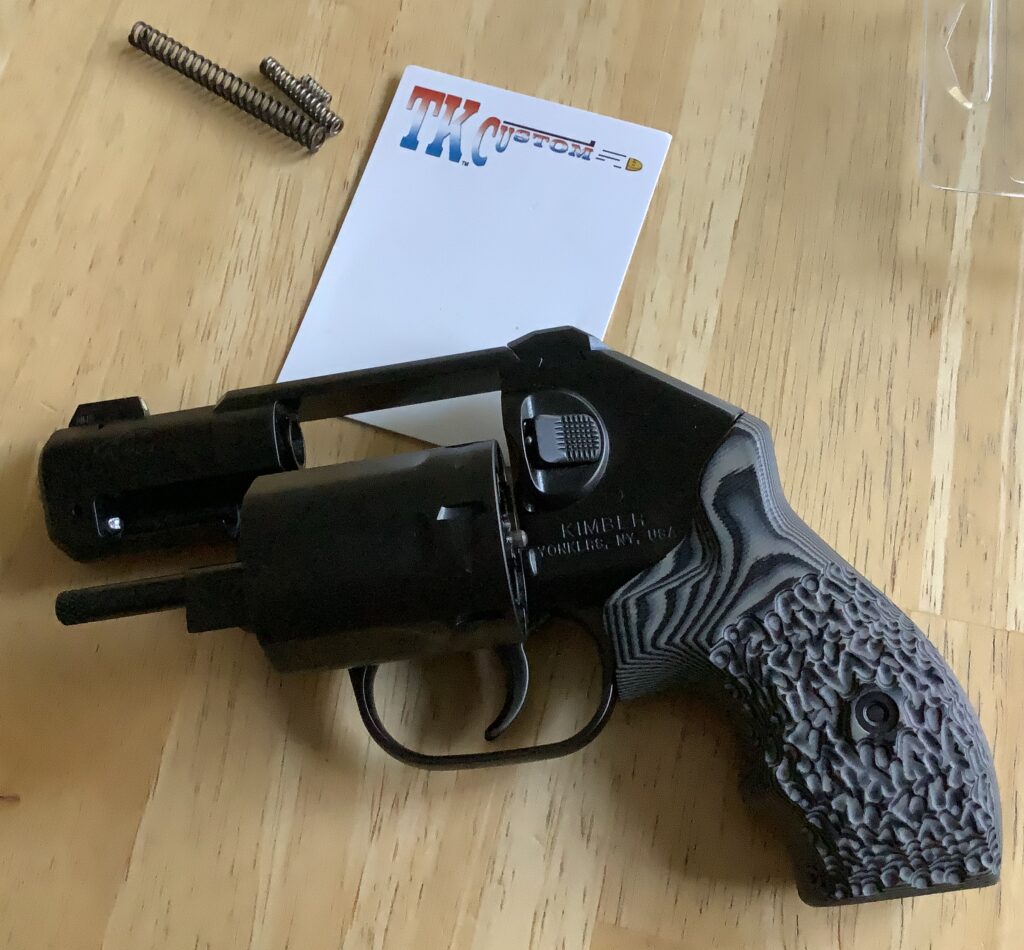
The following pictures will show the major steps in the disassembly, for those who are curious. Of course, before you do any work on your gun, you need to safely unload it, then check it again!
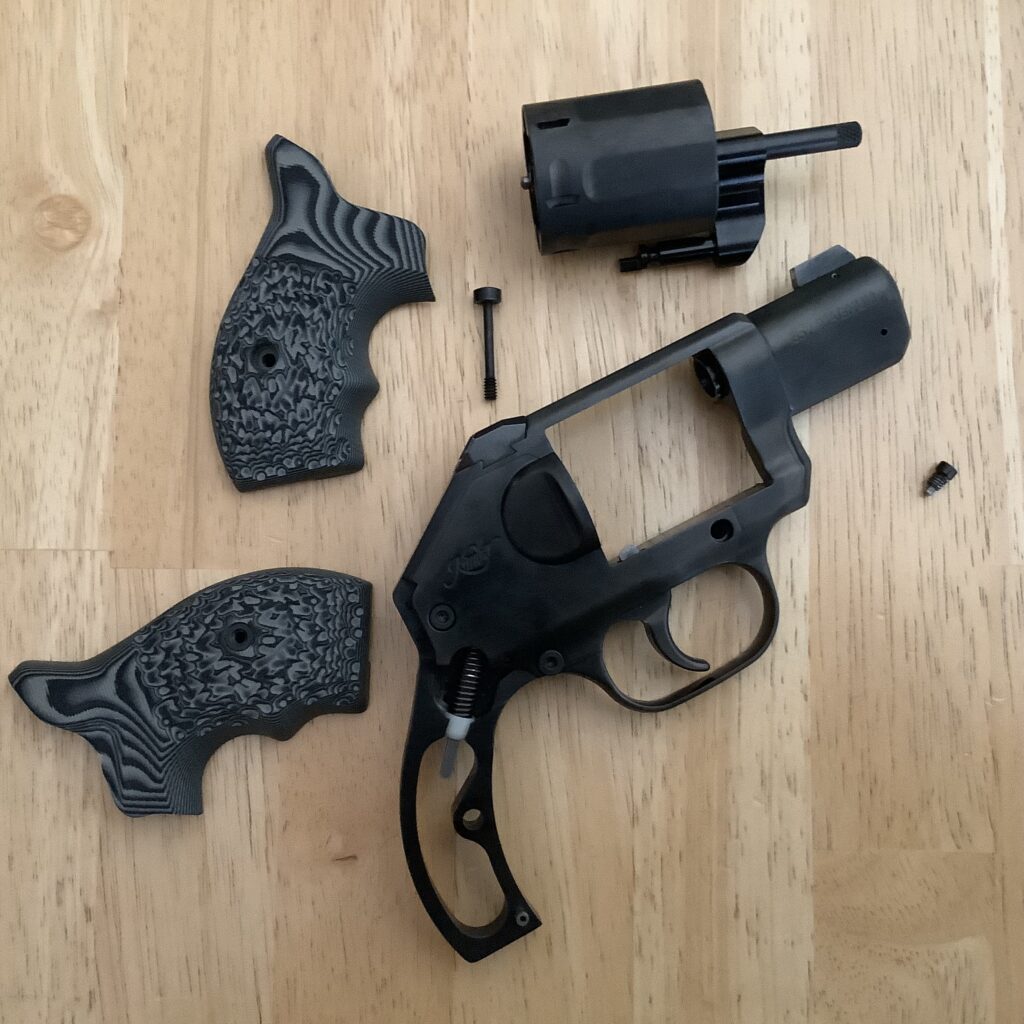
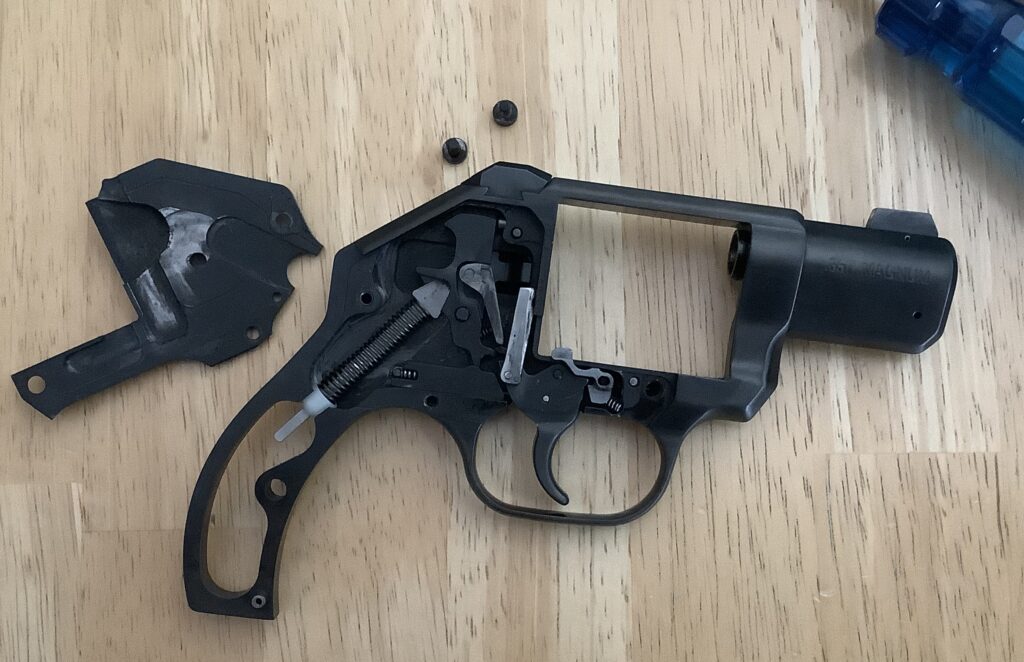
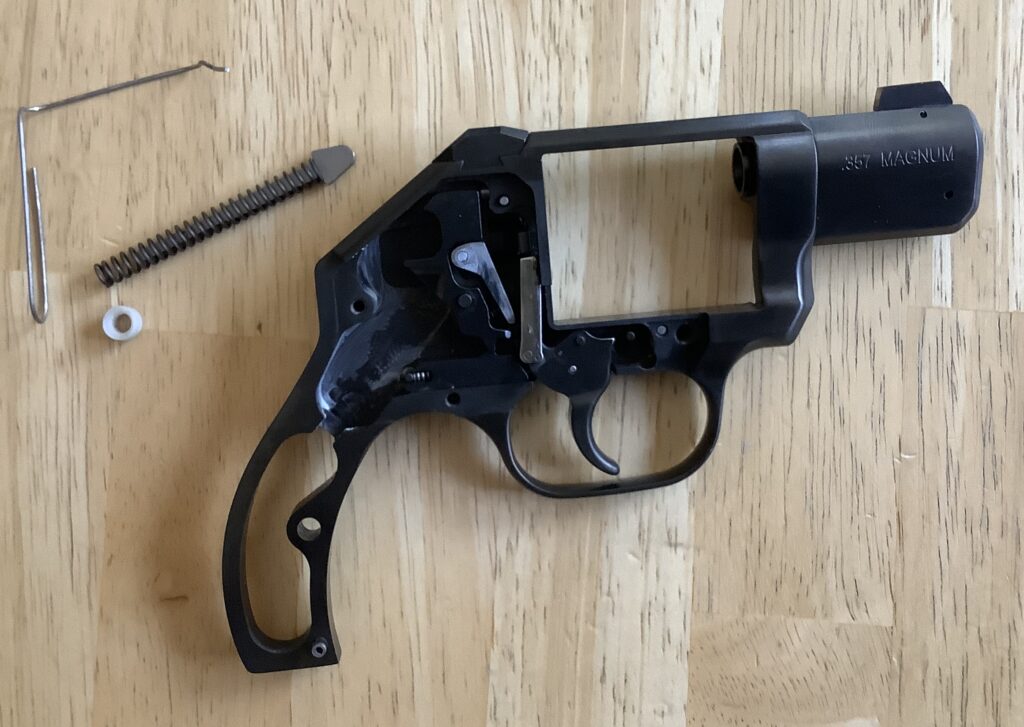
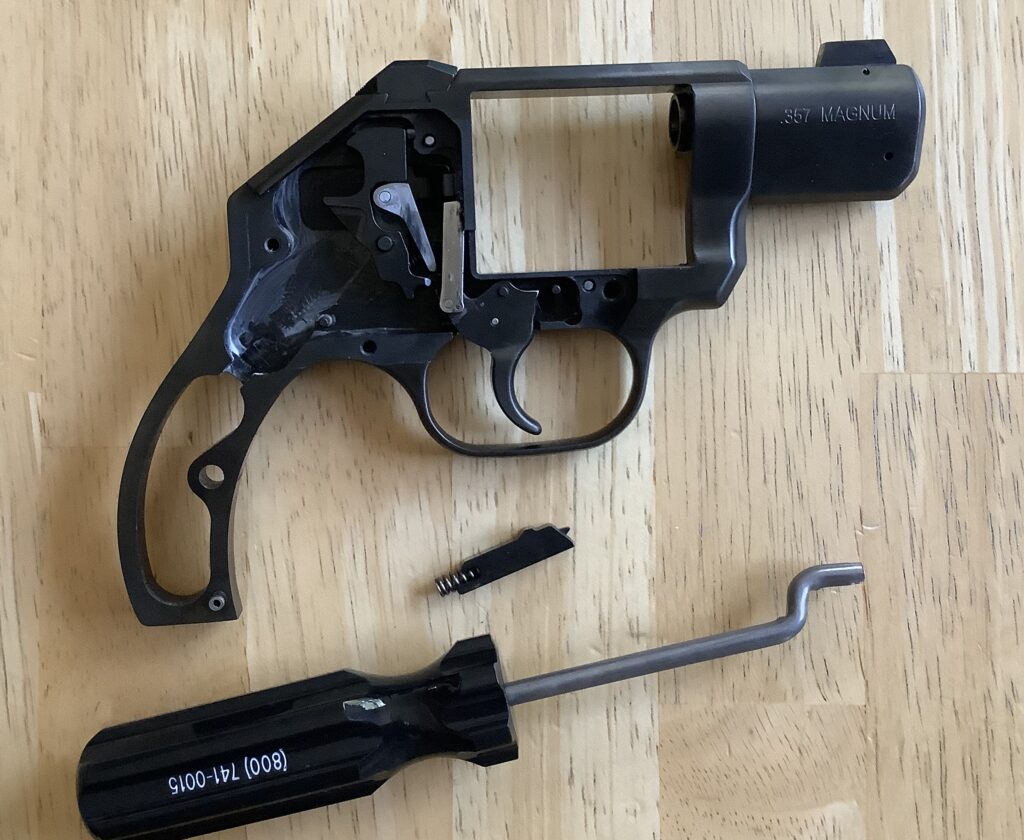
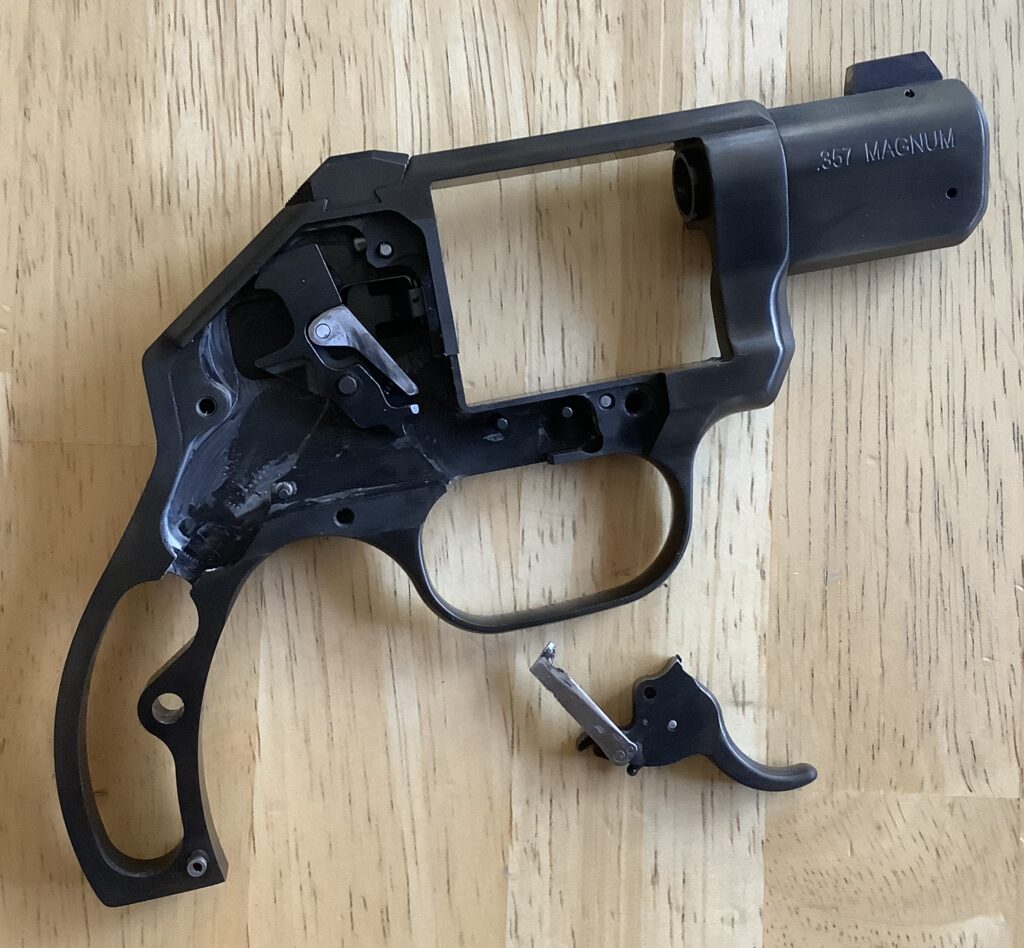
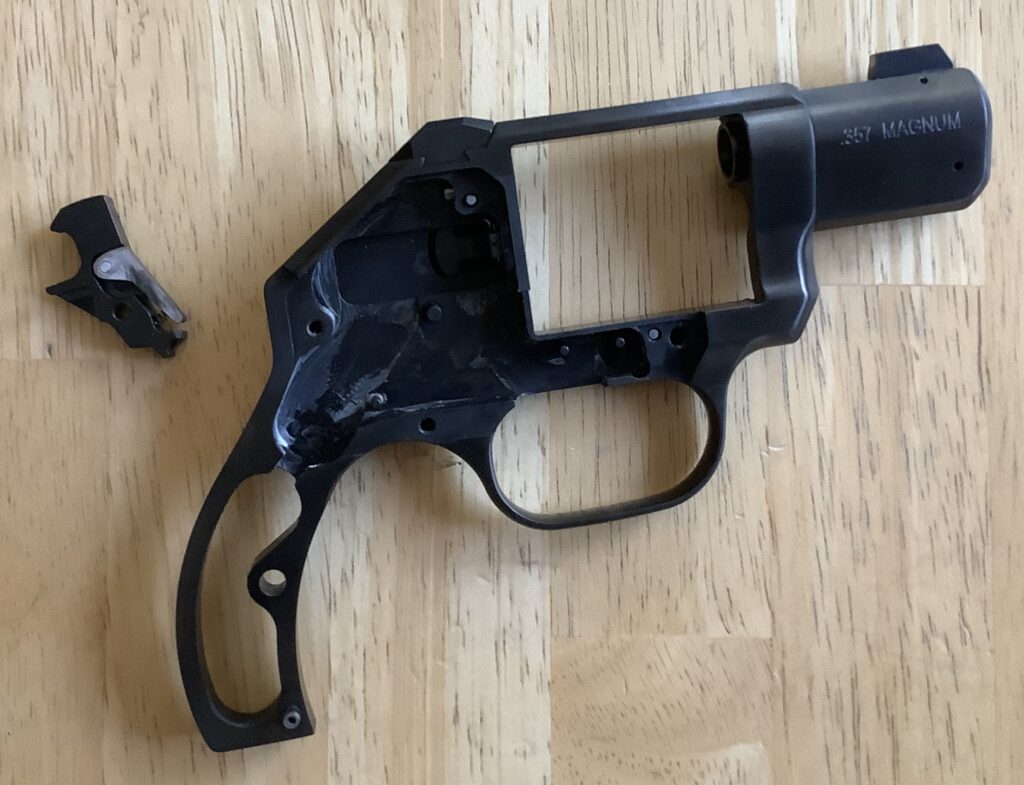

I had no issues at all with replacing the OEM parts with the TK Custom parts, which all fit perfectly in both my 3” Stainless and 2” DC model guns. I only had to do the “Gunsmith’s Prayer” twice in the course of installing two kits—both times when I launched the tiny cylinder bolt spring out of the gun. Fortunately, I heard and saw where they went, and found them quickly, but I might suggest that you remove and install the cylinder bolt with the gun inside a large Ziploc bag, to contain any flying parts. That’s a favorite trick (which I think I learned from Roy Huntington, if I’m not mistaken), and it would have saved me a little trouble if I hadn’t been too lazy to use it, this time. Whatever you do, though, you HAVE TO wear your safety glasses when you’re doing this kind of work, because a small spring like that could lead to a big injury if it shoots into your eye.
Results
My two K6s revolvers had factory trigger pulls that were just over 13 pounds, a piece, as verified by my ultra-sophisticated trigger pull measuring device—a water bucket!
There’s several popular trigger pull measuring devices out there, some mechanical, others digital, but they all have this maddening limitation where they only measure up to 12 pounds. If you’re working on single action guns, that’s plenty, but if you work with double action guns, you can get over 12 pounds pretty quickly, and it’s frustrating when you don’t know how far over 12 pounds you really are.

To work around this, I filled up a water bucket and ran a zip tie through the handle and the trigger guard of my gun. I carefully attempted to lift the water bucket off the ground by slowly and smoothly pulling up on the UNLOADED (checked TWICE!) gun, against the weight of the bucket. Each time I failed to lift the bucket without pulling the trigger, I poured a little more water out and tried again. Through some trial and error, I finally reached the point where my gun’s trigger would support the weight of the filled bucket, and lift it off the ground without cycling the action.
Using a scale, I measured the weight of the filled bucket to get a feel for how heavy my trigger pull was. Now, I don’t presume a high level of precision with this method, but it gets me close enough for my use, and what I found was both guns had double action pulls measuring in the 13-pound range. One of them was about 13.1 pounds, and the other was right behind it.
After changing out the springs with the TK Custom kit, my results were right at 9 pounds a piece with my fancy bucket system.
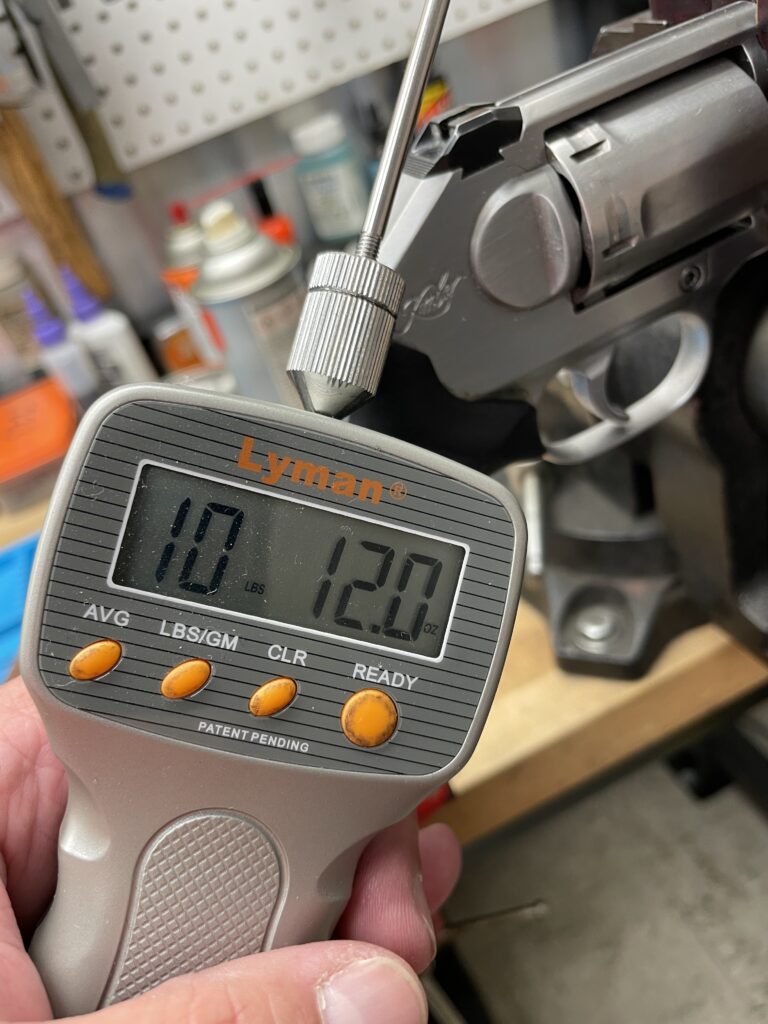
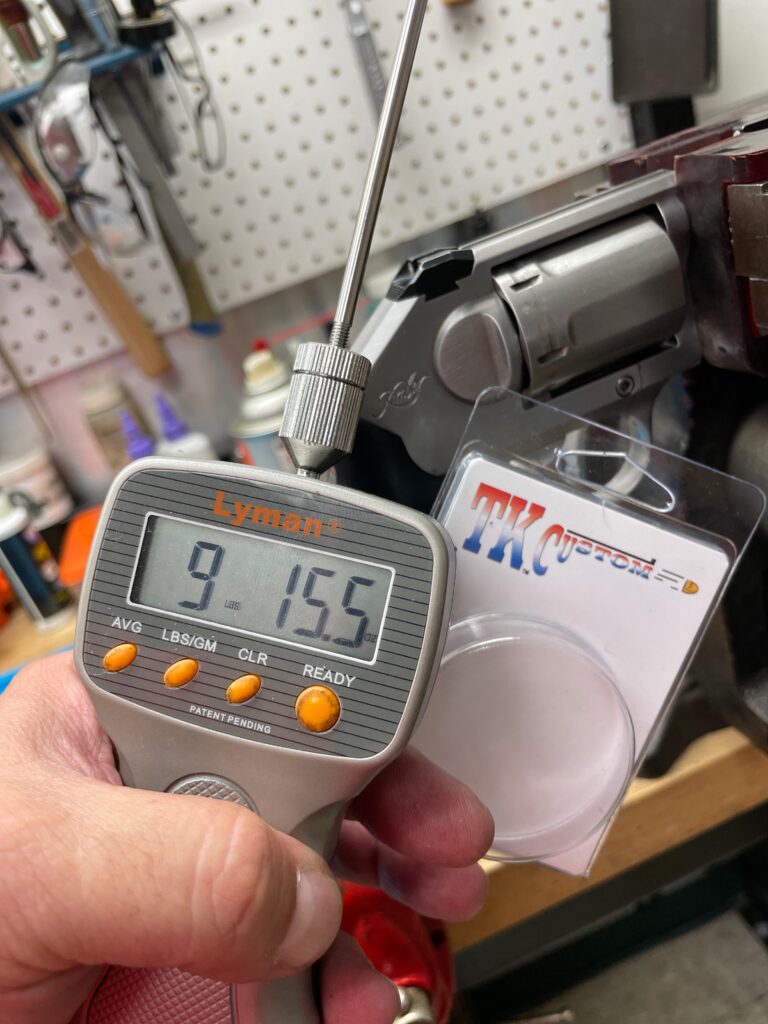
Using a more precise Lyman trigger pull gauge, RevolverGuy Dean Caputo tested his (heavily dry-fired) K6s, and measured the trigger at 10 pounds, 12 ounces before installing the TK Custom spring kit, which brought it down to 9 pounds, 15.5 ounces, afterwards.
So, the three kits brought the trigger pulls down to circa 9 pounds, right where Eli said they would be, when I talked to him.
Magic.
Bench test
I’ll be honest, and admit that I didn’t detect a whole lot of difference in the trigger pull weights, at first, between the OEM and TK triggers. You’d think that a four-pound reduction would make such a significant difference that I’d really be wowed by it, but I guess my trigger finger isn’t as calibrated as I thought it was (or the scale I weighed my bucket on wasn’t as precise as I thought it was). I certainly noticed some difference, as my trigger finger didn’t get fatigued as quickly with the TK springs installed, but I couldn’t tell the pull weight had been reduced by about a third, just playing with it at the bench.
I’m always concerned about having a smooth trigger pull, but the weight seems less important, within reason. I didn’t find the nominal-13-pound trigger pulls of the OEM parts to be objectionable, because the pulls were pretty smooth, but the scale tells the truth–the TK triggers are lighter, without sacrificing any of the smoothness.
However, I did detect a less powerful trigger return with the TK rebound slide spring installed. This wasn’t a surprise, since the rebound slide spring was the focus of TK’s pull reduction effort, but I was a little nervous about the reduction because a weak return can interrupt your shooting rhythm and also encourage short-stroking.
I had experienced this when I first started shooting the Ruger LCR revolvers, because they use a very light return spring on that design, and I was hoping that the modified Kimbers wouldn’t do this.
Shots Fired
I shot my 3” Stainless and 2” DC K6s revolvers with factory Winchester loads, and some commercial reloads, and had no failures to fire with the new spring kit. RevolverGuy Dean Caputo had the same experience with his gun, which popped all his factory-loaded Speer primers without any troubles.
I was also happy that I didn’t encounter any short strokes when I fired the 2” DC K6s in some rapid-fire drills. The trigger returned as fast as I needed it to, and I didn’t notice it being a problem when the shooting tempo picked up.
Wrap Up
If you’re struggling with the OEM trigger pull weight on your K6s, the TK Custom kit will safely and reliably lower that pull down to about 9 pounds, which is probably the sweet spot for a double action revolver—light enough that you won’t get fatigued, but heavy enough that it won’t sacrifice the reliability or safety that’s inherent to a double action trigger.
While I enjoyed the trigger that resulted from the TK kit, it was the replacement firing pin that really won the day for me. Neither of my OEM titanium firing pins had given me an issue, but I always had a nagging doubt about them that I just couldn’t shake. Replacing them with the all-steel, TK Custom firing pins bought me some peace of mind and increased my confidence in the guns. Be advised that TK Custom sells just the firing pin, too, if you’re only interested in that.
When you look at the kit on the TK Custom website, make sure you spend a little time looking at all the other great products and services they offer. If you shoot anything with moon clips, they’ve got you covered, and if you’re interested in action jobs, machining, refinishing, barrel venting, or other custom gunsmith services, they can take care of that, too.
Make sure you tell them that RevolverGuy sent you!
Many thanks for this. I own one of the first 6000 K6S made, and the OEM pin does concern me. Time for a swap, and the ziplock-bag idea is brilliant!
Glad you liked it Wheelgunner. Yep, the bag trick is a winner—saved me a few searches, in the past.
Thanks Mike, for the write up on this kit. I ordered one recently on your recommendation along with one for a J frame S&W. I put that one in a 640 .357 Magnum that needed it- like you observed, Magic! You have motivated me to install the kit in my K6 today. I have never been pleased with the action on my K6, it’s always seemed heavier than it should be based on what everyone says about their Kimbers. The peace of mind resulting from that firing pin replacement cannot be overstated if you carry an older K6 into harm’s way.
The things that Tom and Eli are doing at TK Custom are certainly highlight worthy. Those guys get it, and their customer service is awesome. It’s fresh air to see a business that caters to revolver fanciers today. If you compete with a revolver or carry one socially, TK makes stuff that will help you. Their moonclips are simply peerless, and they make them for a wide array of revolver brands. They make them for auto cartridges (as you would expect) and they can machine your “revolver cartridge” chambered gun to take them, too. Check out the parts and services they provide to improve revolver performance on their website- very good stuff! My comment turned into a TK Custom commercial, but I’m sold on what they’re doing. Huzzah!
Kevin, no apologies necessary for bragging on those guys. They’re doing great work, and deserve the praise. Highly recommended, ‘round these parts. Good folks.
Alright, spring kit went in my K6 with no drama, I was able to avoid the armorer’s crawl today! Upon reassembly, the trigger pull is noticeably lighter and feels more like I think Kimber meant it to. Mine still has a hitch near the end of travel, but that’s a parts fitment issue, not spring related. I am very pleased to have this firing pin in the gun now, too. I aim to get this K6 dirty this week and report back.
FWIW, your water bucket trigger pull scale is American ingenuity at its finest!
Haha! Thanks buddy. Glad you got your kit installed, and look forward to hearing what you think of it! How much do you reckon that it reduced the pull weight?
There is something about the Kimber revolvers that leaves me cold. I don’t know whether its the asthetics, the bulk, or what, but I can’t warm up to them – which has nothing to do with titanium.
Titanium has many good uses – pilot protection in fighter cockpits, gas turbine blades, folding knife handles, etc., but inertia driven firing pins is NOT one of those good uses.
Titanium firing pins seem to be especially popular with devotees of the early 20th century bottom feeders, and in that capacity, titanium firing pins are equally as unpredictable. There is no substitute for knowing with full confidence that if your gun does not go ‘bang’ when it’s supposed to, it’ll be one of two things: you’re either out of ammo, or you have bad ammo. I’ll use reduced power trigger return springs, but the power driver, the mainspring, that’s full power for my peace of mind.
Absolute fire reliability isn’t everything; BUT, it’s way ahead of whatever comes in 2d place.
As it turns out, the TK mainspring doesn’t change much of anything. It seems almost all of the pull weight reduction comes from the rebound spring, in this kit.
Agreed about the Ti parts. Never made sense to me to make a FP out of that material. For 1911s, give me a steel FP and a stronger spring any day, or even—gasp—a Series 80 system.
I’ve been playing with this pair of Kimbers for a few years now, and I’d trade either of them for a .38 Spl S&W 640 before you could even finish the sentence. There’s a lot to like about them, but they just don’t feel right in the hand, for me. The J-Frame Centennial just feels right to me, and I shoot it better.
Mike, you seem to have answered a question I was about to ask: 640 Pro Series or the Kimber K6S? I’ve carried a long suffering M49 since the early 1980s and a 642 more recently and prefer them to the two Detective Specials and an SP101 I’ve let go down the road over the same interval. Care to talk me out of the 640? Thanks, Michael
Michael, my fondness for the .38 Special 640 probably makes that an unfair contest for me to judge, but I certainly wouldn’t try to talk you out of the new 640 Pro.
On the plus side, the 6th round in the K6s is significant—more than the pure math would indicate—and I think the K6s sight picture is the best around. The factory action is generally very good, too. However, those sights are poorly regulated, and the K6s just doesn’t feel “right” in my hand. If you see the Bore Axis article I did, you’ll see how the gun just sits differently in the hand than a J-Frame. It might be a perfect fit in yours, but the backstrap and the hump are just a little off, for me.
The 640 Pro feels right in my hand, and the sights are definitely improved over the normal J-Frame. They’re not as good as the Kimber’s, but they are much better regulated. On the negative side, you may need a new holster for it, as the barrel, frame and cylinder are longer than those on your 642 and 49. Additionally, the OEM action generally isn’t as good as the Kimber’s, even on the Pro Series guns.
If it were my choice, I’d go with the 640 Pro, and plan to dry fire it a lot to smooth things out, but the Kimber would be a good choice for someone who liked its handling qualities.
Interesting comments. While I’d certainly grab a ‘legacy’ 640 Pro if I found one at the LGS, I’d take my Kimber K6S over any new S&W J-Frame. Some of that may just be personal pref in terms of ergonomics (fairly easy to change with either option), but I also much prefer the trigger on the Kimber to recent J-frames I’ve handled, and find the build quality to be very good on my particular example.
I’m honestly not sure what “Pro” means in regards to S&W wheelguns anymore, and they don’t seem to be very forthcoming about the details what exactly the “Pro” treatment includes. I would hardly describe my 442 Pro as having a trigger that seems any better than a base model.
S.H. – I’m curious about the comment in regards to “bulk” with the Kimber? I’ve taken calipers to mine and the cylinder is no wider than my 442 Pro, while offering a 6th round. Is there some other part of the gun that you feel is more bulky than necessary?
Hammer, I don’t think the Pro guns are benefiting from any real action work, from what I see. They might be using more care to match the parts they’re pulling from the bins during assembly, but I’m not seeing any evidence of fitting.
The most visible difference between the Pro series and regular series guns seems to boil down to:
1. Improved sights, on some versions;
2. No internal lock, on some versions;
3. Special markings;
4. Cylinder cut for moon clips, on some versions;
5. Different grips, on some versions;
6. Additional polishing, on some versions.
I think that’s it. Perhaps someone can correct me, if they have better info.
I just wanted to say after you featured TK Custom I called them because of The Revolver Guy write up, spoke to Eli and had a concealed carry trigger job done to my 686+! The work was great, turn around time was great and I couldn’t be happier! The Revolver Guy , the people that make up the revolver community and the dedicated revolver businesses are what makes this community top notch and a truly classy group!
Thank you!
Bob, you made my night with this, thank you! I’m glad to hear that we steered you to them, and that you were so happy with their work! We try to sort through the chaff, and only give you guys the wheat. I bet that 686+ action is really sweet now.
Great article Mike. I’m new here, recently discovered this site while looking up information catered to revolvers. For years i’d been considering buying my first firearm (which I wanted to be a revolver) but kept putting it off. When I finally decided it was time to commit to owning something, that’s when the pandemic started and due to all of the panic buying and ammo shortage everything I was interested in wasn’t available, and what was available I couldn’t afford.
I was hoping to find someone’s old safe queen or dad’s service pistol/hunting sidearm from the 70’s or 80’s for a modest price and I wanted my first pistol to be something that would have sentimental value to discourage the temptation to sell it in the future as I didn’t believe i’d feel the same attachment to a polymer sub compact semi-auto like I would an old heavy wheelgun of yesteryear.
I mistakenly believed that older revolvers would be more affordable due to their age and condition but it seems like the reverse is true; they go up in value instead of down. I couldn’t even rent one to try because my local ranges were out of stock on everything and none of them had revolvers for sale or even ones to rent to try out, those that did had absolutely no ammunition for them either.
I attended my fourth gun show last year after walking away from the previous three empty handed, still not finding anything to my liking after browsing each booth a couple times. Just before I decided to concede defeat and go home, the last table near the exit had someone selling a shooter grade Colt 3-5-7 for a price nearly my exact tax return money. I had never heard of the model before but knew Colts were good so I decided to take a chance on it and bought it to take home with me as my first official firearm purchase.
I bought a Versacarry belt, a Desantis Speed Scabbard, two 5 Star speed loaders, some Steelworx snap caps, a basic $10 Hoppes cleaning kit and the last box of .38 special left in stock. I’ve spent most of this year watching revolver specific video tutorials online and after taking it to the range for the first time earlier last month, i’ve grown to absolutely love my Colt. This particular one has a nickel finish, narrow service hammer and narrow service trigger which leads me to believe it was a former LEO’s sidearm. Drawing, shooting, holstering, reloading, and thumbing back the hammer is like second nature to me which is strange as i’d never held nor shot a gun before, it just feels right. (maybe I was an old revolver cop in a previous life, who knows?)
After reading through all your previous articles over the past couple of weeks i’m pleased to see that all my instincts have been right on the money, topics like how to safely de-cock the hammer and tips like pulling the cylinder release back before closing the cylinder are things I wasn’t taught but was already doing. My Colt truly is a joy to own as it’s become my part of my personality and constant companion as an EDC. Looking forward to more great content from you in the future.
(PS. I’d like to suggest an article on the model 3-5-7 sometime as there isn’t a whole lot of information online about it and only a single Youtube video briefly discussing it at the moment.)
Holy cow, Jeb! You struck gold on your first try! Well, maybe your fourth try, since it sounds like you put a lot of work into it, before you finally found that wonderful Colt. A nickeled one, no less. You should be very pleased.
You’ve got rightful pride of ownership in that Colt, and I know you’ll be a good caretaker for it. You’re right about the older revolvers really holding their value, in a way that the plastic guns probably won’t.
I’m very happy for you, and grateful to hear that you found our articles so helpful and educational. Stick around, as we’ll have plenty more like them, coming your way. Thanks for writing!
Jeb, Congrats on your find. The Colt 3-5-7 came about from the demand for a more compact .357 than the few pre-war Colts built on their New Service (.45 cal) frame.
Colt’s Trooper in .38 Special was basically a dressed down version of the Officer’s Model Match. and was their counterpart to the S&W Combat Masterpiece. Many folks were strongly suggesting that a .357 Magnum version be made. Colt did just that, and called it the 3-5-7. Colt beefed up the existing Officer’s Model frame, gave it a hand fitted and polished lockwork, a frame mounted firing pin, and a very rich blue finish. It is this same action that became the basis for the Colt Python. Once the Python came out, and the Trooper also appeared in .357 Magnum, the 3-5-7 became the odd man out.
The 3-5-7 continued until 1961 Colt decided to build the Trooper in both .38 Special and in .357 Magnum. The rarest of the 3-5-7 guns were made for the Florida Highway Patrol with 5″ barrels in bright nickel. If you Colt is bright nickel, measure the barrel length. If it’s 5 inches, then look for ‘FHP’ and a number marked either on the left side of the lower cylinder window, the butt of the grip frame, or the backstrap.
Tom Kilhoffer did a reliability job on my Colt Officer’s Model probably 30 years ago. I believe it was near Rantoul Illinois. If my memory serves me, he was either ISP or retired ISP. Would love to have a K6S. Thanks, Mike.
Thanks Jack, always good to hear from you. It’s neat that you’ve got such a history with Tom’s work. That’s a good testimony there. Hope you get your K6s!
Installed, and I had a gunsmith do the work to check out a gun I have never examined. Trigger is a pound lighter, and I will test it next week.
I’ve thought about casting up some lead weights for a trigger scale, but have never gotten around to it. I like your water bucket trick much better. Save the lead for bullets!
Let me know how it works for you! A proper weight set would be better, but it does well enough, I think.
Figured I’d throw my two cents out there for some data points, I had a firing pin breakage on a TK kit in my 3 inch K6s after a couple hundred dry fire reps done with snap caps. I preemptively swapped out mainly for the lightened springs, so it was no big deal to pop the original firing pin and firing pin spring back in, and they’ve been going strong since. I’m no engineer so I hesitate to comment on the cause, but it did snap millimeters from the base of the stem for what it’s worth.
Dan, that’s an important data point and I appreciate you sharing it with us. How frustrating it can be, to chase reliability!