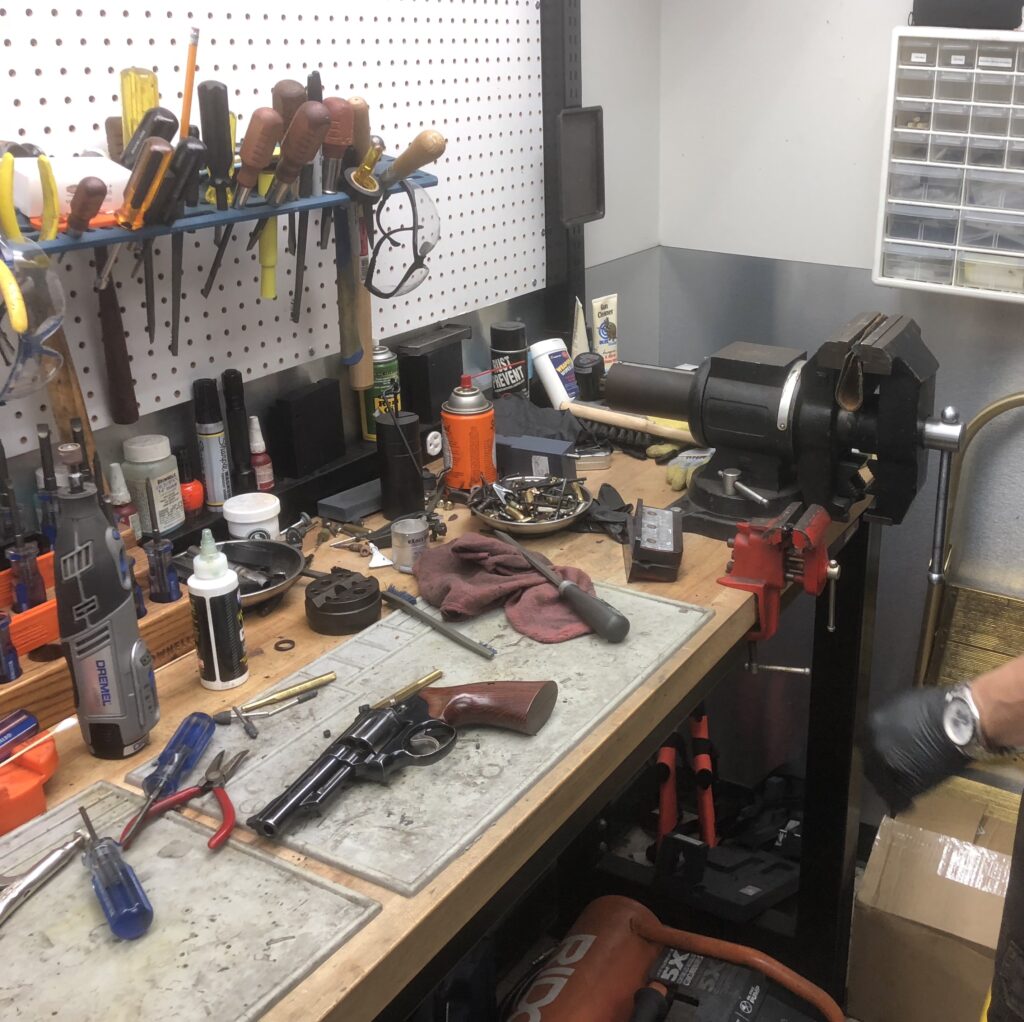
If you do much shooting with your revolvers, you’ll soon discover that while they are highly resistant to neglect, they need a little TLC to remain in good working order. You can’t ignore the maintenance on these fine guns and expect them to keep chugging along. You’ve got to keep them clean, well lubricated, and properly serviced if you want them to sing.
Recently, I was fortunate to pay a visit to Dean Caputo–a great RevolverGuy friend, who’s also an exceptional law enforcement armorer. In addition to all his factory training from Colt’s, Smith & Wesson, and Ruger, Dean has many decades of experience under his belt as a police officer, trainer and armorer, who’s been responsible for keeping a fleet of revolvers–and revolver shooters–in good working order. When I planned the trip, I knew that I couldn’t pass up the opportunity to have him do a once-over on some of my old (but worn) favorites, and a new favorite that was giving me some troubles.
The doctor is in
I came to the “revolver clinic” armed with a handful of guns and a small list of complaints. As Dean completed a detailed inspection of each gun, his sharp and experienced eye detected even more items that needed correction. Additionally, he suggested a few enhancements that would improve the reliability and function of these tools.
I was eager to have Dean work his magic on the guns, and even more eager to learn more about what makes these guns tick, and the kind of service they require to perform as desired. I tried to take good notes and pictures to share this information with you guys, but have to admit that sometimes I was more enthralled with watching him work than documenting it properly! Please note that Dean doesn’t do commercial work, so please don’t try to send him your guns—he’s happy to share his knowledge with you here, but can’t work on your blaster.
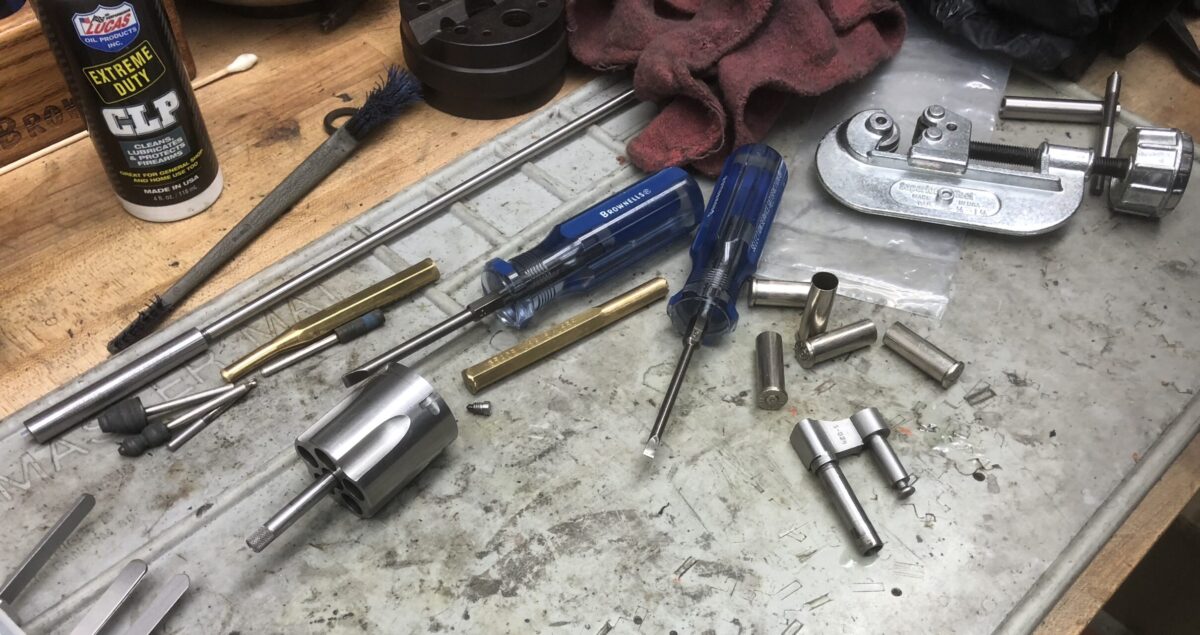
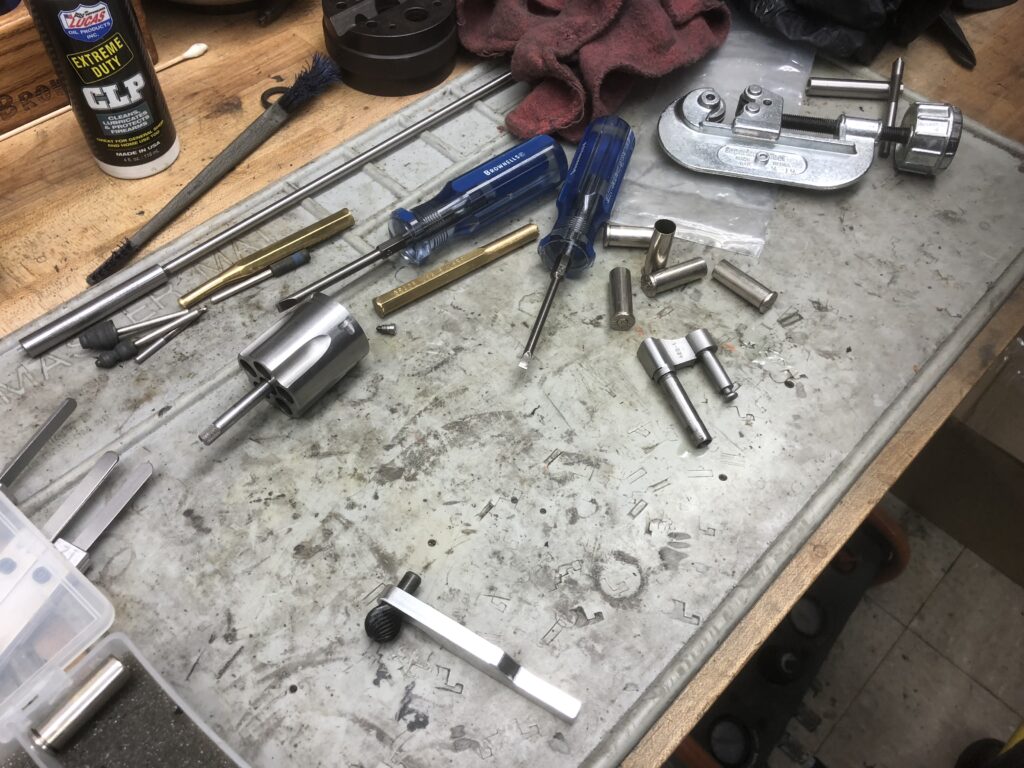
So, without further fanfare, here’s a look at some of the work Dean performed on my revolvers.
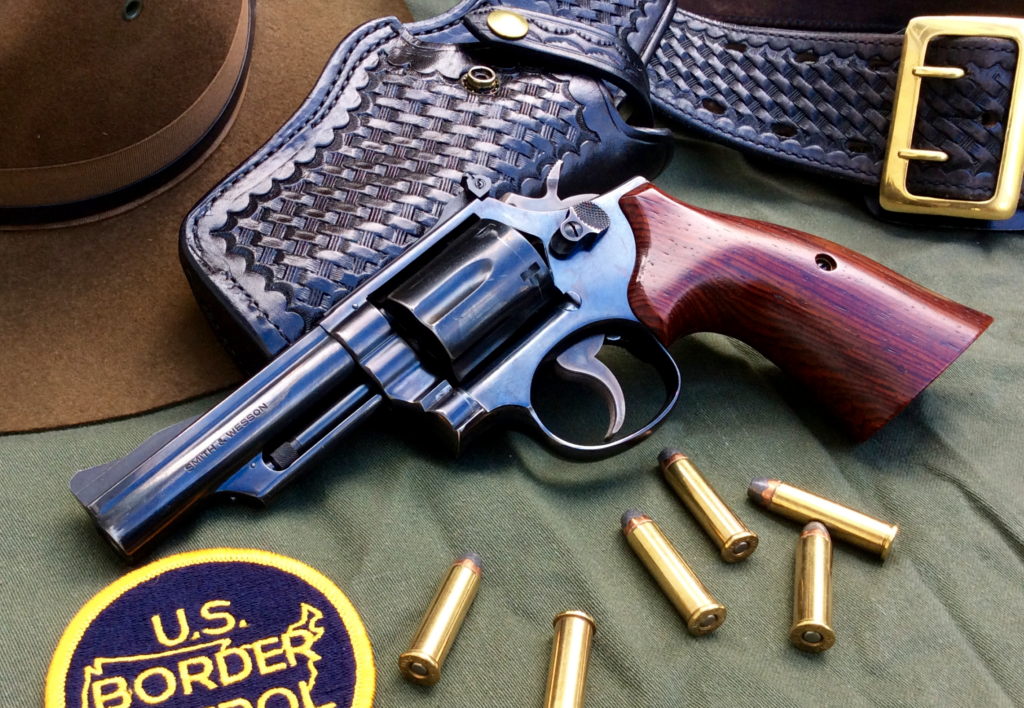
Smith & Wesson Model 19, Combat Magnum
If you’ve been around RevolverGuy very long, you probably know that my favorite revolver design of all time is the Smith & Wesson Combat Magnum, or Model 19. The L-Frame, Distinguished Combat Magnum (designed by the late, Dick Baker, and Justin’s favorite gun) which followed is certainly a more robust revolver, and its extra strength and weight is a big advantage when it comes time to shoot Magnum loads, but I think the heavy-barreled, K-Frame, Combat Magnum has a balance and charm that are irresistible. The more svelte Combat Magnum handles my preferred .38 Special +P loads with aplomb, tracks nimbly, and is lighter on the belt. I think Bill Jordan got it right when he declared his offspring was “the answer to a peace officer’s dream.”
Alas, my sample was well used before I got my mitts on it, and I’ve put a fair number of rounds through it since I took possession. When I brought it to Dean, it had developed an intermittent tendency to be “sticky” when it came time to open the cylinder. It seemed the tip of the ejector rod was hanging up on the locking bolt, somehow, and no amount of cleaning or lubricating was solving the problem.
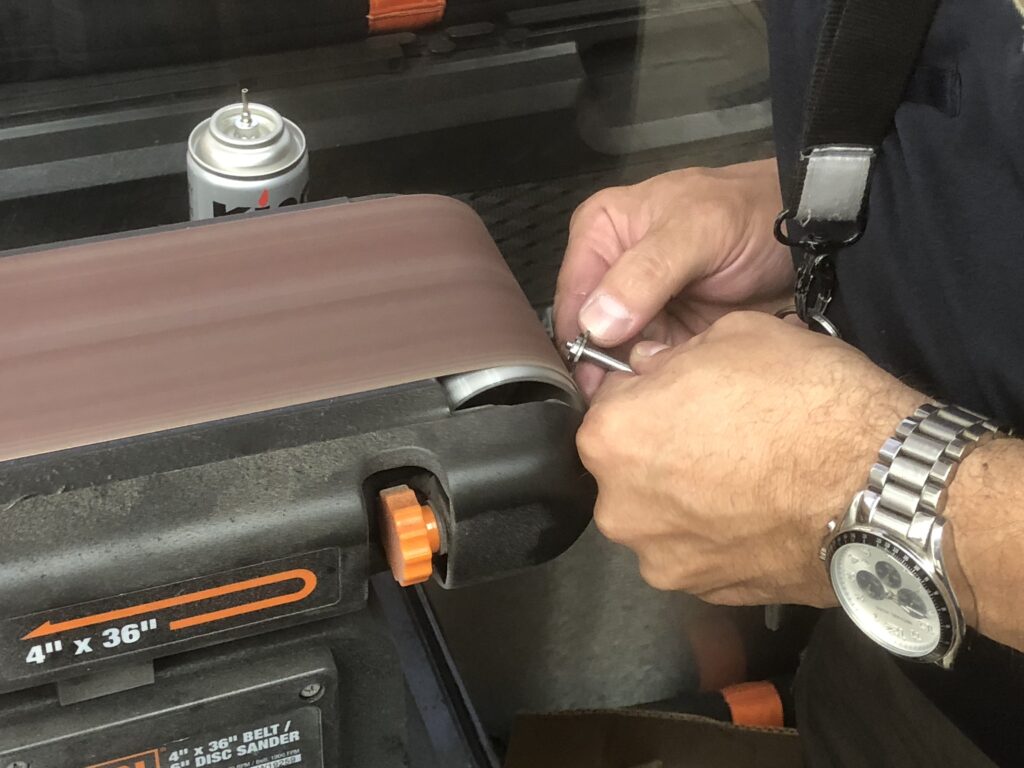
Dean diagnosed the problem right away. It seems the ejector rod tip can develop a small lip on it, which is hardly perceptible to the eye, but is still enough to make the tip drag on the locking bolt. “I bet it only does it on one or two chambers, doesn’t it?” he asked. “Well, yes, that’s right, how’d you know?”
He just smiled, and a few file strokes–and a little cold blue—later, it was all fixed. Dean wasn’t done with my sixgun yet, though.
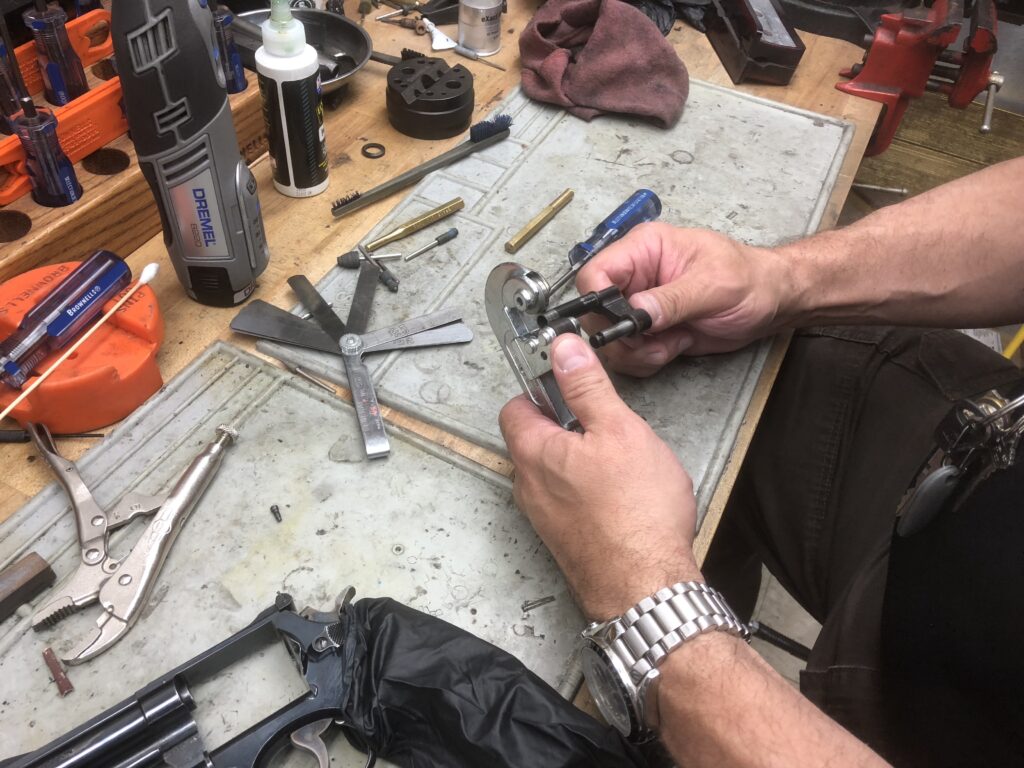
All those years of shooting had given the gun a bit of endshake, where the yoke had too much slop fore and aft. If left untreated, this can beat the gun to death, as the cylinder hammers into the recoil shield when the gun is fired. Dean measured the amount of movement using feeler gauges and saw that the gun had as much as 9/1000s (“9 Thou”) of barrel/cylinder gap (B/C gap) at the extreme, which was approaching the “No-Go” limit of 10 Thou.
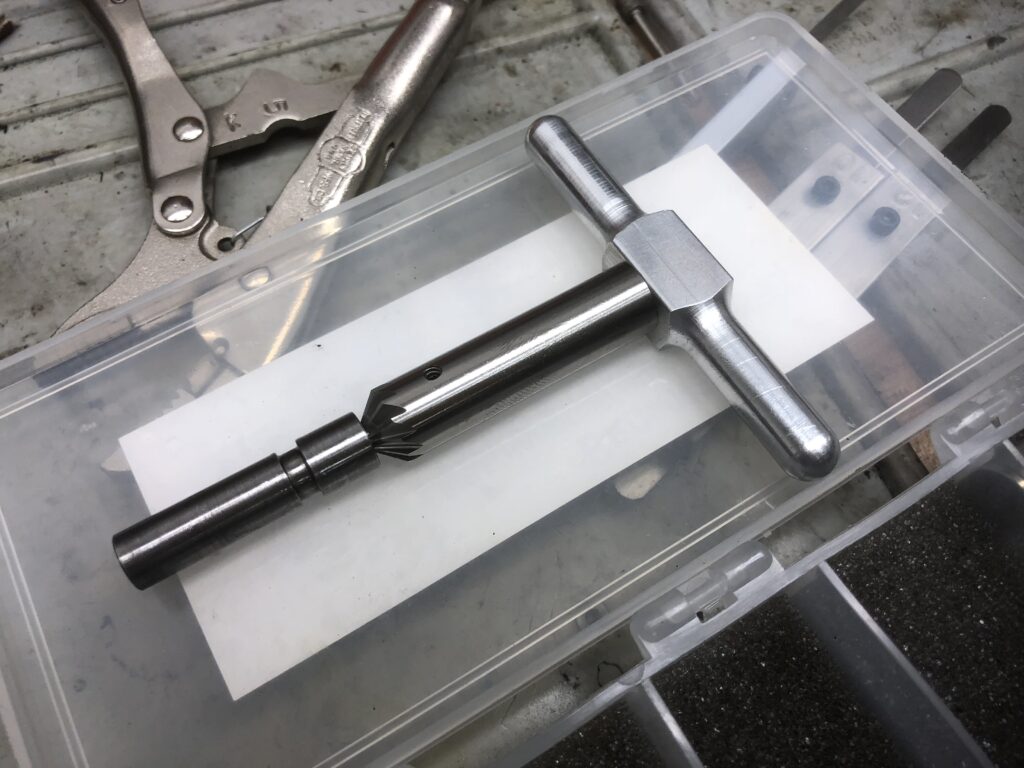
To fix the endshake, Dean was going to stretch the yoke. First, he inserted a tool into the center of the yoke’s axle to support it during the stretching process—this would be necessary to prevent crushing the yoke. Next, he installed a tool that looked an awful lot like a pipe cutter, except the “cutting wheel” had a dulled edge. With the tool clamped onto the yoke axle, he spun it around a few times, then increased the tension on the wheel and made a few more turns. By repeating this cycle, the wheel slowly swaged and displaced the steel, which increased the yoke’s overall length.
Dean explained that the older version of this tool had an edge which left a ring on the yoke’s axle, so an armorer could tell how many times the yoke had been previously stretched. After a certain number of stretches (say, 3 or 4), an armorer would simply replace the yoke with a new piece. It seemed that the yoke on my Combat Magnum had never received this treatment, because there weren’t any rings on it–either that, or previous ‘smiths had used a tool like Dean’s newer model, which didn’t leave a telltale trace, but I suspect it had never been repaired.
After reinstalling the yoke on my gun, the B/C gap now stood at a steady 6 Thou, which was right in the sweet spot. Any tighter and I would have started to crowd the 4 Thou lower limit, and potentially affect the reliability of the gun.
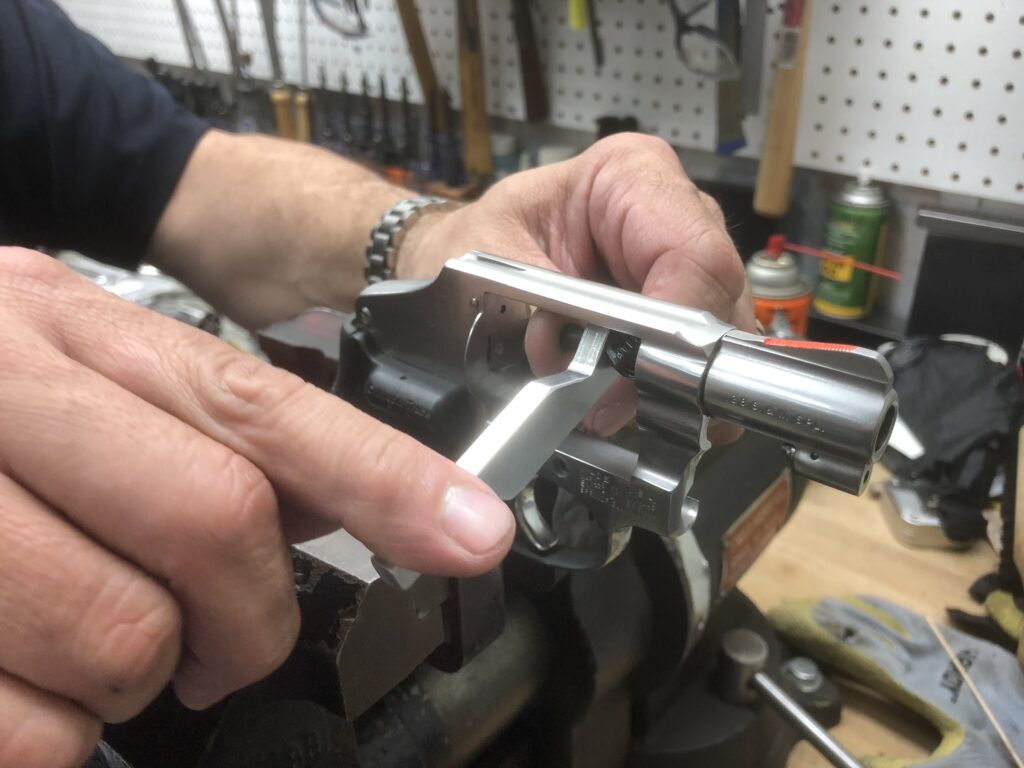
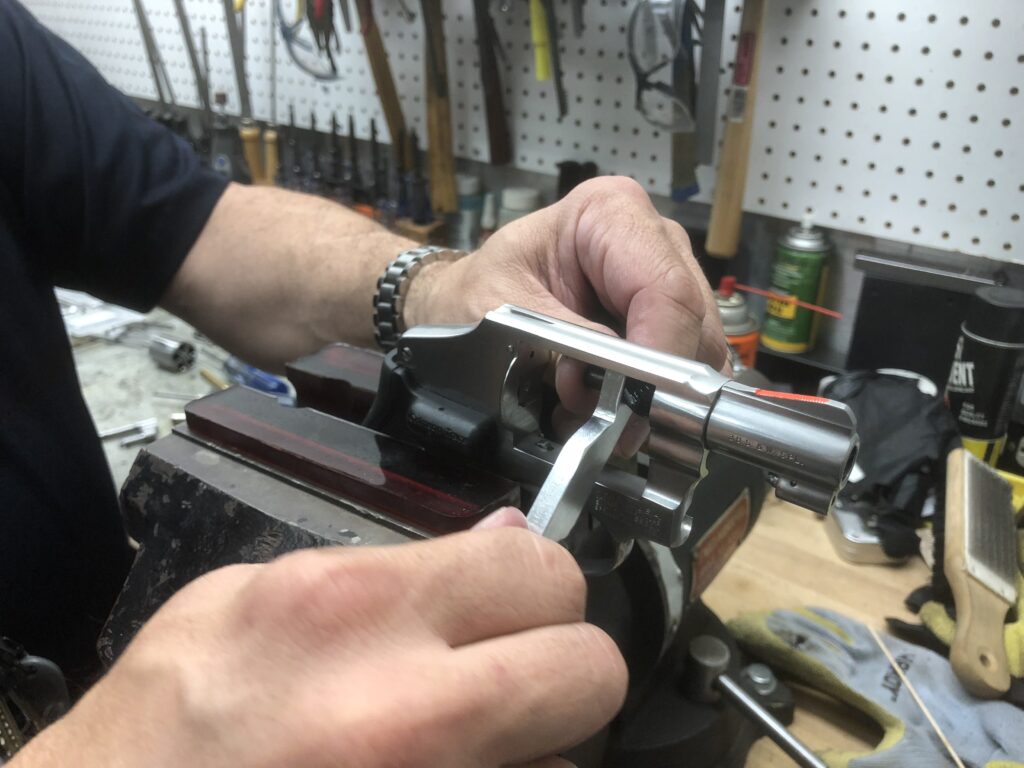
There was one other thing that Dean noticed on my Model 19 that he wanted to fix. On the rear of the thumb piece, there’s a raised shelf that fits neatly into the slot on the side of the frame. The shelf stops the part’s fore and aft movement at the limits of its travel in the slot, and also keeps the thumb piece aligned as it tracks back and forth during operation.

If the thumb piece doesn’t travel far enough to the rear as the cylinder is closed, it won’t create enough space for the center pin to lock into the frame, and you won’t be able to shoot the gun. That’s not normally a problem on a clean and properly-fitted gun, but if some debris finds its way into the pin hole (an unburned powder flake perhaps, or some dirt from dropping the gun), this could be all it takes to prevent you from getting the cylinder into battery.
As a bit of extra insurance to prevent this, Dean likes to relieve the shelf at the rear of the thumb piece just a little, to allow a small amount of extra movement to the rear. This extra travel might be the difference between being able to close your cylinder and get back into the fight, or standing there with Murphy on your shoulder and an inoperative gun in your hands. It’s not necessary on a target or sport gun, but on a fighting gun, it’s a reasonable precaution. Once again, a few file strokes and some cold blue was all it took to get things in the proper order.
Smith & Wesson Model 640, Centennial
Having addressed my beloved Combat Magnum, it was now time to work on the revolver that I actually carry the most, my .38 Special, Model 640 Centennial.
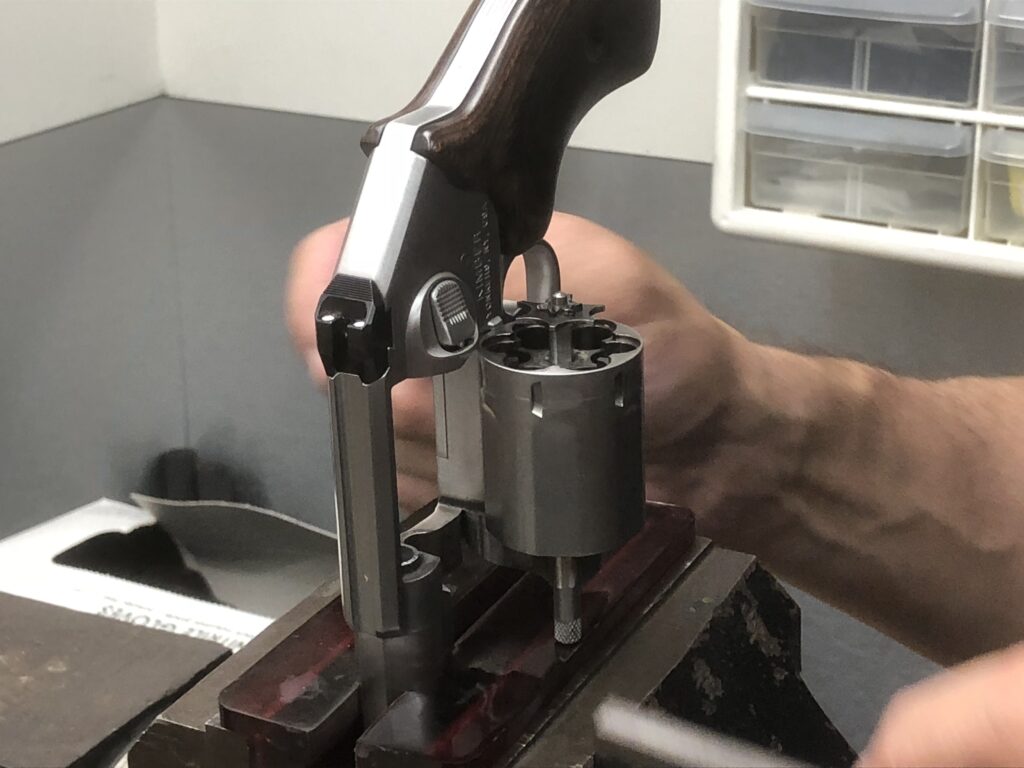
The endshake on my Centennial was even worse than the Combat Magnum, courtesy of shooting plenty of hot +P ammo (and some +P+) through this tiny J-Frame. You could actually see evidence of the cartridge heads slamming against the recoil shield as a result of the extra play, so Dean stretched the yoke in the same manner as described above, and the gun’s now good to go for another several thousand rounds.

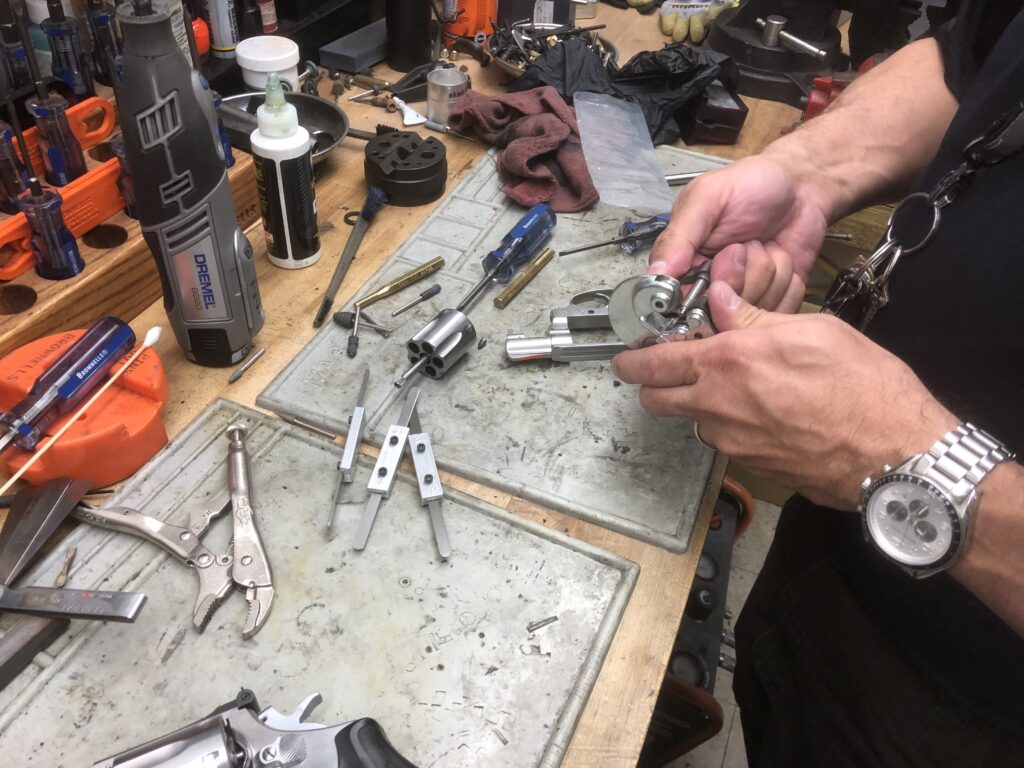
While he had it apart, Dean also cleaned up the forcing cone on my gun with a deburring tool. This gave the forcing cone a uniform bevel which should help to improve accuracy by reducing bullet shaving and deformation as it makes the jump from the cylinder to the forcing cone. Additionally, it should help to reduce lead splatter from shaving, making cleanup a lot easier.
With the cylinder off, Dean chamfered the edges of the five chambers to help guide cartridges into them during a reload. The slight bevel can really make a difference in getting the cartridges to center up, and if I’m not mistaken, it feels like it makes a slight improvement with ejecting fired cases, as well.
This might be because there’s a little less material to grip the exterior case walls near the head of the case, where a lot of the high pressure is concentrated in the initial stages of ignition. With less surrounding material, the friction is reduced around the case head ever-so-slightly, and it feels like this makes a bit of a difference in getting the expanded, fired cases out of the chambers. Even if that’s not true, it certainly doesn’t hurt.
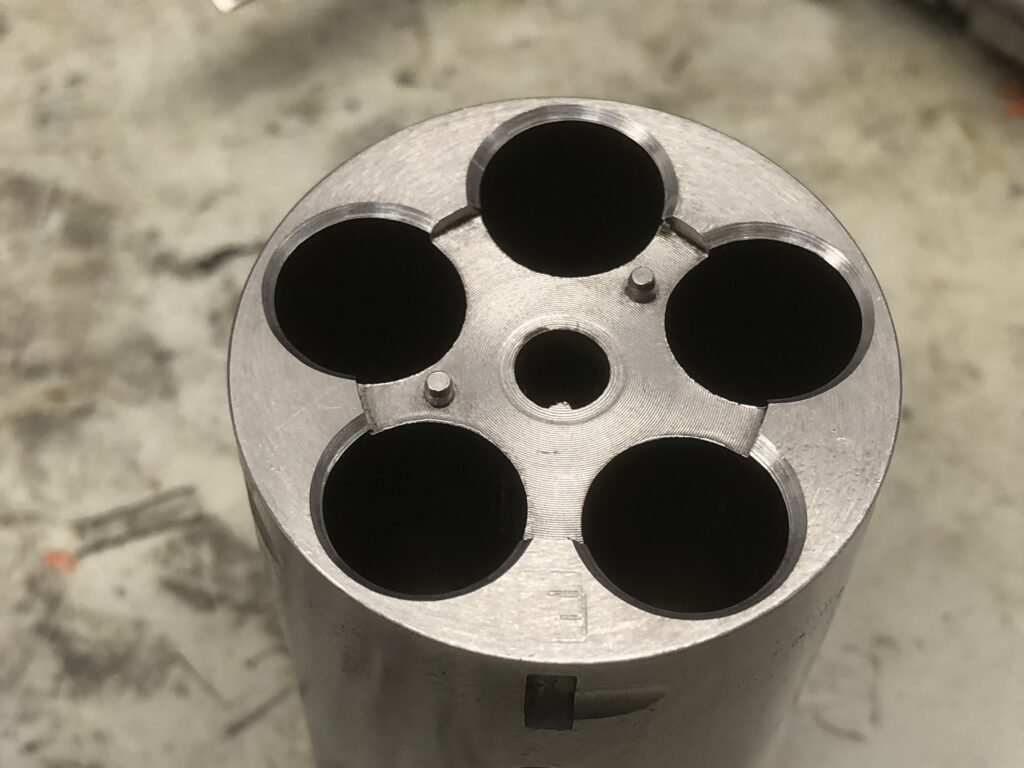
Because the chambers of the cylinder are chamfered with the extractor star removed from the gun, you have to go back and clean up the tips of the star to better match the new contours of the chambers. Dean kissed each of those points gently and made it look like it should.
Kimber K6s 3”
I’ve had a love-hate relationship with my 3”-barreled Kimber K6s ever since I bought it.
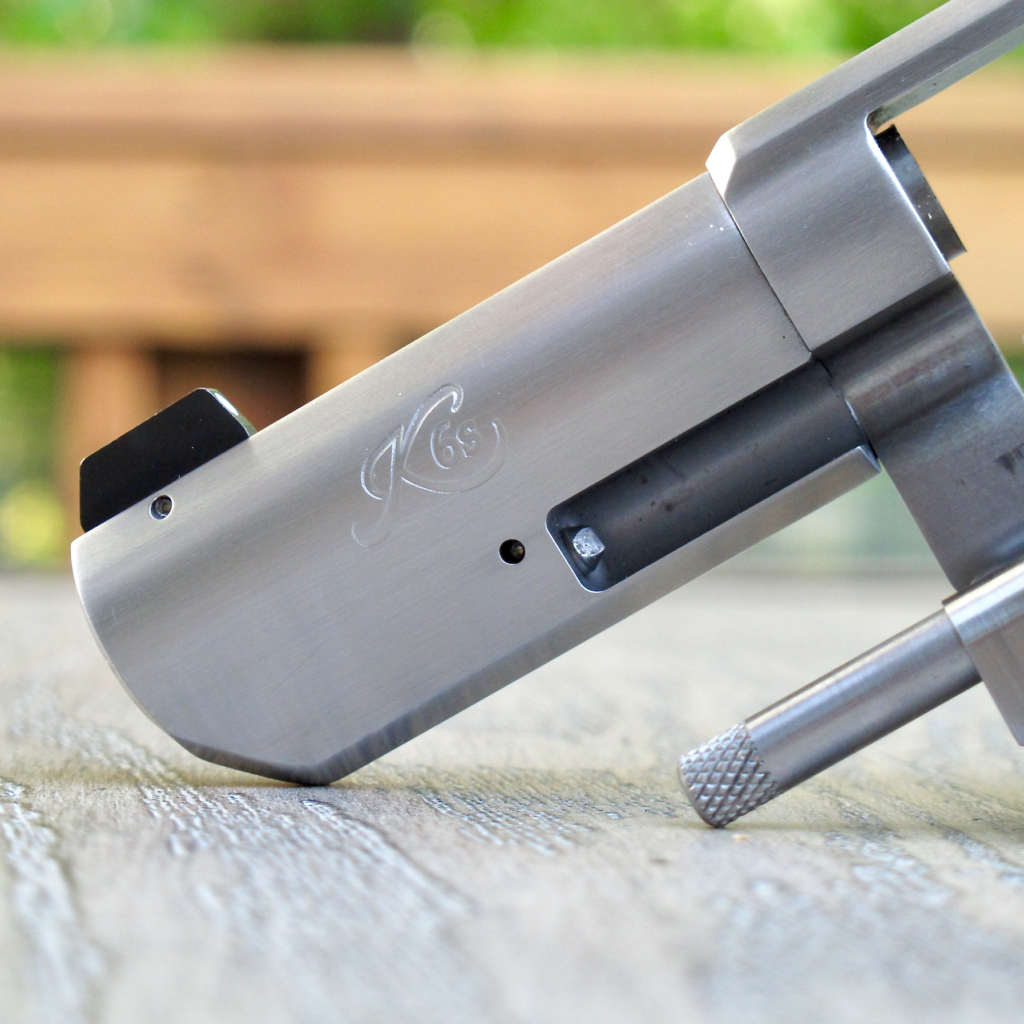
I love the balance of the gun, the six-round capacity, the excellent sight picture (alas, it’s poorly regulated, but I was recently told that Kimber is working on some replacement blades to fix this, and hope springs eternal), and the great trigger, but I’ve never been able to get very far into a shooting session before experiencing significant cylinder drag on the forcing cone.
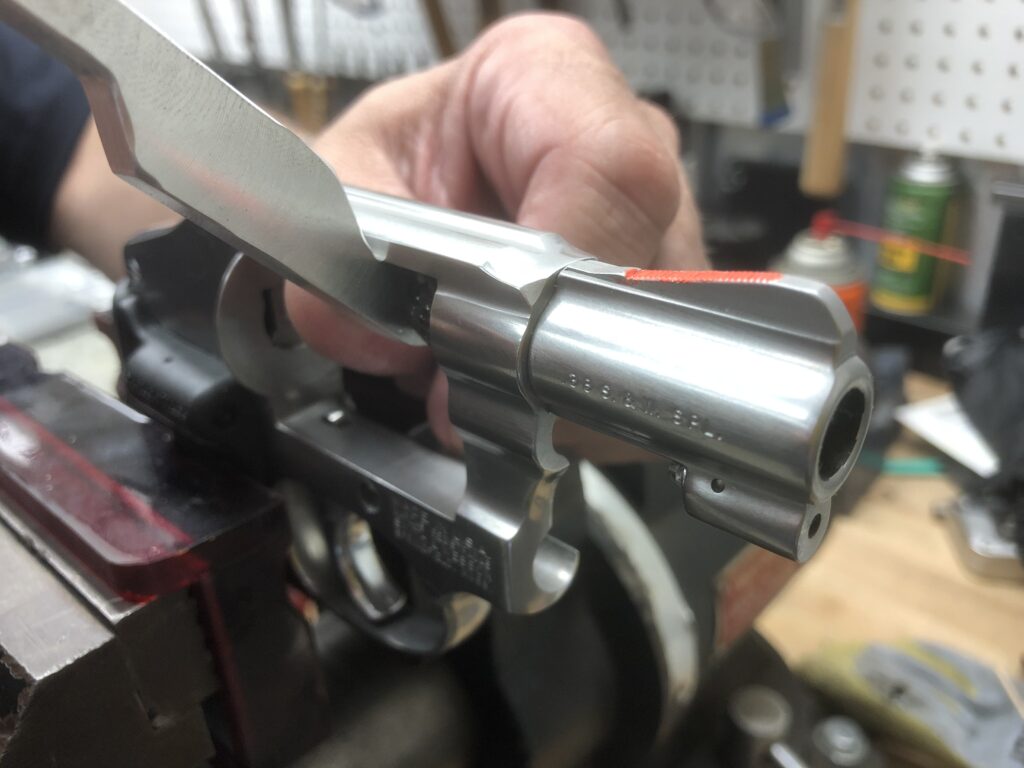
After about 75-100 rounds in the K6s, the cylinder face starts to drag so badly on the forcing cone that it leaves a shiny score mark in the blackened carbon. This happens on the outside edge of chambers, where the top of the barrel extension begins to rub on the cylinder face, and it’s especially bad on two of the chambers, leaving a deep scratch through the carbon.
As Smith & Wesson discovered shortly after the introduction of their stainless guns, stainless steel heats and expands at a different rate than carbon (“blue”) steel, and tolerances begin to shrink quickly when you do a lot of shooting. In fact, this issue encouraged Smith & Wesson to monkey with the location of the Stainless Combat Magnum’s cylinder gas ring, in an attempt to fix the binding problems that shooters were complaining about (it didn’t help).
Dean measured the B/C gap on my 3” K6s and found that he couldn’t pass a 4 Thou “No-Go” feeler gauge through the gaps when the gun was cold. A few of the chambers were definitely less than 3 Thou, while the others hovered somewhere between 3 and 4 Thou. That’s really tight. No wonder the gun started to bind up so quickly when it got hot!
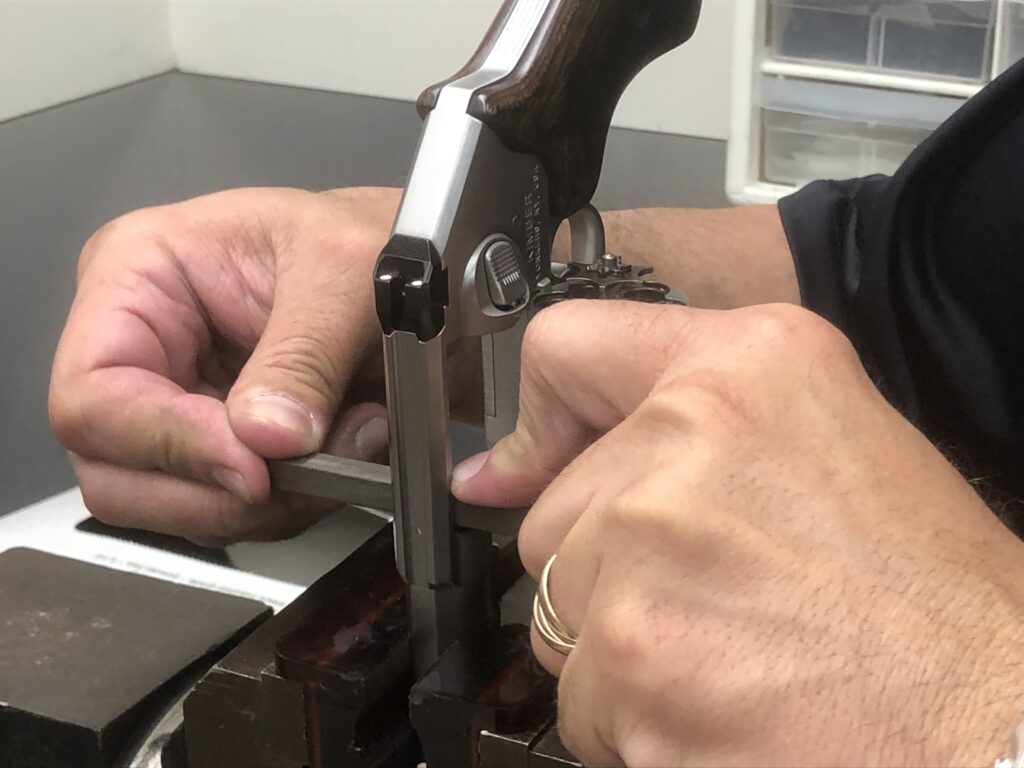
With some careful stone work, Dean relieved the spot at 12 O’ Clock on the barrel extension that was proud and rubbing on the cylinder face when the gun heated up. He didn’t want to get too aggressive, and stopped when we could pass the 4 Thou “No-Go” feeler gauge through all the chambers, asking me to shoot the gun a little and report back.
I shot the gun when I got home, and while it’s a bit better, it still binds up pretty fast as the gun gets hot. The scratch on the face of the cylinder tells the tale—there’s just not enough of a B/C gap to keep this gun reliable past a dozen cylinders or so. I could try to open the gap a little more, but I think I’ll probably just send this one back to Kimber someday and have them address it. Maybe I’ll be able to get the rumored, new and improved firing pin installed while it’s back there, too.
Keep ‘em running!
I thought it was fascinating to learn a little more about the intricacies of keeping these guns running, and watch a skilled set of hands work on them. I know my pictures aren’t the best, but I hope you enjoyed the tour as well.
Keep those great revolvers running smooth, and be safe out there!
Couple of interesting things you mentiond. The cylinder gap was reduced when the yoke was streached, this will not happen. The cylender gap is mesured with the cylinder pushed back so the actual mesurement would not change, however mesured at rest with the cylinder not pushed back the gap would increase as the yoke is streached. The only way to reduce barrel cylender gap is to set the barrel back, and for very small reductions a shim under the star.
Also the Kimber having different cylinder gaps on different chambers.. I juess if there was some carbon build up?
Thanks
More likely that the Kimber cylinder face is irregular. My understanding is that the faces are still polished manually, with the cylinder being held by hand.
Thanks for all the writing!
I’ve got an old S&W .32 Hand Ejector with the same sticky cylinder problem. I can’t feel any burrs on the base release pin and only recently realized the ejector rod also has a movable tip. I can’t feel anything there either. Like yours mine sticks only on a few chambers.
I’ll have to scout around for a qualified S&W or revolver armorer. If I can’t find one maybe a really light touch with an Emory cloth may solve things. I’m a little concerned because I don’t want continued use or either myself or a rookie armorer to damage a fun and historical gun.
Again thanks for all the writing. I’ve only recently discovered this site and I’m still reading through the back pages. Great work.
Thanks Greg, I’m glad you found us and are enjoying the content! Don’t be afraid to touch up the tip of the extractor rod yourself. I fixed a different gun with the same problem, and it only took a few gentle passes with a file to clean things up. You could easily accomplish the same with emory cloth wrapped around a piece of dowel. I also used a bullet-shaped dremel bit to clean up the inside of the hollow tip of the rod—just a few twists using thumb and finger on the bit to make things neat. Easy stuff.